The Golden Dragon of Wales: A Glyndwr Rebellion TL

Status
Not open for further replies.
Prologue
  • The Golden Dragon of Wales:
    A Glyndwr Rebellion TL

    800px-Y_Draig_Aur_Owain_Glynd%C5%B5r.jpg

    Yr Ddraig Aur Cymru

    Prologue:
    The story of Glyndŵr’s War, also known as the War of Welsh Independence and the Tripartite War, began not in 1400, when the first stirrings of Welsh rebellion were unleashed by Glyndŵr across north Wales, but many years earlier in 1384 when a young Owain Glyndŵr travelled north to guard the Scottish border at Berwick-on-Tweed with his elder brother Tudur. This was start of his career in the English army and the following year he took, or rather attempted to take, a step up the ladder to knighthood by joining the army of Richard II in its campaign northwards against the Scots. It was abundantly clear that Glyndŵr had acquired a taste for the adventure of a military career and the opportunity for acquiring both fame and a fortune that it afforded. Thus, it can come as no surprise that in 1387 Glyndŵr joined the retinue of the Earl of Arundel and helped to defeat a French fleet at the Battle of Margate, thus ending the threat of a French invasion from a time at least. The future looked bright for Glyndŵr to establish himself as first a knight of the land and then a prominent military commander in England’s armies. After all, he had the friendship of England’s most powerful Earl and had played a part in the Earl’s hugely popular victory over France. But this all went out the window when he suddenly, and very surprisingly, withdrew from the Earl of Arundel’s retinue that had been preparing for an invasion of France. The reason for this sharp change in attitude has been lost to time, but Glyndŵr’s withdrawal from Arundel’s retinue marked the end of the Welshman’s once promising military career and made it impossible for Glyndŵr to ever achieve the rank of knight.

    106413-004-8F770D83.jpg

    The castle at Berwick-on-Tweed

    From that point onwards, Glyndŵr returned to his estates in his homeland and did not stray from them until he was proclaimed Prince of Wales on 16th September 1400. Nonetheless, Glyndŵr’s short-lived adventures in the English army had provided him with was a firm grounding in military matters and experience of warfare that would stand him in good stead during the war that bears his name. He had served under the Welsh hero and battle-hardened warrior, Sir Gregory Sais, whilst garrisoning the Scottish border and under the prominent Earl of Arundel during, perhaps, his finest moment and had thus learnt from the best before returning home.

    The estates that Glyndŵr returned to in 1387, and from which his war against the English crown in 1400, were three in number and were moderately prosperous, at least by Welsh standards. First came Sycharth, his family home and the seat of his lands, second was a collection of lands in the Dee valley around Corwen and Glyndyfrdwy which held the Cistercian abbey of Valle Crucis which had been established by Glyndŵr’s ancestors and would go on to be the final resting place for Glyndŵr and many of his descendants, finally came lands in region of Iscoed and Gwynionydd which were some distance from his home at Sycharth. At this point it is important to note that Glyndŵr was the descendent of the Princely Houses of both Powys and Deheubarth and, perhaps fortunately, his estates were places steeped in the past glories of these most illustrious of Welsh houses. Whilst residing at Sycarth, Glyndŵr mixed with both born and bred Welshmen, the so-called ‘barwniaid’ or barons of Wales, and also minor English lords from the Marches, it was many of these nobles that formed the core of Glyndŵr’s friends and allies after his crowning as Prince of Wales, but at the tome were little more than drinking and hunting companions.

    528b7e60-9d19-47d4-9c51-c0f2fda0045b.jpg

    Sycharth, Glyndŵr's family home

    Glyndŵr was by no means the wealthiest of lords nor the most prestigious but nonetheless he, at the aged of around 45 in 1400, had enjoyed a successful career, though perhaps not as successful as he had once hoped, in the English army and had a relatively comfortable life in his estates. Despite this, it is hard to imagine that Glyndŵr would not have had thoughts of bitterness and resentment at having been passed over for knighthood, unlike many of his companions after his part in the victory against the French in 1387, and also for a Stewardship in the March of Wales by his one time friend Earl of Arundel. To make matters worse, Glyndŵr also had a long running land dispute with his English neighbour, the Reginald Grey, 3rd Baron Grey de Ruthyn. Whilst it is certain that these feelings of resentment played a part in his motivation to rebel, it must also be remembered that Glyndŵr, as a Welshman through and through, had been exposed to the legends of the Welsh people, the tales of Welsh heroes like Llywellyn the Great, and most importantly to the dreams of an independent Wales. Nobody expected anyone to even attempt to achieve this impossible dream, but Glyndŵr was foolish enough to try.
    _________________________
    Welcome to my latest TL on the rise of the Principality of Wales and the Welsh national hero, Owain Glyndwr. This is the first TL I've written in some time so excuse any rustiness in the writing and do please comment, but most importantly, I hope you enjoy it!
     
    Last edited:
    Chapter 1: Owain Glyndŵr, Prince of Wales
  • Chapter 1: Owain Glyndŵr, Prince of Wales
    No one will ever truly know why Owain Glyndŵr began the Welsh revolt as and when he did, but on the 16th September 1400 he was proclaimed Prince of Wales at Corwen whilst surrounded by a small band of his friends and allies that included his eldest son, his brother, his brothers-in-law, the Hamners, and the Dean of Llanelwy[1]. This proclamation carried little political weight but was a hugely significant statement of intent from Glyndŵr and his followers and carried the burden of hundreds of years of Welsh history with it, not to mention its invocation of the legacy of Llywelyn the Great and is own efforts to unite the Welsh territories. After the proclamation of Glyndŵr as Prince of Wales, his men quickly spread across north-east Wales and only two days later descended upon Ruthyn Castle, the stronghold of Baron Grey. This choice of target was hardly surprising given the Glyndŵr’s existing animosity towards the de Grey family and within the day the castle was nearly destroyed by Glyndŵr’s forces. The action at Ruthyn formed the first battle of Glyndŵr’s War and his victory set the tone for the rest of the war. After the ransacking of Ruthyn, Glyndŵr’s men continued to sweep across north-eastern Wales and Dinbych[2], Rhuddlan, Y Fflint[3], Penarlâg[4], and Holt all fell to Glyndŵr in rapid succession. His own campaigns continued with a raid on the town of Oswestry, that left it badly damaged as Glyndŵr moved southwards to attack Powys Castle and sack Y Trallwng[5] on the 23rd September.


    The arms of the Grey de Ruthyn family

    Whilst Glyndŵr was beginning his campaign against the English, the Tudur brothers of Ynys Môn[6] began there own guerilla war against the English. The Tudurs of Penmynydd were a prominent Ynys Môn family that had previously been loyal servants of the English but crucially they remained loyal to Richard II, not to his deposer Henry IV. Two of the brothers, Gwilym ap Tudur and Rhys ap Tudur had both been importantly military leaders under Richard II’s rule, having commanded a contingent of soldiers raised only 4 years earlier in 1396 to protect North Wales against the threat of French invasion, this had never materialised, however, and the Tudur brothers joined Richard II’s expedition against the Irish two years later. All of this had made Gwilym and Rhys fiercely loyal to Richard II and opposed to the rule of Henry IV. As such, when Glyndŵr announced himself Prince of Wales and launched his rebellion against the English, Gwilyn, Rhys and the third brother, Maredudd, swore allegiance to their cousin. This open defection by the Tudur brothers prompted Henry IV, who was returning southwards from invading Scotland, to turn his army against the Welsh.

    He arrived at Amwythig[7] on the 26th September, only ten days after Glyndŵr had been proclaimed Prince of Wales, and launched his army on a lightning campaign through North Wales. It was a very real possibility that Glyndŵr’s rebellion would be ended by Henry IV before it had truly begun. Fortunately for Glyndŵr, however, Henry IV’s forces were constantly harassed by the terrible Welsh weather and the Tudur brothers’ guerilla forces. Despite this, Henry IV and his men reached Anglesey, where he proceeded to harry the island, burning villages and monasteries, including Llanfaes Friary, the historical burial place of the Tudurs. But when they reached Rhos Fawr, Henry IV and his men were ambushed by Rhys ap Tudur’s guerilla forces and forced to flee back to Biwmares[8] Castle. After this embarrassing defeat, Henry IV and his men retreated back to Amwythig, where they arrived on the 15th October. Here he released some Welsh prisoners of war and two days later was in Caerwrangon[9] with very little to show for his efforts. Perhaps encouraged by the failure of Henry IV’s punitive expedition, many more Welshmen rallied to Glyndŵr’s banner and much of northern and central Wales swore loyalty to Glyndŵr and throughout north Wales there were attacks against English towns, castles and manor houses as the Welsh grew bolder. Even in the south, which was far more loyal to the English than the north, there was a loss of order and lawlessness in Aberhonddu[10] and Gwent. Faced with this growing tide of rebellion, Henry IV appointed Henry Percy, known as Hotspur, the son of the powerful Earl of Northumberland to bring order and return the authority of the English crown to Wales. Henry Hotspur proceeded to issue an amnesty in March to all except Glyndŵr himself and the Tudur brothers.

    399px-Statue_of_Harry_Hotspur_in_Alnwick.jpg

    A modern statue Henry Hotspur in Alnwick

    Many Welsh rebels took advantage of this amnesty as they feared the retribution of the English, but at this point, the Tudurs launched an audacious attack to acquire a bargaining chip for their own pardon that reignited the Welsh cause. Indeed, they went for a prize that they could not hope to hold, the great castle of Edward I at Conwy. The castle was sparingly garrisoned, with only 75 soldiers, but the Tudurs had only 40 men and the castle was well stocked and easy to reinforce from the Conwy estuary. As a result, the Tudurs were forced to draw-up a plan that was brave and foolhardy in equal measure. On Good Friday, which fell on the 1st April 1401, a Welsh carpenter arrived at the castle gate and asked to be allowed inside the castle in order to carry out some work, the two English guards opened the gates only for the carpenter to kill them both and throw wide the gates to let in the Tudurs and their companions. Having taken the castle, all the Tudur brothers had to do was to sit tight and wait for Henry Hotspur to arrive. And this he did, accompanied by 420 soldiers. Despite his numerical superiority, Hotspur lacked the strength to take as formidable a fortress as Conwy castle by force of arms and thus was forced to negotiate with the rebels. A mutually agreeable arrangement was reached, that granted pardons to the Tudurs and their companions, only for the King himself to overrule Hotspur on the 20th April. After that, the Tudurs held the castle for over two months until a compromise was reached on the 24th June that allowed the Tudurs to go free, but only after 9 of the rebels were turned over to the English. Despite the ultimate failure of the Tudurs’ plan, the revelation that the mighty castles of the English could be taken revitalised the Welsh and this was further helped by Glyndŵr’s own success in the field.

    ConwyCastle.jpg

    Conwy Castle

    Whilst the Tudurs were bargaining for their freedom, Glyndŵr won his first major victory of the war at Mynydd Hyddgen. Glyndŵr’s army, which numbered only a few hundred men, were camped at the bottom of the Hyddgen Valley when around 1500 English and Flemish settlers from Sir Benfro[11], which was known at the time as “little England”, charged down the valley on the Welsh camp. Glyndŵr and his men were surprised and outnumbered but rallied to kill 200 of their attackers. This victory for the Welsh alarmed Henry IV so much that he assembled another military force to launch a new punitive expedition against Glyndŵr and his followers. Marching once more into Wales from Amwythig, Henry IV targeted not Ynys Môn, as he had done once before, nor even Glyndŵr’s estates, but rather the Cistercian Strata Florida Abbey, which was known to be sympathetic towards Glyndŵr. This target was chosen to remind the Welsh clergy of their loyalty to the King and to try and prevent the rebellion spreading further south. After much harassment from Glyndŵr’s forces, Henry IV reached Strata Florida and on his arrival was in mood to be merciful. His forces partially destroyed the abbey and even executed a monk on suspicion of bearing arms against him. Despite his success in the punitive aspect of his campaign, he was unable to engage Glyndŵr’s forces in a meaningful number as they stuck to harassing Henry IV’s army and supply chain with hit-and-run tactics. As such, Henry IV was forced to retreat from Wales once more and returned to Caerwrangon on the 28th October with nothing to show for they efforts. The year ended with an inconclusive battle at Tuthill, outside of Caernafon Castle as part of Glyndŵr’s failed first siege of the castle.

    [1] St. Asaph
    [2] Denbigh
    [3] Flint
    [4] Hawarden
    [5] Welshpool
    [6] Anglesey
    [7] Shrewsbury
    [8] Beaumaris
    [9] Worcester
    [10] Brecon
    [11] Pembrokeshire
    ___________________________
    And the now the TL starts in earnest with Chapter 1, which is the first part of double chapter special to get us up to the POD.
    Please do comment and, most importantly, enjoy!
    Gwyn
     
    Last edited:
    Chapter 2: The Rebellion Intensifies
  • Chapter 2: The Rebellion Intensifies
    In the face of Glyndŵr’s ever growing success, the English became divided into two camps on the matter of how to deal with the rebellion. One camp, whose chief proponent was Henry Hotspur himself, saw that the more successful the revolt got, the more disaffected Welshmen and, much more dangerously, supporters of the deposed Richard II it would attract, especially amid rumours that Richard II was still alive. Their fear was that the supporters of Richard II in his former stronghold, Swydd Gaerlleon[1], would take advantage of the rebellion in Wales and rise up against Henry IV, on this matter they were not wrong but the eventual leader of the rebellion that originate in Cheshire would turn out to be someone entirely unexpected. In the meantime Hotspur and the others in the negotiation camp were making overtures to Glyndŵr in an effort to reach a compromise and end the rebellion peacefully. The problem was, however, that Henry IV and his core support, were vehemently opposed to this strategy and did little to support Hotspur’s efforts and instead were determined to introduce further repressive measures against the Welsh.

    th

    Henry IV

    Thus, in 1402 a wave of anti-Welsh legislation was introduced in an effort to establish English dominance over the region. These laws prohibited any Welshman from buying land in England, from holding any senior public office in Wales, from bearing arms, from holding any castle or defending any house, no Welsh child was to educated or apprenticed to any trade, no Englishman could be convicted in any lawsuit brought by a Welshman, Welshmen were to severely penalised when marrying an Englishwoman, any Englishman marrying a Welshman was disenfranchised and all public assembly was forbidden. The message of this sweeping new laws sent was one of utmost suspicion on the part of the English and convinced any who still wavered on the matter that Glyndŵr was the only option left to them. This was especially the case for those Welshmen who had tried to make a career for themselves in English service, but were now being forced from their positions as the middle ground between supporting Glyndŵr and supporting Henry IV vanished.

    Henry IV’s new repressive laws were not the only thing to buoy Welsh support for Glyndŵr’s rebellion as Glyndŵr himself captured not one, but two English noblemen that year. First was his one-time neighbour and arch enemy, Reginald Grey, 3rd Baron Grey de Ruthyn, was captured at his stronghold at Ruthyn itself in early February. Grey was held captive for just over a year until Henry IV agreed to pay Glyndŵr a large ransom for his freedom. Then in June of that year, Glyndŵr’s forces, under his flag bearer Rhys Ddu, captured a prisoner of far more use to him, one Sir Edmund Mortimer, uncle of the Earl of March, the young legitimate heir to the throne. Mortimer was captured by Glyndŵr after the Battle of Bryn Glas, in which Mortimer’s army was badly defeated after rashly charging up the steep Bryn Glas hillside and it was reported that the Welsh women following Glyndŵr’s army went among the dead and dying English soldiers and defiled the bodies of the dead, in revenge for the pillaging and rape carried out by the English the previous year. As he would do with Baron Grey, Glyndŵr offered to free Mortimer in exchange for a large ransom but Henry IV refused to pay for his release, thanks in part to Henry IV’s fear of Mortimer as a potential threat to his hold on the English throne. In response, Glyndŵr and Mortimer agreed a highly surprising alliance against Henry IV and the alliance was sealed by the marriage of Mortimer and Catrin, one of Glyndŵr’s daughters. This was the first of Glyndŵr’s two alliances with English noblemen against Henry IV but, by virtue of being the first, was arguably the most important in lending real legitimacy to Glyndŵr’s cause and making the strength of his position, even at this early stage, abundantly clear.


    The arms of the Earl of March, nephew of Mortimer
    and claimant of the English throne

    To crown it all of, 1402 also marked the start of French and Breton support for Glyndŵr’s rebellion. The French hoped to use Wales as a staging post to attack the English, just as they did through Scotland. The Bretons, meanwhile, were motivated more by their shared Celtic heritage with the people of Wales. As such, French and Breton privateers began to harass English ships in the Irish Sea and provide weapons, food and other supplies necessary for a war effort to the Welsh rebels. Glyndŵr was also supported by French and Breton mercenaries in many of his attacks.

    So it was that as 1403 dawned, Glyndŵr was rapidly growing in power and confidence and, even more importantly, the rebellion was becoming a truly national one as the English administration ground to a halt and many communities and individuals made their own tax arrangements with Glyndŵr and his forces in order to “buy” peace. These payments of “protection money” made Glyndŵr’s success painfully clear to the English. This growing fear of the power and strength of Glyndŵr and his rebellion was all but confirmed when Glyndŵr attacked Caernarfon Castle, one of Edward I’s great castles in north Wales, accompanied by French soldiers and, after a short siege, the castle was taken. This prompted the English to dispatch a substantial army into Wales on a punitive expedition as Prince Henry attacked and burnt Glyndŵr’s estates at Sycharth and Glyndyfrdwy.

    th

    Caernarfon Castle

    Despite this personal loss that took the shine of his success at Caernarfon, Glyndŵr began the campaigning season in July by recreating Llywelyn the Great’s campaign in the west and marching down the Tywi Valley. Village after village deserted the English and rose up to join Glyndŵr and he soon reached Llanymddyfri[2] on the 3rd July, where the both the local gentry and the common folk of the town proclaimed him Prince of Wales and joined his rebellion. From here, he marched on to Llandeilo, after dispatching 300 men to besiege Dinefwr Castle, and once again the local people of all ranks came to swear fealty to the Glyndŵr. From Llandeilo, Glyndŵr pressed westwards to the greatest of English castles in the west of Wales, Carmarthen. The castle did not last long and surrendered to Glyndŵr on the 6th July and Glyndŵr moved onwards to attack Morgannwg[3] and Gwent, burning Y Fenni[4], Brynbuga[5] and even taking the castles at Caerdydd[6] and Casnewydd[7].

    th

    Carmarthen Castle

    This string of successes for Glyndŵr prompted an outpouring of support for the rebellion and the Welsh national ideal and English officials reported tales of Welsh students leaving their studies at Oxford University and Welsh labourers and craftsmen downing tools in England and travelling west to join up with Glyndŵr’s forces. This wave of recruitment meant Glyndŵr could call on seasoned troops as hundreds of Welsh archers and men-at-arms who were veterans of English campaigns in France and Scotland left English service to join the rebellion. A glance at the captains of Glyndŵr’s army of some 8000 men, the largest Welsh army ever assembled, reveals the truly national nature of Glyndŵr’s rebellion. First was the hero of Bryn Glas, Rhys Ddu (the Black) who had once been the Sheriff of Ceredigion and a leading servant of the English regime and second was Gwilym Gwyn ap Rhys Llwyd who had served the Duke of Lancaster for years. Both of these men had been loyal servants of the English but when the time came they had joined the students and labourers in joining Glyndŵr under his banner of Yr Ddraig Aur Cymru.

    [1] Cheshire
    [2] Llandovery
    [3] Glamorgan
    [4] Abergavenny
    [5] Usk
    [6] Cardiff
    [7] Newport
    ________________________
    And that concludes tonight's double special to get us up to the POD. Which is, if you haven't noticed, Caernarfon Castle falls to Glyndŵr. The effect of this will, of course, cause a ripple in the events of the rebellion.
    Once again, do please feel free to comment and enjoy it!
    Gwyn
     
    Last edited:
    Chapter 3: The Four Henrys
  • Chapter 3: The Four Henrys
    If Glyndŵr thought it couldn’t get any better for his cause in the summer of 1403, then he was wrong. It was not in Wales, or even by Glyndŵr’s hand, that the political situation in England was vastly improved for Glyndŵr, but rather by the hand of the man appointed to stop him. Henry Hotspur, son of Henry Percy, Earl of Northumberland, and cousin of Henry IV, raised his standard in revolt against Henry IV at Chester, the bastion of Richard II’s support in England, on 9th July, only 3 days after the fall of Carmarthen. This was a shocking event in many respects, not least because the Percys had supported Henry IV in his war against Richard II. So what lay behind this sudden change? Firstly, the Percys’ relationship with Hnery IV was far more complicated than it first appeared. They might have backed him against Richard II but his action as King since then had roused their anger. Indeed, their grievances were many and included Henry IV’s failure to pay the wages due to them for defending the Scottish border, his demand that the Percys hand over their Scottish prisoners, his failure to put an end to Owain Glyndŵr's rebellion through a negotiated settlement (which also involved him ignored Hotspur’s counsel), his increasing promotion of his son Prince Henry's military authority in Wales (which was side lining Hotspur) and the final straw, his failure to pay the ransom for Hotsur's brother-in-law, Sir Edmund Mortimer.

    Percy_Hotspur.gif

    The Arms of Hotspur
    and the Rebellion

    This sudden defection by Hotspur resulted in Henry IV, accompanied by his 16 year old son Prince Henry, turning his army northwards to march towards Amwythig[1]. The distance proved too much for the young Prince’s force to cover in time and the army of Hotspur arrived in Amwythig in the morning of 20th July, where he was joined in the evening by the army of his uncle who had rapidly travelled south from the family’s estates in Northumberland. Henry IV and his army arrived the day after on the 21st July and after camping overnight outside the town, battle was joined by the two armies only a few hours before dusk on the 22nd July.

    The battle began with a massive archery barrage from both sides, with arrows killing or wounding many men on both sides even before they could meet in hand to hand combat. On the whole, the Percys’ gained an early advantage with their Swydd Gaerlleon[2] bowmen proving to be superior to the simple English bowmen of Henry IV. The situation quickly went from bad to worse for Henry IV and his followers as his right wing, under the command of the Earl of Stafford, broke and fled the field, but the battle was not yet lost. At least until disaster struck. Prince Henry was hit in the face with an arrow from one of the Percys’ Welsh archers and killed by a terrible wound. Henry IV and his men fought on, but news of the death of heir to throne boosted the spirit of the Percys’ soldiers and broke the spirit of Henry IV’s. Seeing the King’s men flagging, Hotspur led a final charge right at the King himself and after heavy fighting the Royal Standard was overthrown and victory looked certain. But then Hotspur became the second prominent victim to be struck down by a stray arrow. With their leader dead, the Percys’ charge was broken and Henry IV and what was left of his army soon forced the Percys to flee the field, leaving over 300 knights lying dead in the mud. The king who had won his crown on the field of battle had been bloodied and come close to defeat, but had narrowly emerged victorious. The Battle of Amwythig had been a disaster for its participants with both sides losing leaders and suffering heavy casualties in the battle which prevented either side from seizing the initiative in the aftermath of the battle.

    Battle-of-Shrewsbu_1924537c.jpg

    The death of Hotspur

    One man did benefit greatly from the result of the Battle of Amwythig, and that was Glyndŵr. The principal reason for this was it particularly gave him a free hand in Wales for a time, whilst Henry IV regrouped his forces to fight the far more pressing matter of the Percys and the second reason was that it provided Glyndŵr with an ally against the English. In the light of this new opportunity, Glyndŵr moved quickly in the spring of 1404 to capitalise on the situation. His first target was Harlech Castle, which was severely under-equipped and under-staffed with the garrison being equipped with only three shields, eight helmets, six lances, ten pairs of gloves, and four guns. As such, Glyndŵr was able to quickly take the castle, with the help of a large French contingent that had landed at Caernarfon over the winter. From Harlech, Glyndŵr marched his army southwards along the coast of Ceredigion Bay[3] to Aberystwyth and its castle. Once more, he found a castle under-equipped and ill-prepared to defend against a siege and thus the two great castles of west Wales fell into Glyndŵr’s hands by the end of June 1404.

    wp6454f6a5_05_06.jpg

    Harlech Castle

    These two castles, along with the castle and port of Caernarfon formed the core of Glyndŵr’s new Principality of Wales as he, for the first time in the rebellion, sat down to draw up plans for the future of the Welsh nation. So it was that he held court in Harlech, appointing Gruffyd Young, the Archdeacon of Meirionnydd[4], as his Chancellor. From there, he moved onto Machynlleth where he called the first Cynulliad, or Parliament, of his reign and was finally crowned as Prince of Wales at Cynulliad House in the presence of his supporters, including Edmund Mortimer and the Hamners, as well as representatives from the lords of Brittany, France and Scotland. At this point, English resistance in Wales had been reduced to just a handful of isolated castles and walled towns and over the rest of the nation Glyndŵr reigned as Prince.

    0b987f24ad6c777dd2e393cabb42d1b80fd013e0.jpg

    Owain Glyndŵr on his throne at Machynlleth

    [1] Shrewsbury
    [2] Cheshire
    [3] Cardigan Bay
    [4] Merioneth
    _______________________
    And now for the biggest change yet. Hopefully its suitably surprising!
    As always, please feel free to comment and, more importantly, enjoy it!
    Gwyn
     
    Last edited:
    Chapter 4: The Prophesied Alliances
  • Chapter 4: The Prophesied Alliances
    As 1405 began matters could hardly have been better for Glyndŵr on the Welsh home front, with the people of Sir Henffordd[1], Sir Drefaldwyn[2] and Swydd Amwythig[3], ending active resistance against Glyndŵr and his forces and opting instead to make their own treaties and protection arrangements with the rebels. His success had also attracted support in more covert circles, with Richard II’s former supporters and the Cistercian and Franciscan Orders sending money and arms to Glyndŵr and his forces to further supplement the income from protection taxes and ransoms. It was from this secure and stable base that Glyndŵr demonstrated his newly acquired status and with the negotiation of a treaty that, if it came to pass, would irrevocably alter the British Isles. This Tripartite Indenture, which was agreed to and signed by Glyndŵr himself, his son-in-law Edmund Mortimer and Henry Percy, the 1st Earl of Northumberland on 28th February. Under this unprecedented treaty the Kingdom of England would be divided into three parts. Percy would rule over twelve of the northern counties of England, stretching from the Scottish border into the Midlands, whilst Mortimer was to rule over the rest of England, bar the regions now claimed by Glyndŵr. According to the treaty, Glyndŵr’s domain would be “…from the Hafren[4] estuary as the Afon Hafren flows from the sea as far as the northern gate of the city of Caerwrangon[5]; from that gate directly to the ash trees known as the Onennau Meigion which grow on the high road leading from Pont y Gogledd[6] to Cynibre[7]; then directly along the highway, popularly known as the old or ancient road, to the head or source of the Afon Trent; thence to the head or source of the river commonly known as Merswy[8] and so along that river to the sea.”

    owain-seal.jpg

    The Great Seal of Glyndŵr
    from the Indenture

    The Indenture says much about Glyndŵr himself and his intentions for his new domain. First, it is clear that Glyndŵr could strike a hard bargain and was ready and willing to make full use of his newly acquired power. It certainly helped that he was the most powerful of the three signatories of the Indenture, with Mortimer living under his patronage and dependent on him and Percy having lost his son and a substantial amount of his family’s forces at the Battle of Amwythig[9] the year before. Added to this, Glyndŵr was bolstered by support from Brittany and France, who had been sending men and supplies to the Welsh, as well as harassing English ships in the Celtic Sea. On top of that, the Indenture shows how central Welsh mythology and legend was to Glyndŵr’s vision of Wales, with the greater Welsh nation described in the terms of Indenture following no actual or historical borders but rather Welsh legend, with the Hafren river being the legendary ‘true’ border of Wales and Ashes of Onennau Meigion being foretold, supposedly by Merlin, as the place where the ‘Great Eagle’, presumably a future great Welsh leader, would call the armies of Wales to him. It could not be clear that, in light of his success, Glyndŵr saw himself as the Mab Darogan, one of the great Welsh heroes, who had been prophesied to forge the Welsh nation anew.

    It was not only at home that Glyndŵr was enjoying success, as he dispatched his Chancellor Gruffyd Yonge, accompanied by Glyndŵr’s brother-in-law John Hanmer, to the courts of Brittany and France. This mission was motivated by two factors, firstly the enmity the French had for the English, something which Glyndŵr had witnessed first hand in his time in English service, and secondly the help that the French and Bretons had already provided to the Welsh. This had included French and Breton forces fighting alongside Glyndŵr’s men and also naval raids by Breton and French fleets on Jersey, Guernsey, Plymouth, the Isle of Wight and even the burning of Dartmouth by a French fleet manned with Welsh soldiers. Thus they travelled first to Brittany, the two envoys landed at the port city of Brest and travelled to the city of Nantes for an audience with the elven year-old Duke John V of Brittany and his mother, Joan of Navarre, who served as regent. Here, Yonge and Hanmer appealed to the Celtic ties that linked the Bretons and the Welsh in their call for aid and it was greeted with promises of help. Heartened by this, the two men journeyed onwards to Paris where an audience with Charles VI was equally as fruitful and ended with the signing of a treaty of alliance between the French and the Welsh, to formalise the support that the French had been providing to Glyndŵr since 1403. With their journey to the continent a resounding success, Yonge and Hanmer returned to Wales in triumph.


    Charles VI

    It was not only the French and Bretons that Glyndŵr reached out to in order to bolster his position in his hour of triumph, with letters also dispatched to the Scottish, Celtic brothers of the Welsh people, King . They had been contacted by Glyndŵr before in 1401-02. Those entreaties for help had ended in disappointment then, with the Scottish army having been routed by the English at the Battle of Homildon Hill. In 1405, however, Glyndŵr felt that his power was such that both the Irish and Scottish would be more willing to aid the Welsh, now that they had proven their worth on the field of battle. First he wrote to the aged King Robert III of Scotland, in a letter full of emphasis on both the shared history and mythology that tied the two names together and on the belief of Glyndŵr that the time had come for a prophecy of Merlin, which foretold that, as Glyndŵr himself wrote, Wales “shall be delivered from English oppression and servitude by [Scottish] aid”, to be fulfilled. Fortunately for Glyndŵr this prophecy of Merlin had flourish in Scotland, as well as Wales, as had the belief that an alliance with the Welsh would one day defeat the English. So it was that, in the light of Glyndŵr’s success, the ancient prophecy of Merlin and the death of the heir to the English throne, Prince Henry, the Scottish followed the example of the French and agreed an alliance with Glyndŵr and his increasingly tangible Principality of Wales.


    Robert III

    [1] Herefordshire
    [2] Montgomeryshire
    [3] Shropshire
    [4] Severn River
    [5] Worcester
    [6] Bridgnorth
    [7] Kinver
    [8] Mersey
    [9] Shrewsbury
    _______________________
    This is more of a worldbuilding chapter, normal service of warfare will resume again next chapter.
    As usual, please comment and, more importantly, enjoy!
    Gwyn
     
    Last edited:
    Chapter 5: The Year of the French
  • Chapter 5: The Year of the French
    So it was that 1405 came to be known as the “Year of the French” in Wales. Charles VI’s first effort was against the English possessions in Aquitaine, whilst simultaneously a force of over 3000 French and Breton knights and men-at-arms under the command of Jean II de Rieux, Marshal of France, set sail from Brest in July and landed at Caernarfon, carrying a significant amount of siege equipment with them, before marching southwards, as Glyndŵr had done the year before, and attacked the town of Hwlffordd[1]. They failed to take the castle but, after being joined by Glyndŵr’s forces, they moved on to Dinbych-y-pysgod[2] and the castle here was taken. Buoyed by this success, they moved on to retake the castle of Carmathen from the English before launching perhaps one of the most audacious moves of the war and marched eastwards, right across South Wales, and into England. At the same time, Henry Percy returned to his lands in Northumberland and, accompanied by Thomas Bardolf, 5th Baron Bardolf, Archbishop Richard le Scrope of York, Thomas de Mowbray, 4th Earl of Norfolk, and Scrope's nephew, Sir William Plumpton, began to gather his followers into an army, backed by Scottish forces, to take on those loyal to Henry IV in the north.


    Henry Percy, 1st Earl of Northumberland

    Thus, Henry IV faced not one, but two, armies opposing his authority in England. From the north came the combined armies of the Percys and the Scottish and the combined armies of Glyndŵr, the French and the Bretons were marching eastwards through Sir Frycheiniog[3]. From here they marched onwards through Swydd Henffordd[4] and on into Swydd Caerwrangon[5] and here they met an English army west of Great Witley, only ten miles from Caerwrangon[6]. Henry IV's army was arrayed on Abberley Hill facing south whilst Glyndŵr's army was positioned on the defensive Iron Age hill fort of Woodbury Hill, facing north. A mark of the importance of the battle is the hill’s folk name of Owain’s Hill. Henry's strategy seemed to be to try and prolong the stand off in order to weaken and intimidate the Franco-Welsh army. So it was that the two armies were lined up opposite each other for nearly 3 days before battle was joined. Indeed it was only the news of the renewed efforts of the Percys to rise up in rebellion in the north that forced Henry IV to make his move as the Welsh and French army remained firm in their position. The battle began, as the Battle of Amwythig[7] had done, with both sides raining arrows on each other. Glyndŵ’s forces held the advantage with their position on the hill and this was further bolstered by the ability of the Welsh archers. Seeing his men flagging after several failed efforts to storm up Woodbury Hill, Henry IV ordered a desperate charge up the hill in a bid to break the relatively weak Welsh left wing, which was commanded by the experienced Rhys Ddu but compromised of inexperienced Welsh rebels. The Welsh were fortunate to survive the charge, and the Welsh cause came close to defeat only to be rescued by the French soldiers of Jean II de Rieux whose professional soldiers bolstered the line and repulsed Henry IV and his men. Scenting victory, Glyndŵr himself led the charge down the hillside into the back of the retreating English soldiers who were broken and fled the field of battle leaving Yr Ddraig Aur flying triumphantly over the hill that bears his name.

    owain glyndwr.jpg

    Owain Glyndŵr leading the charge

    In the meantime, the Percys’ army of some eight thousand men assembled on Shipton Moor to fight an army loyal to Henry IV under the command of Ralph Neville, 1st Earl of Westmorland. The two armies were relatively evenly matched but the arrival of the news of Glyndŵr’s victory at the Battle of Woodbury Hill boosted the morale of the Percys’ army and depressed the morale of Neville’s forces. Despite this the battle began with no clear victor as it quickly descended into hand-to-hand fighting under a dark cloud of arrows. The Scottish soldiers, with their claymores and highland grit, fought long and hard alongside their English allies but the casualties were rapidly piling up for both armies. The break finally came when Neville was cut down by a Scottish soldier and amid confusion as the cries of “The Earl is Dead” were heard around the battle field and the snow poured down, Neville’s army fled the field. This defeat was a major blow to Henry IV’s cause, especially after the disaster at Woodbury, but Henry IV still had a band of loyal followers left around him and had not lost the war yet, especially as the core territories of the crown, in the south of England, were still secure and untouched by invasion.


    Ralph Neville, 1st Earl of Westmorland

    The Year of French had seen Glyndŵr’s star rise to a level never imagined as he led his army to victory against Henry IV himself in battle, This victory had only been possible with the help of the French and Bretons, not to mention the support of the Scottish for the Percys at the Battle of Shipton Moor. It truly was a year in which Glyndŵr’s allies turned the tide for the Welsh cause as they invaded England for the first time. With Glyndŵr’s victory, or at least the securing of Welsh independence, looking increasingly likely it was the result of the Battle of Shipton Moor that would have the most interesting consequences for Britain as it set the wheels in motion for the possibility of the Tripartite Indenture to really come to fruition.

    [1] Haverfordwest
    [2] Tenby
    [3] Brecknockshire
    [4] Herefordshire
    [5] Worcestershire
    [6] Worcester
    [7] Shrewsbury
    _____________________
    A shorter chapter today, but an important one. I'm always working on a map for the TL ATM, so look forward to that!
    As usual, do please comment but most importantly enjoy!
    Gwyn
     
    Last edited:
    Supplement: Tripartite Indenture Map
  • I really hope the Tripartite Indenture eventually comes to pass. It's without a doubt the coolest almost real alternate history that I never knew I needed to know!

    Also, subscribed :)
    And here you can have a map of it. ;)
    Instead of a chapter, today's update is a mini-one in the form of the first accurate digital map of the Tripartite Indenture to be found on the internet, as far as I'm aware at least.

    the_tripatite_indenture_1405_by_ankhvh-dc1qo77.png
     
    Chapter 6: The End is Nigh
  • Chapter 6: The End is Nigh
    As 1406 dawned, the cause of Henry IV and the Lancasters was in dire straits after the twin defeats at Woodbury Hill and Shipton Moor and matters were about to get worse. First, the victorious Percys marched the short distance from the field of battle at Shipton Moor to the city of York where the townsfolk threw open the city gates and the ancient flag of Northumbria was hoisted over York Castle. Whilst the Percys were enjoying their success, Glyndŵr and his army of Welsh and French and Breton soldiers were marching home into Wales, along the Hafren[1] valley. Their target? First Pont-y-Gogledd[2] and then Amwythig[3].

    Upon reaching Pont-y-Gogledd, Glyndŵr and his men found a town gripped by fear of the Welsh menace. They had heard tales of the burning of Aberhonddu[4], which had been carried out by the Rhys Ddu and his men in revenge for the destruction of Glyndŵr’s family homes at Sycharth and Glyndyfrdwy, and word of Glyndŵr’s victory at Woodbury Hill had spread quickly, such was the scale of the disaster. So it was that as the flag of Yr Ddraig Aur and Glyndŵr’s own coat of arms appeared on the horizon flying in the sunlight over a gleaming army of French knights and Welsh archers as it marched up the river valley the people of the town prayed for God to save them from the dragon’s wrath. Glyndŵr answered their prayers with an ultimatum, surrender and swear fealty to him as Prince of Wales and live or starve behind the town walls. This ultimatum provoked a fierce debate among the townsfolk as many still held out hope that Henry IV would arrive to break the siege, whilst the rest saw no hope for their salvation other than to surrender. The tensions among the townsfolk remained unresolved and escalated into something of a riot in the town square, before the remaining townsfolk finally surrendered. The events at Pont-y-Gogledd clearly demonstrated the level of hysteria that was now gripping the Marches and the English people in Wales. With Pont-y-Gogledd taken, Glyndŵr and his men continued their march up the Hafren valley to the greater prize, Amwythig itself. Upon his arrival at the town, Glyndŵr found a Lancaster army waiting for him, under the command of Edward of Norwich, 2nd Duke of York. The army was small in size but they were garrisoning the town and its fortifications in force and thus they avoided the disastrous fighting that had taken place at Amwythig in 1403. So it was, that Glyndŵr was forced to lay siege to the town, helped by the siege weaponry provided by the French. With Henry IV crippled by a bout of illness on his march west to try to relieve the siege, the leaderless Lancaster army was forced to turn back and leave Amwythig to its fate. The siege of the Amwythig lasted until July, at which point Edmund of Norwich raised a white flag on the town walls and sent out a messenger to parley with Glyndŵr and entreat him to allow for a peaceful surrender and to permit the Lancaster soldiers to lay down their arms and leave the town unharmed. Sensing a unique propaganda opportunity, something which Glyndŵr had thrived on in his rebellion, Gruffyd Yonge, Glyndŵr’s Chancellor, advised him to allow the Lancasters to leave freely. Glyndŵr, trusting his charismatic Chancellor, followed his advise and thus Edmund of Norwich marched out of Amwythig unharmed, leaving their arms and banners behind them.

    Town-Walls-Tower.jpg

    The tower from which the white flag was hoisted

    The fall of Amwythig was the latest and greatest feather in Glyndŵr’s cap and he returned to his court in Harlech in triumph. Upon arrival in the castle-town, however, he was greeted with some bad news. The French professional soldiers, who had turned the tide at Woodbury Hill, had grown tired of the dreary weather and the harshness of life in central Wales and pined for the balmy climate of France. Their wishes were reciprocated by the Charles VI and the French court who, after the seizure of English Aquitaine, now hoped for peace with the English. Thus, the French forces of Jean II de Rieux departed from Caernarfon in August 1406 and were waved off from a packed quay by hundreds of thankful Welsh men, women and children. This blow to Glyndŵr was not a disastrous one, what with Henry IV’s health seemingly failing and the Lancaster cause being on the ropes, but it did postpone plans for an ambitious assault on Chester that had been planned in cooperation with the Percys, who were now in the process of expanding their control in the north with the seizure of Malton and the besieging of Scarborough. Instead, Glyndŵr was forced to turn south to the Brynbuga[5] valley after the Daffyd Gam, who had been placed as governor of Brynbuga, had broken his oath of fealty to Glyndŵr in the light of the French departure and gathered an army of Englishmen and Anglophone Welshmen to him before sending word to Henry IV begging for a Lancaster army to come to his aid. With the Percys rampaging across the north, only a small force could be spared but one was dispatched with all due haste.

    6KZC_K.jpg

    Malton Castle

    Glyndŵr arrived in the Brynbuga valley to find an army of rebels camped in the valley near Byrnbuga Castle itself and the Lancaster army only a day’s travel away. Thus, Glyndŵr did not wait to give him men time to rest and was forced instead to fight the Dafyyd Gam's army before they could be reinforced by the Lancaster soldiers. Glyndŵr had the advantage of surprise, but the weariness of his men gave the rebels a fighting chance when battle was joined at Pwll Melyn, less than a mile from the castle. As had become Glyndŵr’s custom, his Welsh archers rained arrows on the English army before the battle descended into vicious hand-to-hand fighting under the dark cloud of arrows flying overhead. It was here that the Welsh soldiers’ experience began to tell, along with their superior weaponry, which had been acquired in the Siege of Amwythig, as scores of the English rebels were cut down. If the result of the battle had been in any doubt, the death of Daffyd Gam himself confirmed it as his followers fled from the field before the wrath of the Welsh. With the English rebels beaten, Glyndŵr and his army set up camp outside Brynbuga to wait for the Lancaster army. As it turned out, however, news of the Welsh victory at Pwll Melyn had reached the Lancaster force and they had turned around and marched home.

    the battle of pwll melyn.jpg

    The Battle of Pwll Melyn

    With his hold on Wales now secure, Glyndŵr and his army, now bolstered by a band of Breton and French mercenaries who had travelled to Caernarfon at the promise of loot after the end of open hostilities between the French and English on the continent, marched north once more and headed for Chester where they planned to meet with an army under the command of Henry Percy, the newly crowned King of Northumbria, to seize Richard II’s old centre of power. At the same time, what was left of the Lancaster forces were marching to Chester as well, after the now revitalised Henry IV had received word of the intentions of Glyndŵr and Henry Percy, for a final showdown. Would the massed Lancaster forces, under the command of Henry IV himself, as well as his eldest remaining son, Thomas of Lancaster, and Lord Grey of Codnor, the only English commander to enjoy any success against the Welsh, be able to save Henry IV’s crown or would it be lost in blood and tears on the field of battle? Only time would tell.

    [1] Severn
    [2] Bridgnorth
    [3] Shrewsbury
    [4] Brecon
    [5] Usk
    ______________________
    Sorry for the wait everyone, the next chapter is finally up and the end is nigh for the war. The final result will be revealed in the next update after today's cliff-hanger ending.
    As usual, please do comment and most importantly enjoy!
    Gwyn
    EDIT: Please note that a minor retcon took place regarding the coronation of Henry Percy as King of Northumbria in York.
     
    Last edited:
    Chapter 7: The Hour of Victory
  • Chapter 7: The Hour of Victory
    Four armies, those being the Welsh army headed by Glyndŵr, the Army of the North led by Henry Percy, the Mortimer army led by Sir Edmund Mortimer (compromised of the French and Breton mercenaries and those supporters that Mortimer had, in reality it was part of the Welsh army but was designated as separate for appearances) and finally the massed Lancaster army under Henry IV himself, marched on Chester for to fight the battle to end all battles on English soil. In the meantime, Constance of York, the sister of the Duke of York, had orchestrated a plot to liberate Edmund Mortimer, the Earl of March and former heir presumptive to the English throne, and his brother Rodger from Henry IV’s imprisonment. The two boys were abducted from Windsor Castle and quickly taken east to Amwythig[1] and housed there in secret. So it was that the stage was set for the fate of England to be decided once and for all.

    The Welsh army and the Mortimers reached Chester on 16th January 1407 and camped on Rowton Moor, a short distance outside the port city itself, to await the arrival of the Northumbrian army that was due to reinforce them. The combined Welsh and Mortimer forces numbered only some 9,000 men, of which around 8,000 were Welsh and the rest French, Breton and even a few Englishmen loyal to Mortimer. The Northumbrian army was due to arrive at Chester the following day, but they were held up but by poor weather and heavy snow in the Pennines and were running nearly a day behind. So it was that Glyndŵr received word from a scout reporting news of the imminent arrival of the Lancaster army in the morning. The Welsh spent a worried night sleeping on the moor and woke in the morning to the banners of Henry IV on the horizon. With scouts reporting the size of Henry IV’s army as outnumbering the Welsh two to one, Glyndŵr mounted his horse and led his men into battle lines to prepare to fight the English on St. Anthony’s Day. As the Welsh prepared to fight to the death for their country, Glyndŵr rode up and down the battle lines on his warhorse stirring his men with a speech that would go down in Welsh history:
    “Soldiers and Companions! Wales, the land of our forefathers is dear to me. The land of bards and minstrels, and hero on hero, who at honour's proud call, for freedom let their lifeblood fall. Her brave warriors, and fine patriots shed their blood for our freedom and all men who stand and fight today will join their hallowed ranks! Wales! Wales! I am true to the great Wales! As long as the sea serves as a wall for this pure, dear land may Wales endure for ever. Old land of the mountains, paradise of the poets, every valley, every cliff a beauty guards; through love of my country, enchanting voices will be dear streams and rivers to me. Though the enemy have trampled my country underfoot, the ancient people of Wales know no retreat, our spirit is not hindered by the treacherous hand and the sweet harp of our land will never be silenced.”
    With these now famous words, Glyndŵr and his men sallied forth to fight the English foe.

    th

    The Welsh charge at Caer​

    The sky turned black with arrows flying overhead as the Welsh charged down the hill, banners flying the wind and sword and armour flashing in the winter sun, at the Lancaster army on the meadow on the banks of the frozen River Dyfrdwy[2]. The Lancaster army hastily drew up into battle lines as the Welsh charge smashed into their left wing, commanded by Thomas, titular Prince of Wales. The left wing was shattered under the brunt of the Welsh charge, and English men fell dead and dying under the lethal rain of arrows flying from Welsh bows. Prince Thomas attempted to rally the men under his command, even as they were cut down around him by Welshmen, and was rescued by the right wing, commanded by Lord Grey of Codnor, which swung round to hit the Welsh left as the snow began to fall heavily upon the battlefield. The snow quickly developed into a blizzard as the battle descended into vicious hand-to-hand fighting on the increasingly churned up meadow. Glyndŵr and his men, stirred no doubt by the words that would come to be the national anthem of Glyndŵr’s new Wales fought long and hard but, even with the heavy losses sustained by the Lancasters in the first charge, the numerical superiority of the Lancasters began to tell and the tide, slowly, but surely, started to turn. Glyndŵr himself, accompanied by his loyal lieutenants Rhys Ddu and Gwilym Gwyn ap Rhys Llwyd as well as his son Gruffud, fought hardest in the thick of the battle but even his bravery could not save his cause single-handed.

    With the moment of defeat seemingly at hand for Welsh cause, salvation appeared through the swirling blizzard as the flying banners of Northumbria and the Percys were seen on the far bank of the Dyfrdwy, in any other year they would have been useless to the Welsh, with river standing in their way, but by some turn of fate or trick of fortune the Dyfrdwy had frozen over that year and the Northumbrians were able to charge across the ice into the rear of the Lancaster army. Henry IV was taken by surprise and, being positioned near the rear of his forces with his bodyguard, was caught by the full force of the Northumbrian charge across the ice. He, and his standard bearer, Sir Walter Blount, survived the initial charge, however, and rallied his men to him for a last stand in defence of the crown that he still bore atop his helm. Harried on all sides, it was the turn of the Lancaster to fight tooth and nail for their lives in the bloodstained snow. Indeed they fought long and hard, until Sir Edmund Mortimer, seeing a chance to claim the English throne for his nephew, took Glyndŵr, his bodyguard and a band of his own supporters, including Thomas Montagu, 4th Earl of Salisbury and son of the executed John Montagu, and charged at the King and his company. Glyndŵr himself cut down Sir Walter Blount and tore the royal standard from his dying hands before Sir Edmund Mortimer struck Henry IV a fatal to the head, before taking the crown of England from the deaad king’s head. With the old King dead, Mortimer unfurled a new royal standard, the royal standard of Edmund Mortimer, Earl of March, the new King of England. Henry IV’s followers, led by Thomas of Lancaster, seeing the Lancaster standard lying torn in the snow and the Mortimers’ standard now flying amidst the snow in it stead, turned and fled from the field, leaving the King and countless of their companions dead or dying on the heath and river bank.

    Corwen-3-768x514.jpg

    A modern statue of Owain Glyndŵr that now stands on
    the field of battle

    After their famous victory, the Mortimers, Welsh and Northumbrians turned to Caer[3] and marched into the city unopposed and in triumph. As the allies were celebrating their success, Edmund Mortimer, Earl of March, arrived in the city in the company of Constance of York and was taken to Caer Cathedral where he was proclaimed Edmund I, King of England, by his uncle and his supporters, with the very crown taken from Henry IV dead body on the battlefield. Welsh independence was all but secured, the Northumbrian revolt was rising in power and England had a new King, if only in name, and a new day for Britain was dawning.

    [1] Shrewsbury
    [2] River Dee
    [3] Chester
    ________________________
    The war is over for two and the war has only just begun for another. So ends Glyndŵr's War in 1407. Some of you may recognised the battle speech as an adapted version of the Welsh national anthem, and for those that don't (and those that do) I recommend listening to it here whilst reading this chapter. As usual please feel free to comment, but most importantly enjoy!
    Gwyn
     
    Last edited:
    Chapter 8: A New Wales
  • Chapter 8: A New Wales
    Welsh independence had been secured for the time being by victory at the Battle of Caer[1], Glyndŵr returned through Wales to his temporary capital of Machynlleth, where he had held his first Cynulliad, Parliament, back in 1404, and was greeted with adulation wherever he went. He and his men marched along the north Wales coast, passing though Dinbych[2], Rhuddlan, Y Fflint[3] and Conwy as they went and in each town they passed through, the townsfolk came out in force to greet their new Prince and liberator as he went by. Glyndŵr then crossed the Afron Menai[4] into Ynys Môn[5] where he received the keys of Biwmares[6] Castle, whose garrison had surrendered to the Tudur brothers after news reached them of the result of the Battle of Caer. After spending a night in Edward I’s finest architectural achievement, Glyndŵr returned back across the Afron Menai and travelled south to Caernarfon where he was greeted by delegations from France, led by Jean II de Rieux and including Charles VI’s daughter Princess Michelle, from Brittany, led by Duke John V himself, from Scotland, led by James, Earl of Carrick and heir to the Scottish throne, and even Ireland, led by Thomas FitzGerald, 5th Earl of Desmond. Accompanied by these delegations of foreign dignitaries, Glyndŵr travelled onwards in a now truly impressive procession and reached Harlech in March 1407, where an opulent banquet, the finest of its kind ever seen in Wales, was held in the Great Hall of Harlech Castle.

    193px-Jean_II_de_Rieux.jpg

    Jean II de Rieux

    After a few days of celebration at Harlech, Glyndŵr journeyed inland to Machynlleth to assemble Welsh nobles, burghers and even some common folk into a Great Cynlliad, Parliament, to mark the beginning of is reign as Prince of Wales in earnest. He addressed the assembled Welsh representatives in Cynlliad House, that still stands in Machynlleth, and set out his vision of an independent greater Wales to the assembled delegates. His plans, as described at the Cynlliad, included the establishment of two Welsh universities, one at Aberystwyth in Ceredigion and one at Abertawe[7] in the south, the restoration of the Tyddewi[8] Archdiocese as well as the alignment of the Welsh church to the French Pope in Avignon. He also took the opportunity to appoint the first Welsh Marcher Lords, who would take on the responsibility of the English Marcher Lords to protect the border, but this time from the English. His eldest son, Gruffud was named Iarll Caer[9], a title that become synonymous with the heir to the Welsh throne, his loyal lieutenants Rhys Ddu and Gwilym Gwyn ap Rhys Llwyd were named Iarll Amwythig[10] and Iarll Henffordd[11] respectively, one of the Tudur brothers, Gwilym, was made Iarll Rhosan[12] and Glyndŵr’s brother-in-law John Hanmer was elevated to Iarll Llwydlo[13]. In addition to this, Glyndŵr’s brother, Tudur ap Gruffyd was made Iarll Penfro[14], the second of the Tudur brothers, Rhys, was made Sheriff of Ynys Môn and Glyndŵr’s Chancellor Gruffyd Yonge was translated from being Bishop of Bangor to replace the English Bishop of Tyddewi. These appointments established the first organised Welsh peerage and put in place native Welsh nobles, the first since the days of Llywelyn the Last, who replaced the Englishmen who had been imposed on Wales as part of the occupation of the region in the previous two hundred years.

    parliament.jpg

    Cynlliad House in Machynlleth

    Having concluded the Cynlliad at Machynlleth, Glyndŵr and his retinue travelled southwards once more, passing through Aberystwyth and the rest of Ceredigion before reaching Sir Penfro[15], famous for its beautiful coastlines, and here he stopped at Hwlffordd[16] where he and his companions were housed in the Augustinian Priordy Hwlffordd[17]. The following morning, 16th May 1407, Glyndŵr and his retinue of dignitaries and loyal supporters began a grand procession through the city, with the Yr Ddraig Aur and Glyndŵr’s own arms flying in the wind and hanging from every building as they passed onwards through streets lined with cheering Welsh men, women and children. Glyndŵr himself rode at the head of the procession, mounted on a white charger, dressed in fine clothes of white and gold and accompanied by his wife Margaret Hanmer on his left and his son and heir Gruffud on his right. Behind him came John V, the Duke of Brittany, Jean II de Rieux, Marshal of France, Princess Michelle, daughter of Charles VI, Prince James, heir to the Scottish throne and Earl of Carrick, and finally Thomas Fitzgerald, Earl of Desmond. Behind these foreign nobles came Glyndŵr’s loyal lieutenants, the newly entitled Welsh Lords, from Rhys Ddu, now Iarll Amwythig, to Rhys ap Tudur, now Sheriff of Ynys Môn, all were mounted on fine horses and dressed in clothes fitting for the occasion. Finally came the rest of Glyndŵr’s family and a select few of from the ranks of those who fought at Caer. The procession reached Tyddewi Cathedral and entered through the Great West Doors, where they found a cathedral packed to the rafters and draped with the white and gold of Wales and the red and gold of Glyndŵr himself. Whilst his retinue made their way to their places in the cathedral, Glyndŵr dismounted from his white charger before walking down the central aisle, his wife still by his side, to sit on a great throne placed in front of the altar. It was on this throne, that Glyndŵr was crowned Owain I of House Glyndŵr, Prince of Wales by Gruffyd Yonge, newly appointed Bishop of Tyddewi, with a single coronet of gold.

    tyddwei cathedral.jpg

    Tyddewi Cathedral

    The crowning of Glyndŵr as Owain I, marked the beginning of a new era for Wales, one it which the Welsh people would stand united for the first time in 200 years and spread across unprecedented borders from the salt waters of the Y Môr Celtaidd[18] to the fresh water of the Afon Hafren[19]. Such was Owain I’s new domain, one that would shaped forever by his reign and owed its very existence to him and followers. So it was that as people up and down Wales celebrated the coronation of a new Prince of Wales long into the night, the golden sun rose over a new day in Wales.

    [1] Chester
    [2] Denbigh
    [3] Flint
    [4] Menai Straits
    [5] Anglesey
    [6] Beaumaris
    [7] Swansea
    [8] St. David’s
    [9] Earl of Chester
    [10] Shrewsbury
    [11] Hereford
    [12] Ross-on-Wye
    [13] Ludlow
    [14] Pembroke
    [15] Pembrokeshire
    [16] Haverfordwest
    [17] Haverfordwest Priory
    [18] Celtic Sea
    [19] River Severn
    _________________________________
    And so we reach Glyndwr's coronation as Owain I, next up the continuing wars in the north and south of England. As usual please do comment, but more importantly enjoy!
    Gwyn
     
    Last edited:
    Chapter 9: Glyndŵr's Vision and Chapter 10: The War of Three Kings
  • Chapter 9: Glyndŵr’s Vision
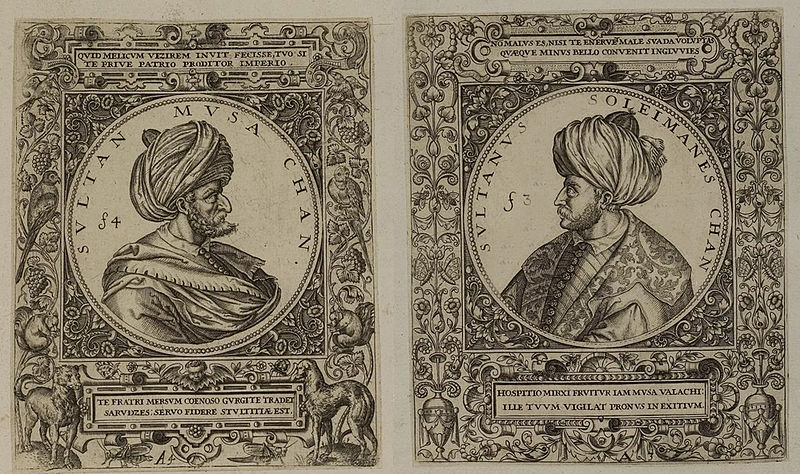
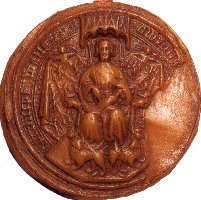
    The best written account of Owain I’s vision for his new Principality of Cymru[1] comes from the records kept of the Cynlliad Cymraeg, or Welsh Parliament, which date back to that very first meeting of the Cynlliad at Machylleth in 1404. The account they contain of the speech that Owain I made to assembled Welsh representatives at the Cynlliad in March 1407, which detailed Owain I’s plans for Wales, is surprisingly comprehensive, and this is testament to archiving work of the monks employed to keep the archives of the Cynlliad. Perhaps the most significant of Owain I’s policies related to the Welsh Church, which had long been dominated by the English. Not only did he plan on removing the English bishops of Wales from post and replacing them with Welsh clergy, as he had already done with the Bishop of Tyddewi[2] the records also reveal the first sign of his intention to realign the ecclesiastical loyalty of his Welsh principality to the French-backed Anti-Pope in Avignon, Benedict VIII. It is worth noting that this realignment of Wales’ ecclesiastical loyalty was somewhat inevitable, with Benedict VII being supported Owain I’s French allies. This realignment would be carried out for nothing in return, however, and, as revealed by a later letter written to Charles VI from Pennal (outside Machynlleth), Owain I demanded the confirmation of Owain I’s ecclesiastical appointments in Wales, the forgiving of the sins of those who had supported him in his war against Henry IV and the elevation of the bishopric of Tyddewi to an archbishopric to be at the head of the new Welsh church, which would include the dioceses of Llanelwy[3], Llandaff, Bangor and even Henffordd[4]. In addition, Owain I also demanded, as a price for the loyalty of his new Wales, that all priests appointed to the principal offices of the Welsh Church understood Welsh and the restoration of monastic lands in Wales under the control of English and/or French monasteries to Welsh monasteries. Finally, Owain I insisted that Benedict VIII accord him the ecclesiastical privileges that had been given to his predecessors as Prince of Wales, as well as the recognition of his personal chapel. It might well strike the modern reader as strange that Owain I’s ambitions for Wales appeared to focus more on the ecclesiastical structure and loyalty of the Wales rather than the political realities of governance of the principality, but it must be remembered than in the 1400s the ecclesiastical and political went hand in hand and that the church was a hugely valuable tool for the kings and princes of Europe to assert their rule over their domains. For that reason, it should come as no surprise that Owain I, who was surrounded by clergy in his circle of supporters, focussed so much on the ecclesiastical future of the new principality in the setting out of his vision for Wales.

    Chapter 10: The War of Three Kings
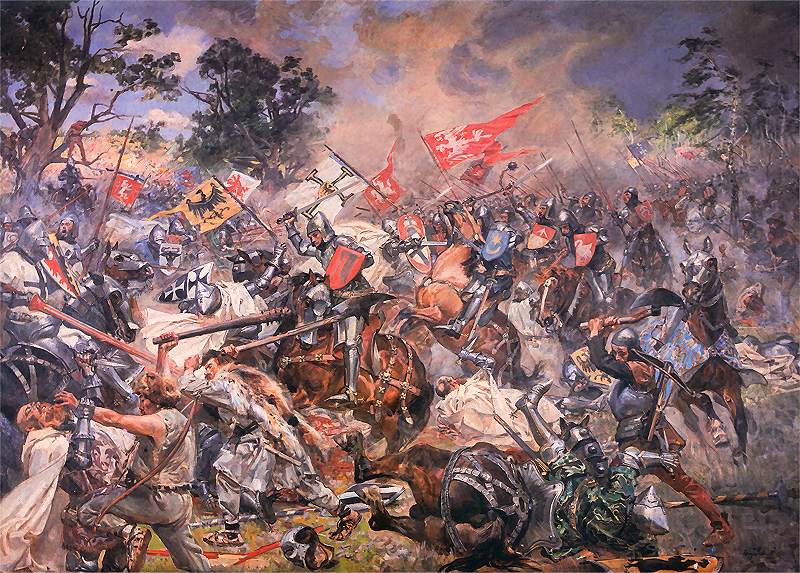
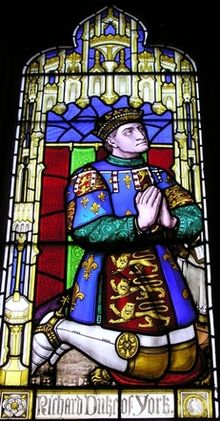
    Whilst Owain I was beginning his rule of Wales in earnest, his English allies, the Mortimers and the Percys were continuing to fight the Lancasters in the continuation of Glyndŵr’s War that would come to be known as the War of Three Kings. The Lancasters controlled the largest domain as February 1407 began, with them and their supporters holding territory from London itself to their father’s old lands in the Duchy of Lancaster, the Percys were the next most powerful, in terms of land held, with much of the north-east under their rule from York, although Richard of Conisburgh, 3rd Earl of Cambridge and member of the Plantagenet House of York, still held several castles in the region, last but not least came the Mortimers who held only a few castles and estates in the west of England, but did have the candidate with, arguably, best claim to the English throne. So it was that the War of Three Kings began with the Mortimers moving on the Lancasters, who were on the ropes after the Battle of Caer[5], to secure some actual territory from which to build their campaign for the English throne and the Percys following suit against the Duchy of Lancaster.

    Earl%20fo%20Cambridge.jpg

    Richard of Conisburgh

    The Mortimer campaign opened with Sir Edmund Mortimer marching his army, made up of an eclectic mix of French and Breton mercenaries, survivors from Henry IV’s army that fought at Caer who had deserted the Lancaster cause and even some of the townsfolk of Caer who had no wish to live under the rule of the Welsh, south through Swydd Caerlleon[6], where the Welsh were now going about establishing their control of the region, and into Staffordshire. At Blore Heath, near the new Welsh border, Sir Edmund Mortimer encountered a small force of Lancaster soldiers, under the command of Edward of Norwich, that had escaped from Caer. Seeing the possibility for an easy victory to bolster his cause, Sir Mortimer engaged the Lancaster army in battle and proceeded to rout the Lancaster force and capture Edward of Norwich, the head of the House of York and a former supporter of Richard II. Whilst this victory was of little significance, in and of itself, it boosted the morale of the Mortimers and gave them a prisoner of not inconsiderable importance. In addition, Sir Mortimer was able to discover that remaining survivors from the Lancaster army at Caer had retreated the Lancaster core territories in the Duchy of Lancaster under the command of Thomas I, the Lancaster candidate for the throne.

    Emboldened by this news, the Mortimers marched onwards to take Stafford itself. This was an unusual target for Sir Mortimer to choose, not because of a lack of strategic value, though this was somewhat limited, but because it fell in the territory assigned to the Percys in the Tripartite Indenture, that Sir Mortimer had signed only two years previously in 1405. On the other hand, Stafford did represent a logical choice since it lay between the Mortimers and London and also as it was a fortified town somewhat close to the lands of Edmund I, as Earl of March, and thus represented a place from which to build their forces. Another positive was the fact that Stafford was only lightly garrisoned, after Henry IV had taken much of the garrison with him to the battlefield, and as such the Mortimer army set up camp outside Stafford with the hope of victory strong in their hearts and sent an ultimatum to the garrison of the town demanding their surrender. Initially the garrison was unwilling to surrender to the Mortimer forces until Edmund I, aged only 15, appeared before the town walls, the crown of Henry IV on his head and the Mortimer Royal Standard carried at his side by Thomas Montagu, 4th Earl of Salisbury. The people of Stafford had watched Richard II, who had named Edmund Mortimer, Earl of March, his heir presumptive, paraded through their town by victorious Lancaster soldiers back in 1399 and the appearance of Edmund I stirred the feeling of the townsfolk in a way that his uncle could not. Edmund I, despite his young age, appealed to the townsfolk to rise up against the treasonous Lancasters and throw wide the gates of Stafford to greet their new king. Whilst it is this appeal that caught the imagination of scholars of the time, it is far more likely that it was the arrival of Edward of Norwich, head of the House of York, by Edmund I’s side, most likely under duress, that convinced the garrison to give in and open the gates, thinking that even the Lancasters’ own family had deserted their cause. So it was, that the Mortimer army marched into Stafford all but unopposed and were able to begin their campaign for the throne in earnest.

    Edward_of_Norwich_Duke_of_York.jpg

    Edward of Norwich

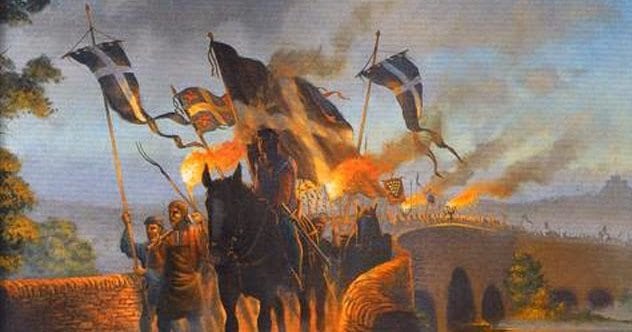
    In the north, meanwhile, the Percy army, which had emerged relatively unharmed from the Battle of Caer, set out from Caer on the 1st February to march north to attack the Lancaster holdings in the Duchy of Lancaster. As the Mortimers had already discovered, Thomas of Lancaster, now proclaimed as King Thomas I, was leading the Lancaster remnants into the Lancaster heartlands to rebuild and had crossed the Merswy[7] only 2 days previously. Henry Percy and his army followed suit just under a week later and headed for the walled port town of Liverpool, a crucial port for the Lancasters to resupply their forces in the Duchy. Liverpool had the interesting fate of remaining in England but now being on the Welsh border, with only the Merswy estuary separating the people of Liverpool from the forces of Welsh. This somewhat inconvenient situation, made all the worst by both the disputes between Welsh and English fishermen over fishing rights and also the influx of English men, women and children fleeing across the Merswy from the Welsh, had created a climate of fear in the town and the Percys might well have been greeted with open arms had news not reached the people of Liverpool that the Percys had helped the Welsh cause. So it was that the inhabitants of Liverpool, despite being more or less abandoned by the Lancaster army, who were retreating north to Wigan and then Lancaster itself, organised themselves into an improvised army to defend the town against Henry Percy and his army.

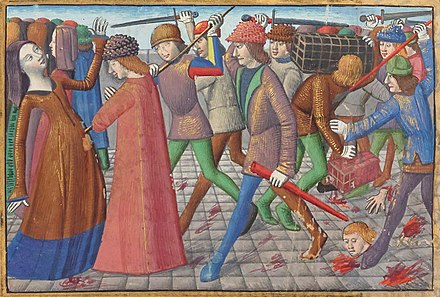
    As it turned out, however, Henry Percy would opt instead to split his army, with him personally leading one army onwards to Wigan in pursuit of the Thomas I and his army and his nephew Thomas Percy, Earl of Worcester, leading a smaller force to take Liverpool. This decision was not one of strategy, but rather one of arrogance, as Henry Percy could not, or would not, imagine an undefended town holding out against the Percy soldiers, which had been battle-hardened over the course of the Percys’ rising. Thus, Thomas Percy marched his small force westwards to, what he assumed would be, a simple victory whilst his uncle chased after the Lancasters. He reached Liverpool at the end of February and found a town whose hastily constructed earthworks, rather than being undefended, were manned by zealous townsfolk thirsting for revenge against the ones they saw as at least partially culpable for their current predicament. To make matters even worse for Thomas Percy and his men, the townsfolk, although poorly equipped and inexperienced, vastly outnumbered the Percy force and this served to embolden the townsfolk further. Thus, the townsfolk sallied forth from their earthworks to attack the Percy army. Fortunately for Thomas Percy and his soldiers, he had had the opportunity to put up some siege works and defences before the townsfolk attacked, but this was soon proved redundant as the townsfolk, armed with an assortment of weaponry, tools and improvised weapons, swarmed the minimal defences and the engaged in the Percy army in bitter hand-to-hand fighting. It swiftly became clear that Henry Percy’s somewhat rash decision to split his army had been ill-advised as Thomas Percy and his men were driven from the field by the savagery of the mob, with hundreds of left dead or dying behind them. The one silver lining for Thomas Percy was the receipt of news, once he and the remnant of his force had fled to a safe distance, that his uncle had marched into Wigan in the wake of the still retreating Lancaster army and taken the town, which had been, unlike Liverpool, undefended.

    hobby-bunker-1-over-72-medieval-peasant-army-xii-xv-century--42-figures-in-12-poses.jpg

    The people of Liverpool attacking the Percy army

    Thus the early months of 1407 were ones of success for the Mortimers and Percys as the Lancasters still reeled from defeat at Caer. That said, the Lancaster cause was not lost as they, despite the gains made by the Percys and the Mortimers, still held the majority of their heartlands and the capital in London. Away from territorial matters, the capture of Edward of Norwich was a blow to the Lancasters as were the rumours that reached them of his defection to join the Mortimers.

    [1] Wales
    [2] St. David’s
    [3] St. Asaph
    [4] Hereford
    [5] Chester
    [6] Cheshire
    [7] Mersey
    ___________________________
    So we come to TTL's equivalent of the War of the Roses at last, whilst the Welsh start to get on with their lives in their new principality. As usual, feel free to comment and, more importantly, enjoy!
    Gwyn
     
    Last edited:
    Chapter 11: The Siege and the Traitor
  • Chapter 11: The Siege and the Traitor
    The shambles that took place outside Liverpool in late February 1407 represented a blow to the Percys rebellion as they had lost a not inconsiderable amount of good soldiers at the hands of the angry mob but the army led by Henry Percy himself, enjoyed its own success, in capturing Wigan from the Lancasters, to help to soften the impact that the battle had on the power of the Percy cause. Shortly after capture of Wigan, news reached the Percys that the Thomas I and his remaining forces had departed Preston by sea to travel south, home of their power base, and rebuild their forces to challenge first the Mortimers, who had now taken up residence in Stafford, and the Percys. This news emboldened the already ambitious, or even egotistical, Henry Percy and he marched on to take Preston. They arrived at the town in March and entered the town unopposed, after Thomas I had taken much of the town’s garrison south with him. Shortly after the capture of the town, Thomas Percy and the survivors of the debacle at Liverpool joined Henry Percy there and the pair marched their army on Lancaster, the seat of the Lancasters power. Upon arrival the pair found the town’s castle to be well stocked and garrisoned. As such the Percys issued the castle constable, one William Rygmayden, with an ultimatum for the surrender of him and garrison, but unfortunately for the Percys, Rygmayden refused to surrender, having heard of the Liverpool debacle, and dug in behind Henry IV’s new gatehouse for the siege, forcing the Percys to set up camp outside.

    300px-Lancaster_Castle_Ashton_Memorial.JPG

    Lancaster Castle as it is now

    Whilst the Henry Percy was attempting to starve out the garrison of Lancaster Castle into submission the Lancaster faction launched their first offensives of the War of Three Kings, against the Percys. Richard of Conisburgh, 3rd Earl of Cambridge and brother of Edward of Norwich, who had been captured by the Mortimers in February, held several castles in Yorkshire, not least the one for which he was named, and from these islands of Lancaster support he launched a daring offensive against York, hoping to take advantage of the Percys’ campaigning in the Duchy of Lancaster. His audacity got off to a bad start, with the force available to him being somewhat smaller than he had hoped or even expected, and when he marched on York he found his way blocked, only a mile from York, by a larger army than his own under the command of the Percys’ close ally, Richard le Scrope, Archbishop of York. Richard of Conisburgh and his men, of which there were only 2000, lined up opposite the Percy army, which outnumbered them two to one, and dug in for a tough fight. Richard and his men fought long and hard against the Percys numerical superiority but were eventually overwhelmed by force of numbers. The battle finally ended in pyrrhic victory for the Percys as hundreds of their inexperienced soldiers, many of them drawn from the people of York, were cut down by Richard and his battle-hardened and trained garrison soldiers. To make matters even worse, Richard of Conisburgh was captured on the field of battle and became the second member of the House of York to be captured by the Lancasters’ enemies.

    220px-richard_plantagenet_3rd_duke_of_york.jpg

    Richard of Conisburgh

    This capture proved to allow the Percys to gain valuable new supporter in their campaign as Richard of Conisburgh, 3rd Earl of Cambridge and brother of Edward of Norwich, the captured head of the House of York, defected from the Lancasters to join the Percys after Thomas I refused to pay his ransom, in an event that had echoes of Sir Edmund Mortimer’s defection to join Glyndŵr. This defection appears strange on the surface, after all Richard was a member of a Plantagnet cadet dynasty, but there were many underlying causes that motivated his choice. Firstly, there were persistent rumours that Richard was in fact not a member of the Plantagnet dynasty and was instead a bastard son of Isabella of Castille and John Holland, 1st Duke of Exeter, these rumours had seemingly been confirmed by the lack of provision for him in his father’s will, back in 1402. This not only placed his position in the Plantagnet family in doubt but also tied him to a man executed for his role in the Epiphany Rising of 1400 against Henry IV. It is unsurprising, therefore, that the confusion surrounding his heritage and the lack of Percy attacks on the castles that he held in Yorkshire resulted in the Lancasters having not a little suspicion for him and his intentions. The result of this was that Thomas I repeated the mistake of his father and refused to pay the ransom that the Percys demanded for him. As such, Richard married Margaret Percy, daughter of Henry Percy, in York and joined the Percy cause under assurances of gaining his brother’s titles when the dust settled.


    Whilst le Scrope was welcoming Richard of Conisburgh into the Percy fold, his patron, Henry Percy, was still besieging Lancaster, a task that was proving difficult as the Lancasters shipped in supplies through the town’s well-defended port on the River Lune to bolster the town garrison. In August, after some six months of siege, Henry Percy, tired of waiting and feeling secure in his position in the north after the defection of Richard of Consiburgh to his cause and the distraction that the Mortimers were providing to the Lancasters in the south, decided that the time had come to try and assault take the town castle by force and thus all but secure the north under their control. The castle of Lancaster was a strong one, thanks in no small way to the efforts put in by Henry IV early in his reign after the town had been devastated by an invading Scottish army in 1389. The most notable of Henry IV’s improvements was a new gatehouse which, despite being incomplete, rivalled the keep as the strongest part of the castle. Against these considerable fortifications, Henry Percy arrayed an arsenal of siege engines that had been acquired or constructed over the course of his campaign, but had seen little significant use until now. The assault on the castle began with the Percys’ cannons and catapults bombarding the castle’s walls and the Percys began to move siege towers up ramps into position to storm the walls. The Lancaster garrison was starving after the months of siege, despite the supplies coming in my sea, and the Percy soldiers initially encountered limited resistance as they poured on to the walls around the gatehouse, but once they tried to move to storm Henry IV’s great gatehouse, they were repulsed by the garrison, who threw rocks and fired arrows from the ramparts. The Percy forces also moved to try and break down the gates with a battering ram but were that attack was also repulsed by the gatehouse garrison, who rained missiles of all kinds on the attackers through the murder holes. With their assault on the gatehouse defeated, the Percy forces drew back to regroup and settled back to starve the Lancaster garrison into submission.

    lancaster-castle1.jpg

    The gatehouse of Henry IV

    They had to wait some time for this, with the garrison’s morale boosted by the failure of the Percys’ assault on the castle and the supplies continuing to come in by sea. After three more months, however, reinforcement for the Percys arrived from across the Pennines, under the command of the newly defected Richard of Conisburgh. These reinforcements effectively ended the possibility of the siege being lifted by any action the garrison could take and it was also looking increasingly unlikely that the Lancasters would make any moves to lift the siege themselves, what with the Mortimers proving a more challenging opponent than expected in the south of England. As such, William Rygmayden finally agreed to surrender to the Percys in late October and, in handing over the keys to Lancaster castle, handed the Percys the keys to the north.
    _______________________
    The Percys have all but secured the north now, but if the Lancasters can mop up the Mortimers, things will get problematic for them. As usual please do comment and, more importantly, enjoy.
    Gwyn
     
    Last edited:
    Chapter 12: Warwick the Kingmaker?
  • Chapter 12: Warwick the Kingmaker?
    Whilst the Percys were establishing their control over the north with the Siege of Lancaster and ‘recruitment’ of Richard of Conisburgh, the Mortimers were having a rather more torrid time in the south. Thomas I arrived in Bristol in March, having fled Preston by sea in late February, and almost immediately began to gather soldiers to him in order to attack the Mortimers in Stafford. In the meantime, however, several naval raids were launched against the port towns of south Wales, the Lancasters having not agreed any actual peace deal with the Welsh, These raids were largely punitive and there was little hope, or indeed intention, of them resulting in a Lancaster invasion of Wales, they did result in some not inconsiderable damage to the port towns of Caerdydd[1] and Casnewydd[2] before the fledging Welsh navy, still made up principally of French and Breton privateers, managed to drive them off. This ultimately proved to be little more than a distraction for the Lancasters as nothing significant came of it and Thomas I and his men moved instead to fight the Mortimers at Stafford. In this campaign, Thomas I was accompanied by the recently ransomed Edward of Norwich and John Beaufort, 1st Earl of Somerset and half-brother of his father Henry IV, as well as his brother John. The force that they assembled was a large one, but smaller than that which Henry IV had taken with him to Cae[3], and numbered some 8,000 men, which were drawn largely from the west country. They marched north through the Hafren[4] valley, a rash choice given the river’s new role as the Welsh and English border claimed by Glyndŵr., though of course the Lancasters did not acknowledge this border. It can hardly be a surprise, therefore, that Thomas I and his army were harassed by Welsh guerrilla forces as they headed northwards and thus arrived outside Stafford having weary after the long march.

    d147b903e905847385be10b366b47723.jpg

    One of the Welsh guerillas in the Hafren Valley

    To make matters more inconvenient for Thomas I and the Lancasters, they arrived at Stafford to find that the Sir Edmund Mortimer had led his army to attack Lichfield, only a day or two previously. Whilst this did improve the possibility of the Lancasters retaking Stafford from the Mortimers, it also ended Thomas I’s hope of ending the Mortimer rebellion in one fell swoop. Nonetheless Thomas I laid siege to the Stafford Castle, which did serve to trap Edmund I, the Mortimer King, in Stafford, though only after the repulsion of a rash assault on the castle by the garrison. This assault cost the Lancasters some 400 men but saw them gain little, and whilst the number of casualties wasn’t hugely significant it was a blow to the morale of the besieging force and a boost for the defenders. Sir Edmund and his army, meanwhile, had seized Lichfield and had their celebrations cut short by news of the Lancaster siege of Stafford. As a result, Sir Edmund was promptly forced to turn his army around to try and relieve their trapped king from the grip of the Lancasters. The situation for the Mortimer cause was swiftly becoming desperate, not least because their army of 6,000 was tired and outnumbered by the Lancasters, though they did have the advantage of Sir Edmund being a far more experienced soldier than Thomas I, who was commanding his own army for the first time.

    So it was that the Battle of Stafford began with there being a very real possibility of the Mortimer cause being crushed just as it was getting started. On the one side was the Lancaster army which had hastily been reorganised to the face their oncoming enemy, abandoning their earthworks and defences that had been constructed around Stafford as part of their siege in the process, and on the other side was the Mortimer army which had been carefully arrayed against the Lancaster force by Sir Edmund. Some distance off, meanwhile, sat the army of Richard de Beauchamp, 13th Earl of Warwick and godson of Richard II, who had yet to decide where his loyalties lay in this fight. On the one hand, he had been loyal to Henry IV in the years of his reign but on the other he bore no loyalty to the rash young Thomas I and victor for the Mortimers represented an opportunity for him to advance the fortunes of his house. The battle got off to a good start for the Mortimers, thanks in no part to their better organisation, as the battle began under a cloud of arrows from both sides. The battle was a long and hard one, with the Lancaster numerical advantage telling, slowly but surely. The Lancaster right wing was doing especially well under the command of Beaufort, the seasoned campaigner and veteran of the Barbary Crusade and more, as they ravaged the Mortimer left flank. Indeed, the situation was steadily worsening for the Mortimers as Beaufort and his men began to threaten the Mortimer centre, which had until that point been holding off Thomas I and his Lancaster centre. Things looked bleak for the Mortimers as Beauchamp and his men continued to refuse to commit, but Sir Edmund himself fought bravely, surrounded by his retinue and slowly began to turn back Beaufort and his men.

    220025.jpg

    John Beaufort, Earl of Somerset

    At this point in the battle, Thomas I made a near fatal mistake as he, thinking the battle all but won, led a group of knights, including his brother John, in a charge at Sir Edmund himself, hoping perhaps to cut the head off the Mortimer snake and the end the rebellion in that battle. Things turned bad for Thomas I as the Mortimer soldiers fought hard against the charging knights and by the time they reached Sir Edmund himself Thomas and his knights were flagging. It was at this most opportune of all moments that Beauchamp sent his men charging into battle, smashing into the Lancaster centre, which had been abandoned by their commander. Beauchamp and his forces cut through the Lancaster centre and joined the resurgent the Mortimers and the battle finally ended after a long and bloody day of hand-to-hand fighting as the Lancasters rapidly retreated under the command of Beaufort and John of Lancaster, leaving Thomas I in the clutches of the Mortimers and Beauchamp after he had been cut off from the body of his forces by his rash charge. This was a big moment for the Mortimers as the Lancaster King fell in to their hands and Beauchamp, one of the most powerful of the English nobles as Earl of Warwick, joined their cause in the hope of avoiding the lurking menace of the Percys in the north.

    170px-Effigy_of_Richard_Beauchamp_5th_Earl_of_Warwick.jpg

    Richard de Beauchamp, Earl of Warwick

    The Battle of Stafford, devastating for both sides fighting, ended the campaigning in the south of England as the Lancasters, now commanded by the far more competent John, aided and abetted by the seasoned John and Thomas Beaufort, Earls of Somerset and Exeter respectively, retreated to lick their wounds. This changing in commanded might appear to be a major blow to the Lancaster cause but closer inspection suggests that it might well be a blessing in disguise as the increased influence of the Beauforts on matters and the elevation of John of Lancaster, a more able politician and general than his rash older brother, substantially improved the quality of the Lancaster command. For the Mortimers, on the other hand, much of their old army had been slaughtered on the field at Stafford, but the defection of Beauchamp to their cause, along with the capture of Thomas I, more than made up for this.

    [1] Cardiff
    [2] Newport
    [3] Chester
    [4] Severn
    __________________________
    As promised, here is another chapter, this time dealing with the south of England rather than the north. As usual, feel free to comment and, more importantly, enjoy.
    Gwyn
     
    Last edited:
    Chapter 13: Anything You Can Do
  • Chapter 13: Anything You Can Do
    Whilst the English took a break from butchering each other on muddy fields and sat back to lick their wounds and regroup, their bitter foes across the Channel began to descend into their own civil war as the dispute between the Houses of Valois-Orléans and Valois-Burgundy bubbled over whilst Charles VI was afflicted by his reoccurring bouts of madness. The heads of both houses were closely related to Charles VI, being princes of blood, and had long been rivals for control of the French Regency Council which ruled when Charles VI was incapacitated. At the head of the House of Valois-Orléans was Louis I, Duke of Orléans, the younger brother of Charles VI and alleged lover of Queen Isabeau, whilst the head of House Valois-Burgundy was John the Fearless, Duke of Burgundy and cousin of Charles VI.

    220px-John_the_Fearless_Louvre.JPG

    John the Fearless

    The causes of the dispute between the two Dukes, who, it should be noted, only held their duchies in the status of appanage as neither were first in line to the French throne, were strongly rooted in the problems of the reign of Charles VI and a clash between contrasting social and economic systems. The Orléanists, perhaps due to their stronger position in the French court since the death of Philip the Bold, Charles VI’s uncle, favoured the traditional French model of a strong feudal and religious system that had a focus on agriculture, whilst the Burgundians, thanks in part to their strong trade links to England through the Flemish wool trade, favoured something closer to the English system in which artisans, merchants and cities were of high importance. Whilst this dispute enhanced the rivalry between the two houses, in any other period of French history little would have come of it, but Charles VI’s madness and bouts of incapacitation from 1393 onwards had necessitated the creation of a regency council which Queen Isabeau presided over. Initially, Philip the Bold of Burgundy exercised great influence over the Queen but after Philip’s death in 1404 the influence of the Burgundian faction waned under his son John the Fearless, even as the influence of the Orléanists grew steadily until, despite the best efforts of John, Duke of Berry and another of Charles VI’s uncles, to mediate between the rivals, it exploded into violence.

    250px-Christine_de_Pisan_and_Queen_Isabeau_detail.jpg

    Queen Isabeau of France

    The Orléanist-Burgundian rivalry reached new heights in the early 1400s, even as French troops were being dispatched to aid the cause of Glyndŵr in Wales, when Louis of Orléans managed to have the Burgundians expelled from the regency council, this being partially responsible for the withdrawal of French soldiers in 1406, and had also moved to block the territorial expansion of the Burgundians by the purchase of the Duchy of Luxembourg in 1404. To add insult to injury, there were also rumours that Louis of Orléans had attempted to seduce Margaret of Bavaria, Duchess of Burgundy. All of these actions drove John the Fearless to desperation as Louis of Orléans, backed by not inconsiderable amounts of money from the French crown, seemed to be blocking him and his ambitions at every turn and he had only one answer, the assassination of his rival. Before he could take action, however, John had to move to build support for his cause among the French people and he did just that, launching a campaign of demagoguery that aimed to exploit the anger of the French taxpayers, always under pressure in peacetime, and that fact that much of what they paid went directly to pay for festivities at the royal court. His promises were certainly good, offering the French people a new ordinance, in the style of the Great Ordinance created by Étienne Marcel at the Estates-General of 1357, that would cut taxes, reduce the power of the King and put in place further reforms of the state administration. With these promises, John was able to convince the merchants, city folk and the universities to join his cause.


    Étienne Marcel

    Thinking himself secure in his position, John made his move on the 23rd November 1407, only a few days after Queen Isabeau had given birth to her twelfth child, a son named Philip. Louis of Orléans had journeyed to see Isabeau at her residence at Hôtel Barbette and whilst he was there received word from Thomas de Courteheuse that his presence was urgently required by Charles VI at Hôtel Saint-Paul. Louis promptly hurried out into the Rue Vieille du Temple where he was set upon by fifteen armed and masked thugs, led by Raoulet d’Anquetonville, a servant of John the Fearless. Louis’ small retinue of valets and guards proved no match for the thugs and were swiftly overwhelmed, with one killed trying to protect Louis. With his retinue driven off, Louis’ hand was cut off and his skull broken with an axe before being left for dead by the Burgundians. With his rival dead in a Paris street, John returned to Paris, where he had great support from the Paris townsfolk and the university, and seized power. In a bid to rub salt into the wounds of the Orléanists, John then had the theologian Jean Petit, an academic at the Sorbonne College of the University of Paris, write a eulogy of tyrannicide to commemorate the killing of Louis of Orléans.


    The assassination of Louis of Orléans

    Unfortunately, for John, however, the death of Louis did not end the Burgundian-Orléanist rivalry but rather intensified it as Charles, the eldest son and heir of Louis as Duke of Orléans, swore to continue his father’s campaign against the Burgundians and to avenge his death, especially after John escaped unpunished, and his marriage to Charles VI’s daughter Isabella secured the ties of the House of Valois-Orléanis to King. Despite Charles’ lust for vengeance the violence of the Burgundian-Orléanist rivalry subsidised as the new Duke’s young age made him unable to move effectively against the Burgundians for the time being, though it must be noted that much of the French nobility, most notably including Bernard VII, Count of Armagnac, supported the cause of the Charles and the Orléanists.
    __________________________
    We have shifted focus away from the British Isles for the first time to Glyndŵr's old ally, the French and the assassination of Louis of Orleans. As usual, please do comment and, more importantly, enjoy!
    Gwyn
     
    Last edited:
    Chapter 14: The Consolidation of Wales
  • Chapter 14: The Consolidation of Wales
    Having spent much of the first half of 1407 on a celebratory tour of the new Principality of Wales following his coronation at Tyddewi[1], Owain I moved in the later months to consolidate his hold over the territories that he had carved out for himself around the negotiating table in Tripartite Indenture two years previously. With much of that territory, barring the odd hostile castle in the Marches that remained in the hands of Lancaster supporters, already under his rule, or in some cases simply under the occupation of Owain I’s soldiers, his priority was assert his new royal authority and put in to practice his plans for the governance of Wales.

    Seal_of_Owain_Glyndwr.jpg

    The Great Seal of Glyndŵr from the Cyfraith Owain

    The first step here was to set out the structure of Cynulliad Cymraeg, or Welsh Parliament, which had only been held on a somewhat informal basis with its members made up of little more than Glyndŵr’s retinue and whoever happened to be on hand and this situation could go on no longer if the new Principality were to last. The structure of the Cynlliad was the subject of much debate, as no-one really knew what should be done with the newly acquired Marches. The basis of the structure of Owain I’s Cynlliad was the Cynlliad of the greatest of Hywell Dda which had been based around the 44 cantrefi of Wales and had summoned 6 members, 2 of which were clergy and 4 of which were laity, from each cantref. That much was simple enough, but for the territories that the 44 cantrefi of Hywel Dda did not cover, there was a not inconsiderable debate about how these regions should be represented at the Cynulliad. Perhaps unsurprisingly, given that these territories, being the former Welsh Marches of England, were largely populated by Englishmen, there were several in Owain I’s court who advocated depriving the regions of representation in the Cynulliad, at least in the short term. Others, however, including Owain I himself hoped to promote the consolidation of this greater Wales as a cohesive country by giving the people of the Marches representation within the Cynulliad that they might be part of the new Wales. There was also the problem of how exactly to divide the Marches into cantrefi, one proposal was to convert the old English ‘hundreds’ directly into cantrefi but the problem with this idea was that even a conservative estimation of the hundreds in the Marches came in at 42 which would give the English almost half of the members at the Cynulliad. This issue thus remained largely unresolved, as neither side of the argument was able to press their case satisfactorily and in the end it was decided to simple leave these territories out of the Cynulliad until they became more integrated into Owain I’s domains and until that time, the Welsh Marcher Lords would effectively serve as governors of the region.

    565px-Cantrefi.Medieval.Wales.jpg

    The cantrefi of Owain I's Cynulliad

    Having resolved to organise the Cynulliad along the lines of Hywel Dda’s cantrefi, Owain I then set out to draft the laws of his principality. Once more, he looked to Hywel Dda for his inspiration and took the Cyfraith Hywel, or Laws of Hywel, which were rumoured to be the ancient laws that had governed Wales for centuries and had been passed down through the years by the bards and jurists of Wales before, according to tradition, being codified by Hywel Dda in his reign. At the same time, Owain I also brought back the old currency of Hywel Dda, the ceiniog or penny, each of which was the weight of 32 wheat grains and was further divided into ceiniog cwyta, or curt penny, weighing 24 wheat grains, the dymey, or half penny, weighing 12 wheat grains, and the firdlyc, or farthing, weighing 6 grains. Owain I did not take the Cyfraith Hywel verbatim, not least because of the inconvenient stipulation of gravelkind inheritance which would have forced Owain I to divide his hard won kingdom among his sons, thus making Wales even more vulnerable to reconquest that it already was.

    He did, however, take on much of laws that governed the royal court, which even went so far as to rank the members of the royal household by order of importance from the King/Prince at the top to the laundress at the bottom, as well the laws of the country which ranged from the laws of the land to laws concerning the naturalisation of the inhabitants of Wales. The criminal law of the Cyfraith Hywel were also rolled out across Wales, with courts established in each cantrefi and in the major towns of the Marches. Under these laws, murder was treated as offence against the family of victim, rather than the state or society, and the punishment was payment of blood money, known as galanas and calculated by the status and position of the victim, by the murderer and his/her extended family to the family of the deceased and other assaults, including rape, were similarly punishable with a fine which even went so far as to place a specific compensation value on each limb. The crime of theft, however, was punishable by imprisonment, at least for the first two times a thief was caught and after that the punishment was the loss of a hand. The Cyfraith Hywel meant much further than just this, however, and covered almost all aspects of Welsh society, thus allowing Owain I to establish his government and administration through the Cyfraith Owain in earnest during the first months of 1408.


    A medieval Welsh judge

    [1] St. David’s
    __________________________
    This originally started as a bonus chapter about Glyndwr's Wales but then it got a too long to be a bonus so I went and made it a full chapter instead. As usual, please do comment and, more importantly, enjoy!
    Gwyn
     
    Last edited:
    Chapter 15: Now is the Winter of Our Discontent
  • Chapter 15: Now is the Winter of Our Discontent
    Much of the summer of 1408 passed by as a period of calm beneath the English sun, but that did not mean that nothing happened. Each faction took the opportunity to try and rebuild and reorganise their forces for the next stage of war, the Lancasters in the south-east and the West Country were undoubtedly under the most pressure of all the factions, having been pushed back and forced to endure a string of defeats under the leadership of first Henry IV and then Thomas I which had resulted in the north being all but lost and the capture of Thomas I himself by the Mortimers. Thus, as the campaign season began in the late spring of 1408, they were hoping that the tripartite leadership of John of Bedford, Henry IV’s third son, and John and Thomas Beaufort, the Earls of Somerset and Exeter, who were serving as counsellors to their nephew, would guide the Lancaster cause back from the brink. The Percys, meanwhile, were going evermore confident in their position, even to the point of arrogance, as the north fell ever increasingly under their dominion, although Liverpool frustratingly continued to stand strong with the support of the Stanleys, vehement Lancaster supporters particularly after the seizure of their lands in Swydd Caer by Glyndŵr, something which they blamed both the Percys and the Mortimers for, from their new estates on the Isle of Man. Last but not least, the Mortimers in the Midlands had enjoyed a fruitful time over the summer as they expanded their power base in the Midlands rapidly and, more importantly, peacefully as the great influence of Warwick in the region allowed the acquisition of first Worcester, whose castle formed part of the Beauchamp estates, and then Kidderminster and the towns of Bromsgrove and Pershore in quick succession. In addition, both the Lancasters and Percys had spent the summer engaged in some minor attacks, which were manifested as naval attacks from the Isle of Man for the Lancasters and forays southwards into the Midlands from Yorkshire.


    The arms of John Stanley of the Isle of Man

    This persistence on the part of the Percys was the key driver in John of Bedford’s decision to march his army north in a bid to retake the city of York, which had been held by the Percys since 1406 and served as the capital of their fledging kingdom in the north. As such, John of Bedford, accompanied by Thomas FitzAlan, 12th Earl of Arundel, marched northwards at the head of a significant Lancaster army in early August, whilst John and Thomas Beaufort, the Earls of Somerset and Exeter who now acted as counsellors to their nephew, remained in the south. Whilst John and his army marched northwards, the Mortimers, sensing an opportunity to march on London itself, assembled their forces and headed south across the river Avon and into the idyllic countryside of the Cotswold. The region, famous for its wool production, was rapidly overrun by the Mortimers and Sir Edmund and his men reached Cutteslowe, a heath a short way outside Oxford, in late August after a some minor clashes near Woodstock. At Cutteslowe, the Mortimer army encountered a significant Lancaster army, under the command of Richard de Vere, 11th Earl of Oxford, and the two armies drew up to face each other in battle lines on the heath. The two armies were unevenly matched, with the Mortimers holding the numerical advantage, and the battle began in earnest with the Mortimer army charging across the field and smashing into de Vere’s force, which was quickly overwhelmed by the Mortimers and driven from the field, with de Vere being among the dead left scattered across the heath.


    The arms of Richard de Vere, Earl of Oxford

    With de Vere killed, and much of the Oxford garrison with him, the Sir Edmund and his men advanced on Oxford itself and found the city gates wide open to welcome them, having been opened by the people of the university. With the city in Mortimer hands, Edmund I, the Mortimer King, moved to imitate the methods of John the Fearless, Duke of Burgundy, and build his support through demagoguery. With that in mind, he set out a series of promises for his reign, which included a reduction in taxes, the curbing of the powers of the monarch and, perhaps most importantly, the reaffirmation of Magna Carta, which still held a prominent position in the English political consciousness. Much like John the Fearless’ promises had done in France, the promises of Edmund I were designed to appeal to the people of the universities of England and the middle classes and so they did, with many of people of Oxford, both the city and the university, joining the Mortimer cause. Boosted by this support, the Mortimers moved on from Oxford to march down the Thames Valley on London with all the force that they could muster. By this time, however, John of Bedford had, unsurprisingly, heard of the Mortimers seizure of Oxford and turned his men back, having only fought the Percy forces once, at Lincoln where a small force that had strayed southwards was routed.

    th

    Oxford Castle

    The Mortimers reached London first and had hoped to march into London unopposed, but found the city walls manned by Lancaster supporters led by John Talbot, Earl of Shrewsbury. As such, the Mortimer army set up camp at Runnymede in order to besiege the city. A few weeks into the siege, John of Bedford and his army arrived at Runnymede to fight the Mortimers, having been harassed and harangued by soldiers loyal to the Percys on their journey south, and arrayed themselves in battle lines opposite the Mortimer camp. The resulting Battle of Runnymede was fought on the 2nd October 1408 and was long and bloody, with hundreds of soldiers from both sides dying on the once beautiful meadows of the area. The battle was eventually won when Sir Edmund Mortimer, himself, led his knights in a charge against the Lancaster right wing, commanded by Thomas FitzAlan, Earl of Arundel. Arundel’s wing was smashed by the charge and, once the Mortimer infantry joined the Lancaster centre in fierce hand-to-hand fighting on the banks of the Thames, the Lancaster force was broken and John of Bedford fled the field. After the surrender of London several weeks later and the entry of the Mortimers into the city, John of Bedford was forced to flee England itself and sailed to France where he was taken in by the Orléanists, many of whom had favoured peace with England in the first place. As a result, the Beaufort brothers in the West Country promptly raised their standards in rebellion against the Mortimers and prepared to move on the Mortimer holdings in the western Midlands.

    ec77758a981ad0d377ea9bd6092fe2e5.jpg

    John of Bedford

    The seizure of London by the Mortimers in early November was a massive blow to the Lancasters as Edmund I was crowned King of England in Westminister Abbey on the 16th November 1408 with only the Beauforts standing strong in opposition in the West Country in the hope that John would return from France with Orléanist soldiers to back their cause. The Percys, meanwhile, were greatly enjoying the defeat of John of Bedford in the south and moved to take Liverpool at last. They besieged the city in early November and the city fell a month later to mark the low point of the winter of discontent for the Lancasters who were now on the verge of defeat.
    _____________________
    The War of Three Kings is more or less over for the Lancasters now, but they'll be a continuing thorn in the Mortimer side for a long time to come. As usual, please do comment and, more importantly, enjoy!
     
    Last edited:
    Chapter 16: The New Britain
  • Chapter 16: The New Britain
    John of Bedford’s flight to France all but ended any serious threat that the Lancasters posed to the allies of the Tripartite Indenture, especially as the Lancaster King, Thomas I, had been imprisoned in the Tower of London by the Mortimers after they had seized London in late 1408. The Beaufort brothers, along with Humphrey of Gloucester, their nephew and the last son of Henry IV still in England, had raised their flags in rebellion in the West Country, but the 8 years of continuous war that had gripped England had depleted their forces to such an extent that their rebellion was hardly a major threat to Edmund I’s new throne, albeit it remained a threat that needed to be quelled before it could gain momentum. In addition, the welcoming of John of Bedford by the Orléanists and tried the Lancaster-Mortimer war in England to the Orléanist-Burgundian dispute in France. The Mortimer interest in supporting the Burgundians as and if they could went beyond the ties established by the support offered to John of Bedford by the Orléanists, since the new Mortimer kingdom would have to rely on the wool trade for its wealth, at least in the short term, and the Burgundians were the holders of Flanders, the centre of the continental wool trade. These matters were occupying the thoughts of the Sir Edmund and Richard de Beauchamp, Earl of Warwick, who were powers behind Edmund I’s throne, as 1409 began whilst Mortimer forces in the rest of England (used here to for the area of pre-1400 England assigned to the Mortimers in the Tripartite Indenture of 1405) moved to bring the south-east fully under Mortimer control.

    In the lands already controlled by the Mortimers, meanwhile, Edmund I began to put his promises into action and lowered some, but not all, taxes as well as making a great show of reaffirming the Magna Carta in a public ceremony full of pomp and circumstance that included Edmund I swearing an oath in front of the Bishops of London, Winchester and Norwich, as well as a large crowd of the people of London. The decision was also taken to commission a new coat of arms for the new king. In this process, there was a lengthy debate on whether or not the Mortimer King would abandon the English claim to the French and end the expensive, in both men and money, campaigns on the continent. Sir Edmund felt that the cause should be abandoned as France seemed to serve only as a killing field for the flower of English youth and that it would be especially pointless to continue to pursue the French throne now that even English Gascony had been taken by the French. On the other hand, Warwick sought to unite the Mortimer England with a French adventure to stir nationalism behind the Mortimer King and saw the Burgundian-Orléanist conflict stirring in France as an excellent opportunity for just such an adventure. The debate threatened to boil over into something of a feud between the Sir Edmund and Warwick before the argument was eventually decided that abandoning the claim to the French throne would make the Mortimer king appear weak and might well lose the Mortimer’s important support. As such it was eventually decided to mimic the arms of Richard II and create an arms quarterly, 1st and 4th, France ancien, 2nd and 3rd England, impaling, Barry of six, Or and Azure, on a chief two pales, the corners gyronny, overall an escutcheon argent. These arms represented both the continuing claim to the French throne by the Mortimer and the House of Mortimer’s new throne.

    Arms of Edmund I Alternate.png

    The Royal Arms of Edmund I Mortimer

    The Percys, meanwhile, having at last taken Liverpool in the last weeks of 1408 and received the surrender of Pontefract castle in January 1409, turned their attentions south of the Humber for the first time to seize control of the territories assigned to them in the Tripartite Indenture. In the process, they took advantage of the Mortimers’ distraction with the Beauforts to sweep southwards and move into Lincolnshire and march on Lincoln, a city rich in both money and connections to the English thrones over the years. With the draining of Lancaster supporters from the north of England to both the Stanley-held Isle of Man and France, as they fled the wrath of the Percys and the Mortimers, the Percys initially encountered little resistance to their march southwards. They’re arrival at Lincoln was greeted by crowds lining the streets, crowds who hoped that the end of the war and a new king in the north would bring back the days of prosperity to Lincoln. As they moved on to Nottingham, however, they were greeted by popular resistance from the people of the region, who did not want to be ruled over by a northern king. The resistance was surprisingly strong given its non-military nature and was led by the Mayor of Nottingham, John de Alastre, but was soon defeated by the battle-hardened army of the Percys. The defeat of the Mayor and his army was immediately followed by the surrender of Nottingham and its castle to the Percys as their domain spread steadily southwards into the Midlands. Despite their best efforts, however, the Midlands between Warwick and Nottingham remained as something of a no man’s land as neither the Mortimers nor the Percys had been able to subdue the region as they each struggled with their own problems in the form of the Beauforts and Stanleys respectively.

    92b20c00a197614aa89659af400251a0.jpg

    Nottingham Castle

    As such, 1409 ended with the Mortimers having cemented their hold over the English throne, at least ceremonially, and the Percys having extended their domain ever southwards as both factions sought to establish their control over the lands that they had mutually been promised in the Tripartite Indenture of 1405. The Lancasters, meanwhile, had all but been removed from the fight for the English throne, although they would remain as trouble for both the Percys and the Mortimers as their loyal supporters remained in force in some areas of the country.
    ______________________
    Sorry for the delay, I'm a bit busy recently! Anyway, this new chapter is a development of the Mortimer and Percy realms, but especially the Mortimers. As always, please do comment and, more importantly, enjoy it!
    Gwyn
     
    Last edited:
    Chapter 17: Time Waits For No Man
  • Chapter 17: Time Waits For No Man
    The decade from 1410 to 1420 was one that help to shape Europe for decades, if not centuries afterwards. It began with England and Wales being in their worst state since the Anarchy in the days of Stephen and Matilda, as the Mortimers and Percys steadily carved off territories off the remaining Lancaster holdings and the Welsh cemented their control on the lands from the Celtic Sea to the Afon Hafren[1], by force in many cases. This ongoing fighting, that continued well into the decade, was steadily reshaping British society as the population of the island was whittled down in battle after battle between the various factions. The last of the core Lancaster supporters in the south of England, the Beauforts, were defeated by the Mortimers in 1412 after holding out in the West Country, and especially Bristol, for an impressive amount of time before finally succumbing when Sir Edmund Mortimer took Bristol Castle. This was not the end of the Lancaster resistance to the Mortimer throne, however, as flashes of rebellion sporadically appeared in the West Country and, worst of all, in Cornwall in 1418. As for the Percys and the very ambitious Henry Percy, by 1414 they had established full control over the north and as far south as Leicester. His strength had been weakened, however, by an ill-fated expedition against the Pale which was a clear demonstration of how Henry’s ambitions were now going beyond simply the north, but its dramatic failure at the Battle of Dundalk forced Henry to refocus his attention back to establishing the structure of his new Northumbrian kingdom. Of the three of the signatories to the Tripartite Indenture, Owain of Wales enjoyed the most peaceful decade as he, unlike Henry Percy, had all but completed the establishment of his vision for an independent Wales over the previous years and now the Cyunlliad met twice annually, once in Machynlleth in the north and once in Caerdydd[2] in the south, whilst Owain I held court in his new capital of Aberystwyth. The only source of trouble for Owain was the persistent problem of the substantial number of Englishmen in the Marches who staged minor uprisings from time to time throughout the decade.

    view_of_aberystwyth_castle_about_1300_ad_large.jpg

    Aberystwyth Castle, seat of Owain's court

    Perhaps the most wide reaching, at least in the British Isles, of the events of the 1410s was the Cornish uprising that began in 1418 and, despite only lasting a year and a half, devastated a West Country already ravaged by the Beaufort Rising against the Mortimers and almost led to Owain and the Mortimers coming to blows. The Courtenay family, strong supporters of the Lancasters and former allies of the Beauforts in their rebellion, held territories in Devon and Cornwall and, fearing retribution from the Mortimers after their involvement in the Beaufort Rising, decided to raise their own flag in rebellion against the Mortimer throne. They quickly dispatched messengers to John of Bedford, who remained in France, and Humphrey of Gloucester, who had been in hiding in Devon since the fall of Bristol. John of Bedford did not return to the country, despairing of the Lancasters’ chances of regaining their throne now that the Beaufort brothers were incarcerated in the Tower of London, along with the Lancaster King Thomas I, but Humphrey of Lancaster resurfaced and joined the Courtenays in their rising. At this point a curious occurrence took place as the people of Cornwall, who had long resented the rule of London, saw an opportunity to gain their independence and joined the Courtenay rebellion in droves. The result of this was that a rising that had begun as just another dynastic conflict quickly became something akin to Glyndŵr’s War in Wales, with Humphrey of Lancasterr at its head, at least initially. Humphrey moved quickly and secured swathes of Cornwall west of the Tamar River and things looked promising for the rebellion but Humphrey was plagued by the same rashness that had led to his brother Thomas’ capture at Stafford and this led to Humphrey leading an audacious attack across the Tamar and against Exeter, a town that still housed many supporters of both the Lancaster claim to the throne and the Beauforts, Thomas Beaufort having been Earl of Exeter until his capture. Whilst this choice made some level of sense, the town was some distance from the core of Cornish support and subsequently Humphrey and his army were defeated by Sir Edmund near the coastal town of Sidmouth, only a short way from Exeter, and Humphrey himself was killed, leaving John as the last free son of Henry IV.


    Humphrey of Lancaster

    The death of Humphrey and the defeat at the Battle of Sidmouth did not end the Cornish Rebellion, however, as many of Humphrey’s army managed to flee the field of battle and return home to Cornwall. The Mortimers, meanwhile, assumed that the death of Humphrey would end the rebellion and Sir Edmund marched his army east once more. This gave the Cornish rebels, still dominated by the Courtenay family, a vital window of opportunity to rebuild and select a new leader. Much to the Courtenays’ dismay, the new leader chosen was one of the survivors of the Battle of Sidmouth, one Michael Tyrell[3] who had led many of the Cornish rebels to safety after Humphrey’s death. Tyrell promptly dispatched messengers to Prince Owain in Wales, appealing to the shared Celtic heritage of the Welsh and hoping that Owain’s experience in rebelling against the English would help the Cornish gain their own independence. Upon receipt of Tyrell’s message, Owain had a difficult decision to make, by the terms of the Tripartite Indenture he was an ally of the Mortimers and all three signatories had agreed to respect the territories assigned to each in the agreement, on the other hand helping the Cornish gain their freedom would simultaneously weaken the English further and strengthen the new Welsh state. Unable to reach a consensus at an emergency Cyunlliad called at Caerdydd in early 1419, Owain opted to play it safe and sent Tyrell vague promises of support and a token shipload of weaponry to help the rebellion.

    The promises of support from Owain, despite their vagueness, invigorated Tyrell and the Cornish rebels, prompting them to seize control of swathes of Cornwall once more before crossing the Tamar, this time in force, and besieged Exeter. This dramatic revival of the Cornish rebellion, forced the Sir Edmund to lead another army westwards, this time to end the Cornish rising once and for all. News of the approaching Mortimer army prompted Tyrell to send a second messenger to Owain, this time the message enclosed was one of desperation that practically begged Owain to send an army to help the Cornish rising. Once again, Owain was faced with a difficult decision, but this time the risk of involvement had dramatically increased. If he dispatched an army to help the Cornish and the Mortimers were defeated and Cornwall liberated then Wales would gain a valuable ally, but if the Cornish were defeated, as seemed to be the most likely possibility, then Owain would have made a very dangerous enemy, one that they may well not have been able to defeat, and have broken the terms of the Tripartite Indenture which would have significantly weakened the odds of Wales’ long term survival.

    [1] River Severn
    [2] Cardiff
    [3] Not an OTL figure
    ___________________________
    As promised, a time skip has occurred and now we have reached 1419 and the Cornish Rebellion which has presented Owain with a fateful decision to make. As usual, please do comment, and most importantly, enjoy.
    Gwyn
     
    Last edited:
    Chapter 18: Revolts and Dynasties
  • Chapter 18: Revolts and Dynasties
    For many modern historians, the fate of the Cornish Rebellion of 1418-1420 appears obvious, but such is the benefit of hindsight. It might appear clear today that the Cornish simply lacked the military capacity to secure their independence at that time, especially so after the death of Humphrey of Lancaster and many Cornish rebels at the Battle of Sidmouth, but as the events unfolded in late 1419 the threat to the Mortimers from the Cornish, and the possible Welsh intervention, seemed to be all too real. It was for that reason that the army Sir Edmund marched westwards in late 1419 was one of great strength, so much so that they outnumbered the Cornish two to one when they met in battle outside Exeter. Despite their numerical superiority, Sir Edmund was initially unwilling to send his army into battle, his mind plagued perhaps by the rumours that Owain and the Welsh would cross the Hafren[1] in support of the rebels, thus giving Tyrell and the Cornish the opportunity to reorganise and draw up in battle lines for a last stand against Sir Edmund, all the while hoping against hoping that the Owain’s gold and white banner would appear on the horizon. No such banners appeared, however, and Sir Edmund ordered his right and left wings to crush the Cornish before the Welsh could arrive. This indecision, the Mortimer centre having been held back to defend against the sudden arrival of any Welsh army, almost proved fatal to the Mortimer army as the Cornish rebels were initially able to repel the Mortimer attack, albeit at a not inconsiderable cost to their numbers, even harrying them as they retreated. Faced with an embarrassing defeat, and by now confident that the by now aged Owain wouldn’t be riding to the aid of the Cornish on this day, or indeed any future one, Sir Edmund threw all his remaining forces into the field. This quickly overwhelmed the Cornish rebels, routing them and setting them to flight. The slaughter at Exeter ended the Cornish Rebellion in January 1420, as the Battle of Sidmouth should have done two years previously, and at the same time ended popular resistance to the Mortimers in their new domain.

    Cornish-Rebellion-1497-Featured.jpg

    The Cornish rebels marching to Exeter

    Having now covered the violence and fighting of the 1410s, the goings on in the corridors of power in the Triple Kingdoms of England and Wales can now be looked at in earnest. First, the Kingdom of Northumbria. As the newest of the three kingdoms, Northumbria had little immediate history to model its structure and systems on and had become a kingdom almost by accident. It is true that the Tripartite Indenture had promised Henry Percy a kingdom in the north, but the chances of that happening, had seemed remote, to say the least, in 1405 and it was arguably only Henry Percy’s sheer willpower and immense ambition that had driven the armies of the Percys to dominion in the north. By 1414, however, Henry Percy the Elder’s strength was failing and the ill-fated invasion of the Pale proved to be a last hurrah for the old Earl. Determined to establish, or re-establish depending on how one looks at it, the Kingdom of Northumbria before his death, Henry Percy travelled to York in early 1415 to be crowned King of Northumbria by Archbishop Richard le Scrope in York Cathedral. Gruffyd ap Owain Glyndŵr, Iarll Caer[2] and heir to the Welsh throne, and Edmund I of Mortimer England both travelled north to the coronation, with Owain too old to make the journey and Sir Edmund too busy fighting the Beauforts in the West Country, and Henry Percy the Elder was crowned Henry of House Percy, King of Northumbria, on the 2nd March 1415. Only a few weeks later, however, Henry I died in his family home in Northumberland, leaving his grandson Henry Percy the Younger to be crowned as King Henry II of Northumbria in May of the same year. Henry II was far more pro-active in establishing the internal system and government of Northumbria than his grandfather had ever been and proceeded to take steps to turn the north into a functioning state. His first step was to call a parliament of the nobles of the north in York, the capital of the new kingdom, and set out the programme for his rule. This was yet another example of how the radical partitioning of the Kingdom of England and the need for the new monarchs to maintain popular support for their reigns led to a flourishing of what modern historians might call liberal policies in the new states as the monarchs made several concessions to their nobility over the course of their reigns.

    250px-York.mstr..jpg

    York Cathedral

    Edmund I experienced somewhat different problems to his northern counterpart as Sir Edmund, and to a lesser extent Richard of Warwick, remained as the powers behind his throne even though he had long since achieved his majority. Admittedly, both were away campaigning against first the Beauforts and then the Cornish for much of the decade, which left Edmund I behind in London to more or less reign as he pleased, but nonetheless he still resented the influence that Sir Edmund and Warwick held over the court. In the meantime, the repeated rebellions in the west of the Mortimer kingdom had taken their toll on the region and would leave Cornwall as a troublesome territory for the Mortimer kings for sometime to come. The result of this was that the new Mortimer regime was forced to spend a not insignificant portion of the kingdom’s tax revenue to rebuilding the war-ravaged territories and it was this burden that would hold back the Mortimers from any efforts to reunite the Kingdom of England. The most pressing issue, however, was that of Warwickshire and Norfolk. Thanks to the alliance that the Mortimers had forged with Richard of Warwick, much of Warwickshire had formed part of the Mortimer domain even before they had taken London, as for Norfolk, this territory was separated from the other domains assigned to the Percys in the Tripartite Indenture by the Wash and this had allowed the Mortimers to seize control of the territory before the Percys could move south. These territories were now under Mortimer rule in all but name, and yet the Percys still hoped to add the lands to their domains to fulfil the terms of the of the Tripartite Indenture. Unfortunately for both parties, however, the issue would continue to rumble on for several years as the both sides held their ground. Another matter occupying the minds of the Mortimers was which of the suitors of Princess Eleanor de Mortimer, the sister of Edmund I and now one of the most eligible princesses in Europe, would be most advantageous dynastically. Among these suitors included King Henry II of Northumbria and Philip of Burgundy.

    Last but not least came the Principality of Wales, the systems of government and laws of the new territory had been put in place and cemented by Prince Owain over the course of his reign. As the years wore on his sons, especially Gruffyd, took on greater responsibility in the principality. Gruffyd had managed to boost his power in the court with the marriage of his son Owain to Princess Michelle of Valois, a marriage designed to cement the Franco-Welsh alliance. This provoked something of a rivalry between the sons as they jostled for position in the royal court in Aberystwyth. They were far from the only ones, however, as many of the rebellion old guard were also trying to manoeuvre themselves into place for positions of power when the new prince ascended to the throne. Owain continued to try and maintain control over his nobles but by 1420 his health was well and truly failing as he neared the age of 65. As such he was forced retreat from the pomp of court life and in his dying days anointed Gruffyd, who was hardly young himself at around 45, as heir to the Welsh throne and regent until his father’s death. As rumours of Owain’s impending death began to circulate, the people of Wales draped the streets in black cloth and dressed in mourning clothes and the nobles of Wales flocked to Sycharth to be there at the death of the man who had brought Wales to life. The founding father of the Welsh nation, the man seen by many in Wales as the living embodiment of Yr Ddraig Aur Cymru and the greatest of all the Meibion Darogan[3] breathed his last on the 11th March 1420 in a small room in his family home of Sycharth surrounded by his wife Margaret, his children, his lieutenants, loyal to the end, and even his son-in-law Sir Edmund Mortimer as Archbishop Gruffyd Yonge gave the dying warrior his last rights.

    _80415621_e7c26021-1346-4f89-bb0f-33717f8c8f60.jpg

    Owain Glyndŵr in his heyday

    [1] River Severn
    [2] Earl of Chester
    [3] Sons of Destiny
    _________________________
    And so ends the story of Owain Glyndŵr, Prince of Wales. Next time around, the update will look at Europe beyond Britain and France for the first time. As usual please do comment and, most importantly, enjoy.
    Gwyn
     
    Last edited:
    Chapter 19: Widening the Lens
  • Chapter 19: Widening the Lens
    Whilst England and Wales were being irrevocably changed in less than two decades, continental Europe was also experienced turmoil between 1400 and 1420, especially in France, the Teutonic Order and the shattered remnants of the Ottoman Empire left by Timur’s 1402 invasion. In France, there had been a short period of calm after the murder of Louis of Orléans and John the Fearless’ seizure of Paris, but after Charles of Orléans attained his majority and was betrothed to Blanche of Brittany, the sister of Duke John V, conflict began again. In the Teutonic Order, tensions with Poland and Lithuania, whose monarchs had recently converted to Christianity, reached new heights following the death of Konrad von Jungingen and his replacement by his younger brother, Ulrich, who adopted a far more aggressive stance against both the Polish and Lithuanians and busily prepared for a pre-emptive strike to try and end the war before it had even started. In the Ottoman Empire, the long and brutal Interregnum Wars had gripped the empire in the aftermath of the death of Sultan Bayezid I in 1403 as his sons fought it out for control of the empire.

    The events in Britain had the greatest effect on France, the Baltics and Turkey being too far away for the deposition of the Lancasters to have a direct effect. In France, however, the impact was two-fold, firstly the removal of France’s greatest enemy from the balance of power in Europe, ironically, gave them the freedom to go about killing each other without fear of invasion by another power. Secondly, the arrival of John of Lancaster in France gave the Orléanists an experienced and battle-hardened commander to lead their armies against the Burgundians. As such, following the betrothal of Charles and Blanche war began again in 1410 as John of Lancaster led an Orléanist army, primarily made up of Breton soldiers, many of whom were veterans of Glyndŵr’s War, against Burgundian-held Paris. John of Lancaster and Charles ravaged the environs of Paris and advanced into the suburbs forcing the signing of a treaty in the Saint-Marcel suburb in November 1410 that temporarily ended the fighting. Within a year, however, John the Fearless had returned to Paris with an army of some 60,000 men and seized the city again, but a force of Bretons remained entrenched in western Paris, leading to bloody street fighting as the Burgundians drove the Bretons out of their positions and chased them across the Seine to Poissy, the opposing Orléanist and Burgundian armies prepared to engage once more, only for a royal army to arrive and broker another temporary peace between the two factions. This peace, however, didn’t last any longer than the last one had, as the Cabochien Revolt gripped Paris in 1413 with the support of John the Fearless and the Burgundians. Despite the initial success for the Burgundians, the attempt to exploit the Revolt ended in failure when the people of Paris, terrified by the savagey of the Cabochiens, appealed to the Orléanists for aid, leading to John of Lancaster and Charles retaking the city in early 1414. At this point, the Burgundians appealed to the Mortimers, who already had strong ties to the Burgundians due to the reliance of both on the English wool trade, for aid against the Orléanists but the Mortimers were still engaged in dealing with the Beaufort Uprising in the West Country and were unable to provide any meaningful aid at the time. As such, peace returned to France, if only in the short-term. Perhaps the biggest factor in this peace was the declining Burgundian finances which heavily damaged their ability to continue to fight the war against the Orléanists. As the Burgundians were steadily forced out of French politics by the Orléanists, who exploited the period of peace to their advantage as fully as possible, John the Fearless began to shift is ambitions away from control of the French royal court to the establishment of the Burgundian fiefs as a state in its own right, an ambition that would be inherited with great eagerness by his heir, Philip, and would consume eastern France for the decades that followed.

    440px-Vigiles_du_roi_Charles_VII_56.jpg

    Slaughter on the streets of Paris

    In the Baltics, meanwhile, the tensions between the Teutonic Knights, who enjoyed the support of the Holy Roman Empire, and the Polish and the Lithuanians had reached boiling point and, after the beginning of an uprising in Teutonic-held Samogitia, Hochmeister Ulrich von Jungingen launched a pre-emptive strike against the Polish, hoping to defeat the Polish and the Lithuanians separately, and invaded Greater Poland, initially achieving some level of success before they were turned back by the Polish at Bromberg/Bydgoszcz. Neither side was ready for full-scale war, however, and Wenceslaus, King of the Romans, brokered a truce in October 1409 that was due to expire in June 1410. Unsurprisingly, both sides used this time to try and gather allies, with the Teutonic Knights receiving support from both Wenceaslaus, who declared Samogitia to be rightfully Teuton, and Sigismund of Hungary, who had interests in Polish-held Moldavia and made efforts to drive a wedge into the Polish-Lithuanian alliance by offering Grand Duke Vytautas of Lithuania a king’s crown, his acceptance of which would have violated the Ostrów Agreement, Vytautas did not accept the crown, however, and instead moved with Władysław II Jagiełło of Poland to invade the Teutonic State. As they had already secured a truce with the Livonian Order, the target of the Polish-Lithuanian alliance was Prussia and the especially the Teutonic capital of Marienberg.

    Ulrich_von_Jungingen.jpg

    Hochmeister Ulrich von Jungingen

    In a shrewd strategic move, the two leaders agreed to unite their army in one single force and march on Marienberg with a massive force to crush anything the Teutons could throw at them. This decision gave the Polish-Lithuanian force the advantage from the outset as the Teutons had been expecting two separate simultaneous invasions rather than a single massive army and Jungingen had based his army at Schwetz. As such, when Władysław II Jagiełło led his army into Prussia, heading for the ford at Kauernick, Jungingen was forced to rush his army eastwards to defend Kauernick, after having to fend off a diversionary attack by the Polish. Jungingen and his men arrived only a day before the Polish-Lithuanian army and prepared as best as they could to defend the fords and battle began the following day as Władysław II Jagiełło sort to smash his way through the Teutonic defence line. The resulting Battle of Kauernick was momentous and one of the largest battles in medieval Europe and also one of the bloodiest as the battle descended into bloody hand-to-hand fighting in the fords of the Drewenz River themselves. The battle was long and costly for both sides, but the Lithuanian wing of the united army suffered the most and were soon forced to retreat in disarray, allowing the remaining Teutonic Knights to smash into the side of Władysław II Jagiełło’s centre and, after further slaughter in the river water, drive the Polish from the field. The Battle of Kauernick thus ended in the bloodiest of pyrrhic victories for the Teutonic Knights. Both armies had suffered huge casualties, with the total deaths far outstripping even the slaughter at the Battle of Caer[1] in 1407, and all three parties were forced to the negotiating table, leading to the signing of the Treaty of Lautenberg in July 1410 that saw the Teutonic Knights give up both Samogitia and Dobrzyń Land, which had been occupied in the initial invasion, but were given financial payments in recompense for the former.

    Battle-of-Grunwald.jpg

    The Battle of Kauernick

    The Wars of the Ottoman Interregnum had begun in 1403 after the death of Bayezid I. Mehmed Çelebi had been confirmed as sultan by Timur, but his 4 brothers İsa Çelebi, Mûsa Çelebi, Süleyman Çelebi, Mustafa Çelebi, refused to recognize his authority, and instead each claimed the throne for himself. As such, civil war soon broke out among them. Bayezid I’s oldest son, Süleyman, who had set up his capital at Edirne, ruled over northern Greece, Macedonia, Bulgaria and Thrace. The second son, İsa Çelebi, established himself as an independent ruler at Bursa and Mehmed, the proclaimed Sultan, formed a kingdom at Amasya. War began first between Mehmed and İsa, but Mehmed quickly defeated İsa following the two battles of Ermeni-beli and Ulubad, resulting in İsa fleeing from Bursa to seek safety with the Byzantines in Constantinople itself, and Mehmed promptly occupied İsa’s old kingdom. Seeking revenge, İsa moved against Mehmed again, but the subsequent battle at Karasi between the armies of the two ended in a comprehensive victory for Mehmed and İsa being forced to flee once more, this time to the Emirate of Karaman. It was here that both İsa’s bid for the Ottoman throne and also his life ended, after he was killed in the bath by Mehmed’s agents. At this point, the final surviving son of Bayezid I, Musa Çelebi, who had been captured by Timur at the Battle of Ankara, was freed and initially joined his brother Mehmed’s cause. In the meantime, Süleyman had crossed the Bosphorous Straits with a large army and was at first successful, capturing Bursa in March 1404 and then Ankara later that same year. This led to a persistent stalemate in Anatolia, which lasted from 1405-1410, during which time Mehmed attempted to outflank Süleyman by sending Musa to Thrace with a small force to attack Süleyman's territories.

    800px-Ottoman_Princes_Musa_and_Suleiman_Celebi.jpg

    Süleyman and Mûsa

    This manoeuvre succeeded to an extent as Süleyman was soon forced to retreat to Thrace, where a short but violent contest between him and Mûsa ensued. At first Süleyman had the advantage, defeating Mûsa at the Battle of Kosmidion in 1410, only for his army to defect to Mûsa at Edirne the following year, leading to Süleyman’s execution on the orders of Mûsa, who promptly seized the Ottoman dominions in Thrace. Thinking his new position secure, Mûsa then moved to besiege Constantinople in revenge for Emperpr Manuel II Palaiologos’s old alliance with Süleyman. Perhaps unsurprisingly this resulted in Mehmed becoming involved once more, after Manuel called for his aid, and Mehmed's Ottomans garrisoning Constantinople against Mûsa's Ottomans of Thrace. Mehmed was unable to break the siege, however, and was soon force to retreat across the Bosporus to quell a revolt that had broken out in his own territories, leaving Mûsa to continue the Siege of Constantinople. Shortly afterwards, however, Mehmed returned to Thrace and, having tried and failed to gain assistance from Stefan Lazarevic, the Despot of Serbia, marched against Mûsa once more in 1414, having being forced to raise a new army. The armies of the rival Ottoman brothers met on the plain of Chamurli and ended in the latest in the succession of bloodbaths to have taken place in medieval Europe since 1400s, with Mehmed and his men eventually emerging triumphant. Mûsa had surviving by fleeing the field when the tide had turned, but was later captured and strangled on his brother’s orders. With all his brothers’ dead, Mehmed was at last able to crown himself Sultan Mehmed I, and end the War of the Ottoman Interregnum.

    [1] Chester
    _________________________________
    Sorry for the wait everyone! I hope that the extra long chapter goes someway to make up for that. If anyone has any ideas for where to go next in this TL, I'm all ears! Last but not least, please do comment or leave a like and, most importantly, enjoy!
     
    Status
    Not open for further replies.
    Top