You are using an out of date browser. It may not display this or other websites correctly.
You should upgrade or use an alternative browser.
You should upgrade or use an alternative browser.
Divine Wind, a Pacific War TL
- Thread starter TofuTanker
- Start date

Yes, here it is, the first serious timeline that I will actually finish. (This is my, what, sixth attempt?) Anyways, it starts with a major Japanese victory in the Battle of the Santa Cruz Islands in October 1942, which will lead to a retake of Guadalcanal, which will then cause a ripple effect for the rest of World War Two. Please read it and tell me what you think.
By October 1942, the 1st Marine Division, supported by the fleet of the United States Navy, had secured a large portion of the island of Guadalcanal, including the strategic airbase at Lunga Point known as Henderson Field. But Japanese Army and Navy units were putting the Americans under constant stress, and disease was taking its toll upon the Marines. During August 1942, in the Battle of the Eastern Solomons, an American carrier task force led by Vice Admiral Jack Fletcher repulsed a Japanese attack led by Admiral Isoruku Yamamoto. On the ground, Major General Kiyo Kawaguchi’s attack in September at the Battle of Bloody Ridge ended in disaster.
Japanese brass planned another attempt to knock the Americans off of Guadalcanal, involving a land offensive and a sea attack simultaneously. The ground attack, led by Lieutenant General Harukichi Hyakatuke, failed in its main objectives. However, the naval attack plan went ahead.
Yamamoto had five aircraft carriers at his disposal: the Shōkaku, Zuikaku, Zuihō, Hiyō, and Junyō. Many surface ships had also been amassed. With a combined total of over two hundred aircraft, many of which were crewed by the most highly trained and experienced aviators in the Japanese Empire, the task force seemed very capable.
Yamamoto, for the first time in many months, felt optimistic. The Americans only had two aircraft carriers in the area. The American forces on Guadalcanal were wearing thin. If Yamamoto could eliminate American naval forces and bombard Henderson Field, transport ships could safely pass through “The Slot” in the Solomon Islands and reach Guadalcanal with fresh soldiers, supplies, and equipment, enabling the Japanese Army to start a renewed offensive. Moreover, if the American carriers were put out of action, Guadalcanal could be isolated and blockaded.
The battle plan was as follows. Vice Admiral Nobutake Kondo would act as the overall leader of the entire task force in addition to commanding the “Advanced” force consisting of the Junyō, two battleships, four heavy cruisers, one light cruiser, and ten destroyers. Rear Admiral Hiroake Abe’s “Vanguard” force included two battleships, three heavy cruisers, one light cruiser, and seven destroyers. The bulk of the striking power would be contained in the “Main Body” force, with the Shōkaku, Zuikaku, Zuihō, a heavy cruiser, and eight destroyers commanded by Vice Admiral Chuichi Nagumo. (Hiyō had been damaged in an accident and was under repair at Truk.) The ships would proceed southeast until they could engage the American fleet operating in the area.
Rear Admiral Thomas Kinkaid, meanwhile, commanded the carriers USS Hornet and USS Enterprise along with one battleship, three heavy cruisers, three light cruisers, and fourteen destroyers. On October 25, a PBY Catalina flying boat sighted the Japanese fleet. Kinkaid hurriedly launched a strike force of twenty-three aircraft, but the Japanese knew they had been sited and quickly reversed direction to evade the strike.
Then at 06:45 the next day, an American scout aircraft sited the aircraft carriers of the Japanese fleet. [1] The radio operator quickly tried to send a report to the American fleet, but the radio did not work. After several minutes of frustration, the pilot resigned to fly back to the fleet.
Then at 06:58, a Japanese scout aircraft located the Hornet and successfully relayed its coordinates. Immediately, Kondo authorized a strike. By 07:40, 64 Japanese aircraft from the three Main Body carriers were in the air.
Simultaneously, Kondo ordered the Vanguard force, as well as his own Advanced force, to move ahead at full speed towards Kinkaid’s ships. The Junyō, Shōkaku, and Zuikaku later launched additional aircraft.
It was not until 07:49 that a second American scout aircraft sighted the Japanese fleet. Since the aircraft arrived in between the first and second waves, the Americans had no indication that the Japanese were launching aircraft. Kinkaid ordered the Hornet and Enterprise to launch their aircraft.
At 08:52, the Japanese air commander sighted the Hornet and began preparing his flight for an attack. It was not until 08:55 that the Americans spotted the incoming attackers and vectored all nearby F4Fs on combat air patrol (CAP) against the Japanese. However, faulty communications and mistakes muddled the defense efforts. Several Wildcats managed to reach the dive bomber formation and shot down several, but the majority of the Japanese aircraft were unharmed.
It was at this point that the Japanese pilots realized that they had caught the Americans in the act of launching their own strike force.
The Japanese air commander could not believe his good luck. He immediately ordered fourteen Zeros to attack the climbing American aircraft. The Japanese fighters swooped in and began tearing apart the formation of low, slow American aircraft with cannon fire. The remaining aircraft attempted to get off of the Hornet as quickly as they could, but wreckage on the deck impeded takeoff operations.
The one-sided dogfight that was developing around the Hornet interfered with the planned dive bombing attack, so it was not until 09:14 that the 18 D3A “Val” dive bombers nosed down over the Hornet. At 09:16, a 250kg semi-armor piercing bomb struck the Hornet amidships, penetrating three decks before exploding. Moments later, a second Val planted another bomb near the stern. At 09:19, the Hornet was hit a third time. Fire and smoke billowed into the sky.
Meanwhile, torpedo bombers began to make their run. At 09:14 and again at 09:18, the Hornet was torpedoed and subsequently lost power. With fuel and ammunition causing secondary explosions, the Hornet was dead in the water.
Meanwhile, the American strike force had suffered heavy losses. Out of the original 29 aircraft, 15, including the aircraft of Commander R. Eaton, were shot down. The Japanese lost eight Zeros and three Vals. As the Japanese aircraft began returning to their carriers, they spotted the Enterprise, so the next wave of Japanese aircraft attacked the Enterprise.
The American aircraft from Enterprise, comprising 18 aircraft, were unable to locate the Japanese carriers. Instead, they moved to attack the heavy cruiser Chikuma and scored one bomb and one torpedo hit. They were also intercepted by Japanese fighters, however, and six American aircraft were destroyed for the loss of five Zeros.
The few surviving aircraft from the Hornet were more successful, however, and a formation of dive bombers managed to reach the Shōkaku relatively unmolested while the fighters and torpedo bombers were engaged by the Zeros on BARCAP. Only one bomb hit the Shōkaku, but it penetrated two decks and caused 81 casualties. Another bomb hit the water very close to the hull, causing additional damage.
After the Japanese aircraft departed, Kinkaid decided to withdraw his fleet, as both of his carriers were damaged and incapable of mounting large-scale air operations. He also believed that the Japanese had two to three undamaged carriers in the area. At about 09:13, the Junyo and the Zuiho launched 19 Zeros and 25 Vals towards Kinkaid’s fleet. They then scored a hit each on the Enterprise, the battleship South Dakota and the light cruiser San Juan. The Japanese also dropped two bombs very close to the Enterprise, causing further damage.The Enterprise caught fire, and several secondary explosions worsened the situation.
By this time the Enterprise was too damaged to keep up with the fleet, and the Hornet was so severely battered that she had to be towed by the cruiser Northampton. At 15:20, more aircraft from the Junyō arrived, and strikes from the Zuikaku and Zuiho soon followed. By 16:19, the Hornet had been abandoned, and the Enterprise was dead in the water. Kinkaid, aware that more Japanese strikes were probably on their way, ordered his remaining ships to depart. The Japanese launched several more strikes, but none managed to reach the American ships. The Chikuma left for Truk for repairs while the Shōkaku, Zuikaku and Hiyō had to leave for Japan for repairs as well as to training and delivering more planes and aircrew, while the bulk of the remaining Japanese fleet returned to Rabaul to refuel.
Overall, the Japanese suffered one carrier and one heavy cruiser damaged, but the Americans lost two carriers, while a battleship, a light cruiser, and two destroyers also suffered damage. [2]
While the Japanese had scored a definite tactical victory, they had lost quite a few aviators--134--while the Americans lost 89. [3] While it was not an enormous disparity, the lack of experienced pilots would be a significant handicap for Japan in the rest of the war. Nevertheless, the Americans now had no operational carriers in the Solomons. The Japanese could supply fresh troops to Guadalcanal and bombard the island at will. Soon 1st Marine Division’s lines would be broken. Vice Admiral Chūichi Nagumo was given the Order of the Rising Sun, 2nd Class for his actions in the battle.
The sun was rising in the East.
[1] The radio not working marks the POD of this timeline.
[2] The Japanese had two carriers damaged in OTL, while the Enterprise was damaged and not sunk, and one American destroyer was also sunk.
[3] The actual figures were 148 and 26.
---------------------------------------------------------------------------------------------------------------------------------------------------------
Divine Wind
By October 1942, the 1st Marine Division, supported by the fleet of the United States Navy, had secured a large portion of the island of Guadalcanal, including the strategic airbase at Lunga Point known as Henderson Field. But Japanese Army and Navy units were putting the Americans under constant stress, and disease was taking its toll upon the Marines. During August 1942, in the Battle of the Eastern Solomons, an American carrier task force led by Vice Admiral Jack Fletcher repulsed a Japanese attack led by Admiral Isoruku Yamamoto. On the ground, Major General Kiyo Kawaguchi’s attack in September at the Battle of Bloody Ridge ended in disaster.
Japanese brass planned another attempt to knock the Americans off of Guadalcanal, involving a land offensive and a sea attack simultaneously. The ground attack, led by Lieutenant General Harukichi Hyakatuke, failed in its main objectives. However, the naval attack plan went ahead.
Yamamoto had five aircraft carriers at his disposal: the Shōkaku, Zuikaku, Zuihō, Hiyō, and Junyō. Many surface ships had also been amassed. With a combined total of over two hundred aircraft, many of which were crewed by the most highly trained and experienced aviators in the Japanese Empire, the task force seemed very capable.
Yamamoto, for the first time in many months, felt optimistic. The Americans only had two aircraft carriers in the area. The American forces on Guadalcanal were wearing thin. If Yamamoto could eliminate American naval forces and bombard Henderson Field, transport ships could safely pass through “The Slot” in the Solomon Islands and reach Guadalcanal with fresh soldiers, supplies, and equipment, enabling the Japanese Army to start a renewed offensive. Moreover, if the American carriers were put out of action, Guadalcanal could be isolated and blockaded.
The battle plan was as follows. Vice Admiral Nobutake Kondo would act as the overall leader of the entire task force in addition to commanding the “Advanced” force consisting of the Junyō, two battleships, four heavy cruisers, one light cruiser, and ten destroyers. Rear Admiral Hiroake Abe’s “Vanguard” force included two battleships, three heavy cruisers, one light cruiser, and seven destroyers. The bulk of the striking power would be contained in the “Main Body” force, with the Shōkaku, Zuikaku, Zuihō, a heavy cruiser, and eight destroyers commanded by Vice Admiral Chuichi Nagumo. (Hiyō had been damaged in an accident and was under repair at Truk.) The ships would proceed southeast until they could engage the American fleet operating in the area.
Rear Admiral Thomas Kinkaid, meanwhile, commanded the carriers USS Hornet and USS Enterprise along with one battleship, three heavy cruisers, three light cruisers, and fourteen destroyers. On October 25, a PBY Catalina flying boat sighted the Japanese fleet. Kinkaid hurriedly launched a strike force of twenty-three aircraft, but the Japanese knew they had been sited and quickly reversed direction to evade the strike.
Then at 06:45 the next day, an American scout aircraft sited the aircraft carriers of the Japanese fleet. [1] The radio operator quickly tried to send a report to the American fleet, but the radio did not work. After several minutes of frustration, the pilot resigned to fly back to the fleet.
Then at 06:58, a Japanese scout aircraft located the Hornet and successfully relayed its coordinates. Immediately, Kondo authorized a strike. By 07:40, 64 Japanese aircraft from the three Main Body carriers were in the air.
Simultaneously, Kondo ordered the Vanguard force, as well as his own Advanced force, to move ahead at full speed towards Kinkaid’s ships. The Junyō, Shōkaku, and Zuikaku later launched additional aircraft.
It was not until 07:49 that a second American scout aircraft sighted the Japanese fleet. Since the aircraft arrived in between the first and second waves, the Americans had no indication that the Japanese were launching aircraft. Kinkaid ordered the Hornet and Enterprise to launch their aircraft.
At 08:52, the Japanese air commander sighted the Hornet and began preparing his flight for an attack. It was not until 08:55 that the Americans spotted the incoming attackers and vectored all nearby F4Fs on combat air patrol (CAP) against the Japanese. However, faulty communications and mistakes muddled the defense efforts. Several Wildcats managed to reach the dive bomber formation and shot down several, but the majority of the Japanese aircraft were unharmed.
It was at this point that the Japanese pilots realized that they had caught the Americans in the act of launching their own strike force.
The Japanese air commander could not believe his good luck. He immediately ordered fourteen Zeros to attack the climbing American aircraft. The Japanese fighters swooped in and began tearing apart the formation of low, slow American aircraft with cannon fire. The remaining aircraft attempted to get off of the Hornet as quickly as they could, but wreckage on the deck impeded takeoff operations.
The one-sided dogfight that was developing around the Hornet interfered with the planned dive bombing attack, so it was not until 09:14 that the 18 D3A “Val” dive bombers nosed down over the Hornet. At 09:16, a 250kg semi-armor piercing bomb struck the Hornet amidships, penetrating three decks before exploding. Moments later, a second Val planted another bomb near the stern. At 09:19, the Hornet was hit a third time. Fire and smoke billowed into the sky.
Meanwhile, torpedo bombers began to make their run. At 09:14 and again at 09:18, the Hornet was torpedoed and subsequently lost power. With fuel and ammunition causing secondary explosions, the Hornet was dead in the water.
Meanwhile, the American strike force had suffered heavy losses. Out of the original 29 aircraft, 15, including the aircraft of Commander R. Eaton, were shot down. The Japanese lost eight Zeros and three Vals. As the Japanese aircraft began returning to their carriers, they spotted the Enterprise, so the next wave of Japanese aircraft attacked the Enterprise.
The American aircraft from Enterprise, comprising 18 aircraft, were unable to locate the Japanese carriers. Instead, they moved to attack the heavy cruiser Chikuma and scored one bomb and one torpedo hit. They were also intercepted by Japanese fighters, however, and six American aircraft were destroyed for the loss of five Zeros.
The few surviving aircraft from the Hornet were more successful, however, and a formation of dive bombers managed to reach the Shōkaku relatively unmolested while the fighters and torpedo bombers were engaged by the Zeros on BARCAP. Only one bomb hit the Shōkaku, but it penetrated two decks and caused 81 casualties. Another bomb hit the water very close to the hull, causing additional damage.
After the Japanese aircraft departed, Kinkaid decided to withdraw his fleet, as both of his carriers were damaged and incapable of mounting large-scale air operations. He also believed that the Japanese had two to three undamaged carriers in the area. At about 09:13, the Junyo and the Zuiho launched 19 Zeros and 25 Vals towards Kinkaid’s fleet. They then scored a hit each on the Enterprise, the battleship South Dakota and the light cruiser San Juan. The Japanese also dropped two bombs very close to the Enterprise, causing further damage.The Enterprise caught fire, and several secondary explosions worsened the situation.
By this time the Enterprise was too damaged to keep up with the fleet, and the Hornet was so severely battered that she had to be towed by the cruiser Northampton. At 15:20, more aircraft from the Junyō arrived, and strikes from the Zuikaku and Zuiho soon followed. By 16:19, the Hornet had been abandoned, and the Enterprise was dead in the water. Kinkaid, aware that more Japanese strikes were probably on their way, ordered his remaining ships to depart. The Japanese launched several more strikes, but none managed to reach the American ships. The Chikuma left for Truk for repairs while the Shōkaku, Zuikaku and Hiyō had to leave for Japan for repairs as well as to training and delivering more planes and aircrew, while the bulk of the remaining Japanese fleet returned to Rabaul to refuel.
Overall, the Japanese suffered one carrier and one heavy cruiser damaged, but the Americans lost two carriers, while a battleship, a light cruiser, and two destroyers also suffered damage. [2]
While the Japanese had scored a definite tactical victory, they had lost quite a few aviators--134--while the Americans lost 89. [3] While it was not an enormous disparity, the lack of experienced pilots would be a significant handicap for Japan in the rest of the war. Nevertheless, the Americans now had no operational carriers in the Solomons. The Japanese could supply fresh troops to Guadalcanal and bombard the island at will. Soon 1st Marine Division’s lines would be broken. Vice Admiral Chūichi Nagumo was given the Order of the Rising Sun, 2nd Class for his actions in the battle.
The sun was rising in the East.
--------------------------------------------------------------------------------------------------------------------------------------------------
[1] The radio not working marks the POD of this timeline.
[2] The Japanese had two carriers damaged in OTL, while the Enterprise was damaged and not sunk, and one American destroyer was also sunk.
[3] The actual figures were 148 and 26.
Last edited:
Of course the Japanese had a problem with oil. That doesn't mean, however, that they can't take the island. The fewer American ships are around, the fewer Japanese ships are needed to counter them, which means less oil is used. And being able to use actual transport ships for supply runs, rather than using high-speed destroyers (which, of course, take up far more oil per cargo than transport ships) would save them some fuel oil as well.
By the way don't take this as a "JAPAN WINS WWII" timeline. I am fully aware of the limits of Japan's military infrastructure at the time.
By the way don't take this as a "JAPAN WINS WWII" timeline. I am fully aware of the limits of Japan's military infrastructure at the time.
I really like the PoD, and so far this looks like a well-researched and interesting timeline. I'm a little skeptical of the Japanese managing to retake Guadalcanal (due, as Don Lardo already pointed out, to fuel limits), but given things so far I think it is very realistic that they'll try.
Da Pwnzlord
Banned
I think this is really interesting because it's a timeline that has a POD so "late" into the war.
If the Japanese can hang on as a pain in America's butt for longer than OTL, this could have profound effects on the European war; The Russians might end up conquering all of Germany (due to delayed Overlord) while the RoC gets more Lend-Lease; perhaps we'd see the Cold War centering in East Asia with a more Nationalist-friendly (and thus longer, more inconclusive) Chinese civil war.
LeoXiao, a more extended Guadalcanal campaign would have none of those effects. The US doesn't need to divert resources or equipment from the European theater, with the exception of carriers, which the US does not have to divert in the first place.
KyleB, the radio fails on the first scout plane which has no way of fixing the radio or rushing to give word to the nearest ship or Henderson field, the second scout plane's report does not sufficiently alert the Americans despite having an hour from that report to scramble a major fighter CAP(at minimum), the fighters on Henderson field stay out of the fight...too many flukes going one way, not to mention an undeservedly high hit rate for the IJN, particularly the strike involving only 25 bombers total.
The premise that the IJN would be able to bombard at will, something which cost them two battleships to land based USMC air power OTL, is debatable and the premise that the IJN would deploy sufficient forces, let alone supplies and transport, to defeat the marines more so.
Deploying two to three Japanese divisions will cost far more fuel than a few supply trips by some destroyers and, given the Japanese inferiority in armor, artillery, other firepower and so forth it will take a force of that size to take Guadalcanal, far more than the Japanese ever even considered deploying.
I didn't change all that much from the OTL battle; the Americans did have major problems with communications and efficient air operations, and Henderson Field did not take part in the actual battle. With no first American strike, the Zuihō is able to launch more aircraft against the American fleet which adds to the hit count.
Besides, the entire series of Guadalcanal naval actions seemed like a fluke in the Americans' favor to me. Considering the IJN's numerical superiority, one would expect the battles to be tipped more in their favor.
Besides, the entire series of Guadalcanal naval actions seemed like a fluke in the Americans' favor to me. Considering the IJN's numerical superiority, one would expect the battles to be tipped more in their favor.
Here is the next installment. Sorry for taking so long; I will try to be quicker about this from now on.
--------------------------------------------------------------------
With the American fleet destroyed, spirits among the Japanese on Guadalcanal were high. The island was relatively peaceful for once. The Americans were under strict orders to remain on the defensive until American naval and air power could be returned to the area, so the Matanikau Offensive and the operation at Koli Point to encircle troops under Major General Shōji were called off. Meanwhile, General Harukichi Hyakutake saw no need to launch attacks on the Americans before reinforcements arrived.
On November 2, the first transport convoy from Rabaul, escorted by destroyers, arrived at Guadalcanal. One of the nine ships that departed was sunk by a submarine, and they were harassed by PT boats along the way, but when the Japanese ships unloaded their cargo on Guadalcanal, the Marines' predicament took a heavy turn for the worse. Together, the transports carried 11,000 soldiers, ninety field guns consisting of mostly 70mm and 75mm pieces, but with a few of 105mm caliber, forty 37mm and 47mm anti-tank guns (the 47mm piece was new, modern, and capable of knocking out a Sherman at close range), a few dozen vehicles of various types, and plenty of food and ammunition.
On November 4, some preliminary air strikes were carried out by Japanese land-based D3A Val and G4M Betty bomber aircraft. In addition, some Imperial Japanese Navy destroyers shelled the American lines. Most of the fire was concentrated along the areas west of the Lunga River and on Henderson Field.
At dawn on November 5, the Japanese launched a decisive offensive towards Henderson Field. 27,000 Japanese troops, well supported by artillery and a few light tanks, participated in an all-out attack into a 1.5 mile wide perimeter in Sectors 4 and 5 of the American perimeter, along the Lunga River and just west of Henderson Field. The attack began with a ten-minute artillery barrage. Then Hyakutake's soldiers charged towards the American lines.
Hyakutake, in an odd departure from ordinary Japanese military doctrine, learned from his mistakes. The Battle of Henderson Field on October 23-26 resulted in total defeat for the Japanese because they had charged across an open ridge where American artillery power could be brought to bear for maximum effect, so Hyakutake's next attack went through denser jungle terrain. The inevitable result of this, however, was chaotic close-quarters combat, where small firefights depended on numbers and close-range firepower. The Americans held their lines as long as they could under the Japanese assault, but the frenzied charges of Hyakutake's troops led to total confusion in the dense and poorly lit battle zone. Eventually the American lines broke and by the nightfall on November 5, the Japanese attackers reached the Lunga River 2,000 yards from Henderson Field, and a mere 800 yards from the headquarters of the Marine 1st Division itself. Hyakutake could not believe his success. A large swath of strategic land had been taken. However, a staggering 8,000 Japanese troops were lost. American casualties were approximately 3,500. A few pockets of Marines were left in the newly taken areas.
Japanese offensive on November 5th

Final Japanese lines at 2100 hours with isolated pockets of Marine troops

On November 6th, the Americans launched relatively minor counterattacks aimed at dislodging the Japanese from their threatening positions near the division headquarters (which were being emergency evacuated anyway) and preventing the Japanese from being able to cut off the Marines in the west by reaching the ocean. The counterattacks were moderately successful but did not make the situation any less precarious. Meanwhile, Japanese light artillery pieces were moved to a forward position in order to accurately shell Henderson Field.
Map of American counter-offensive, led by General Vandegrift, on the 6th, with new Japanese artillery positions in black

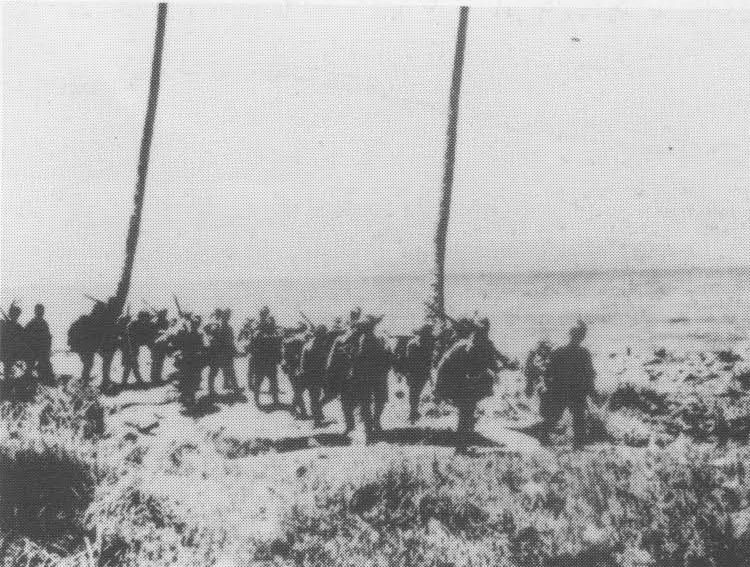
Japanese troops walking across the river from Henderson Field
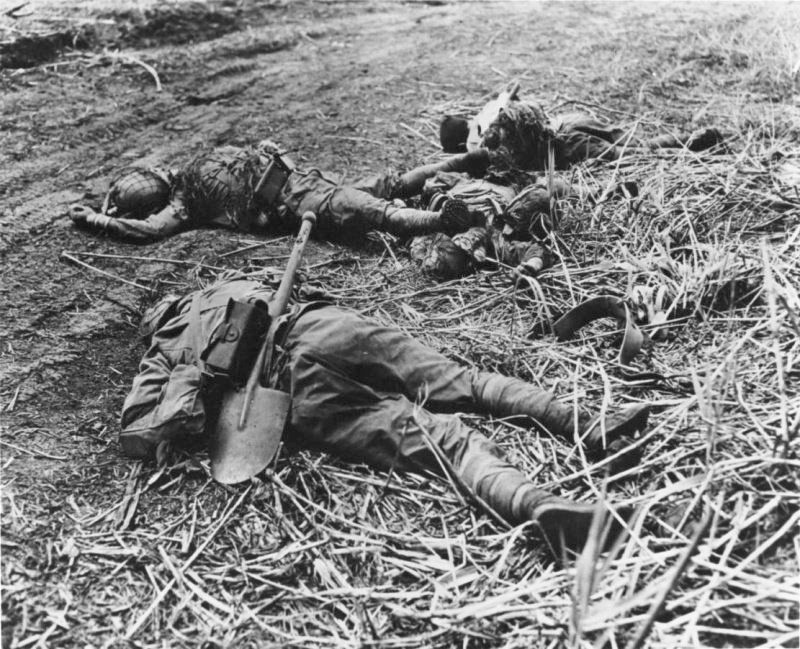
Dead Japanese soldiers
The battle would come to be known as the Battle of Lunga River.
--------------------------------------------------------------------
With the American fleet destroyed, spirits among the Japanese on Guadalcanal were high. The island was relatively peaceful for once. The Americans were under strict orders to remain on the defensive until American naval and air power could be returned to the area, so the Matanikau Offensive and the operation at Koli Point to encircle troops under Major General Shōji were called off. Meanwhile, General Harukichi Hyakutake saw no need to launch attacks on the Americans before reinforcements arrived.
On November 2, the first transport convoy from Rabaul, escorted by destroyers, arrived at Guadalcanal. One of the nine ships that departed was sunk by a submarine, and they were harassed by PT boats along the way, but when the Japanese ships unloaded their cargo on Guadalcanal, the Marines' predicament took a heavy turn for the worse. Together, the transports carried 11,000 soldiers, ninety field guns consisting of mostly 70mm and 75mm pieces, but with a few of 105mm caliber, forty 37mm and 47mm anti-tank guns (the 47mm piece was new, modern, and capable of knocking out a Sherman at close range), a few dozen vehicles of various types, and plenty of food and ammunition.
On November 4, some preliminary air strikes were carried out by Japanese land-based D3A Val and G4M Betty bomber aircraft. In addition, some Imperial Japanese Navy destroyers shelled the American lines. Most of the fire was concentrated along the areas west of the Lunga River and on Henderson Field.
At dawn on November 5, the Japanese launched a decisive offensive towards Henderson Field. 27,000 Japanese troops, well supported by artillery and a few light tanks, participated in an all-out attack into a 1.5 mile wide perimeter in Sectors 4 and 5 of the American perimeter, along the Lunga River and just west of Henderson Field. The attack began with a ten-minute artillery barrage. Then Hyakutake's soldiers charged towards the American lines.
Hyakutake, in an odd departure from ordinary Japanese military doctrine, learned from his mistakes. The Battle of Henderson Field on October 23-26 resulted in total defeat for the Japanese because they had charged across an open ridge where American artillery power could be brought to bear for maximum effect, so Hyakutake's next attack went through denser jungle terrain. The inevitable result of this, however, was chaotic close-quarters combat, where small firefights depended on numbers and close-range firepower. The Americans held their lines as long as they could under the Japanese assault, but the frenzied charges of Hyakutake's troops led to total confusion in the dense and poorly lit battle zone. Eventually the American lines broke and by the nightfall on November 5, the Japanese attackers reached the Lunga River 2,000 yards from Henderson Field, and a mere 800 yards from the headquarters of the Marine 1st Division itself. Hyakutake could not believe his success. A large swath of strategic land had been taken. However, a staggering 8,000 Japanese troops were lost. American casualties were approximately 3,500. A few pockets of Marines were left in the newly taken areas.
Japanese offensive on November 5th
Final Japanese lines at 2100 hours with isolated pockets of Marine troops
On November 6th, the Americans launched relatively minor counterattacks aimed at dislodging the Japanese from their threatening positions near the division headquarters (which were being emergency evacuated anyway) and preventing the Japanese from being able to cut off the Marines in the west by reaching the ocean. The counterattacks were moderately successful but did not make the situation any less precarious. Meanwhile, Japanese light artillery pieces were moved to a forward position in order to accurately shell Henderson Field.
Map of American counter-offensive, led by General Vandegrift, on the 6th, with new Japanese artillery positions in black
Japanese troops walking across the river from Henderson Field
Dead Japanese soldiers
The battle would come to be known as the Battle of Lunga River.
Last edited:
but when the Japanese ships unloaded their cargo on Guadalcanal, Japan's predicament rose dramatically.
Just FYI, I think you mean the American's predicament. ;-)
Good update - I especially like that the Japanese are continuing to take heavier casualties than the US - keeps this from seeming like a Japan-wank.
Just FYI, I think you mean the American's predicament. ;-)
Good update - I especially like that the Japanese are continuing to take heavier casualties than the US - keeps this from seeming like a Japan-wank.
Thanks for the correction. Next update is going to be tomorrow, hopefully.
Thanks for the correction. Next update is going to be tomorrow, hopefully.
If I'm nitpicking too much, just let me know. :-}
If I'm nitpicking too much, just let me know. :-}
No, it's perfectly fine, the more nitpicks the better I always say.
Next update won't come until Monday.
-------------------------------------------------------------------------
Morale among the Americans in the Pacific was at an all-time low.
On November 8, a second Japanese transport convoy steamed down "The Slot" to land additional support on Guadalcanal. This one had fewer soldiers--only 4,000, not nearly enough to recoup recent losses--but it carried plenty of ammunition and supplies to sustain operations on the island.
Meanwhile, Japanese artillery on the island continued shelling Henderson Field through the night of the 7th/8th. By now, the airfield facilities and aircraft were so badly wrecked that there was no hope for it to become operational without major engineering support and additional aircraft, which required significant naval operations in order to bring the necessary materiel to Guadalcanal. However, by noon on November 8th, American 105mm artillery had found the range on the Japanese field gun batteries located near the Lunga River, and promptly put them out of action.
The Americans managed to hastily bring some supplies to the Americans on November 9, but retreated immediately and lost a transport, with two more damaged, in the attempt. For the Japanese had deployed the aircraft carrier Junyō, with a screening force of a few cruisers and destroyers, to the area (with 24 Zekes and 18 Vals) in order to maintain dominance over the island. Vice Admiral Nobutake Kondo was commander of the Junyō and the escorting surface ships. The light cruiser Nagara served as his flagship, and he had five destroyers as well.
Air strikes and shore bombardment at point-blank range wore down the Marines on the island severely. Now the Japanese officers on the island were confident to just form a line of defense along the Lunga River, sit back and let the Navy do their thing. However, Yamamoto was worried: if the Americans sent a heavy force of surface ships, or perhaps even another aircraft carrier which they might still have, the Japanese ships could be badly outnumbered. However, the facts of war prevented him from alleviating the situation because the Japanese were suffering from a shortage of bunker fuel and of the top Japanese brass were reluctant to send more ships into the area.
In order to address the situation, Admiral William Halsey, Jr. decided to send a large force of surface ships to crush the Japanese forces. On November 10, he ordered the battleships South Dakota and Washington, the heavy cruisers Portland, Northampton and San Francisco, the light cruisers Helena, Juneau, San Juan, and San Diego, along with nine destroyers, to assemble as quickly as possible before moving towards Guadalcanal at full speed. The "big ships" were commanded by Rear Admiral Daniel J. Callaghan on the San Francisco, with Rear Admiral Norman Scott on the Juneau in charge of the advance screen of light cruisers and destroyers. On November 14, the combined force--albeit with a few of the cruisers lagging behind--passed the northernmost of the New Hebrides. They were a mere 70 miles away from the Junyō, which was anchored off the tiny islet of Nugu, when they were sighted at 1300 steaming at 25 knots near the eastern tip of Guadalcanal.
Immediately, the Junyō launched a strike force. 12 Vals and 9 Zekes were in the air by 13:35. At 13:59, the Japanese fighter squadron leader spotted the American ships. The bombers split up into a group of six to go after the light cruisers in the front of the formation, and a group of seven to attack the battleships.
At 14:03, the first Vals began to dive towards the Juneau and the San Diego, with three targeting each ship. One bomb struck the San Diego perfectly amidships, right between the funnels. The resulting explosion, several decks below topside, rocked the ship and started several fires. The San Diego immediately lost speed. A second bomb scored a near miss that caused some of the front 5" guns to stop working. The Juneau received no hits. Three Japanese bombers were shot down.
By 14:04, five dive-bombers were nosing down over the South Dakota. Two were immediately shot down, while only one managed to score a hit. A Val planted a 250kg high-explosive bomb at the port side of the bow, significantly bending Turret A's leftmost gun. A third Val was shot down as it pulled out of its dive.
The remaining two Vals attacked the Washington. Anti-aircraft fire shot down one; the other scored a near miss. By the time that the Japanese planes returned to the Junyō, six bombers had been shot down.
Last edited:
Surprise update!
-------------------------------------------------------------------------
When the Japanese pilots were debriefed, they reported "Two battleships damaged, one cruiser sunk, one cruiser damaged." Kondo decided that the Americans were still a threat and the Junyō to launch another strike, then start retreating from the area.
By 15:12, November 14, six Vals and four Zekes had managed to get aloft. It was a bright, clear day and by this time the American ships were almost in sight of the Japanese ships. The Junyō with her accompanying task force began to withdraw west-northwest at 21 knots.
At 15:29, the Japanese aircraft began making their runs against the American ships. All of them targeted the nearest ship, the cruiser San Francisco, which was Rear Admiral Daniel Callaghan's flagship. Concentrated anti-aircraft fire claimed two Vals, while two more were destroyed as they made their way home. However, a 250kg general purpose bomb struck the San Francisco aft of the second funnel, wrecking the seaplane facilities. Three 60kg bombs also hit the ship, including one that landed square on Turret B, but did no significant damage.
By 15:34, Kondo realized that his aircraft had no chance of stopping the Americans, and ordered his ships to turn northwest and increase their speed to 25 knots. Rear Admiral Scott then ordered his force of light cruisers and destroyers (minus the San Diego, which was steaming back to Nouméa for repairs) to increase their speed to 32 knots, while Callaghan's force was trailing at 26 knots. Scott also ordered two of his destroyers to stay with Callaghan, two to follow the light cruisers, and the remaining five to head for the Japanese ships at 36 knots.
In order to escape the Americans, Junyō had to sail with the wind, which meant she could not launch her aircraft without turning around and being badly exposed to the American ships' guns.
But that afternoon, the Helena closed the distance between the opposing fleets enough open fire on the Junyō at a range of 12 miles with her forward 6-inch guns. Before long, the destroyers began firing with their 5" weapons. Soon the Junyō was hit, and small fires appeared. The shelling continued; the destroyers were approaching the Junyō fast and now the San Juan and Juneau began shooting. A gunnery officer on the Helena perfected a firing solution for the Junyō, and soon 6-inch shells began scoring punishing hits. Junyō began burning brightly. Several secondary explosions rocked the ship. Several Japanese destroyers, and the Nagara, began shooting at the pursuing American ships with their rear guns, but did only minor damage to the destroyer Monssen.
Kondo ordered the crew of the Junyō to scuttle the ship. He then ordered his remaining ships to escape at high speed, fearing the superior strength of the American ships. The crew of the Junyō detonated explosive charges in the hull before making their way to nearby Savo Island.
Naval Battle of Guadalcanal, part 1, showing fleet movements as well as Japanese air strikes.

But the battle was not over yet. Several days earlier, Yamamoto had sent several large ships to Guadalcanal to counter Callaghan's fleet. The battleships Kirishima and Hiei, the heavy cruisers Suzuya and Kinugasa, ten destroyers, and a convoy of thirteen transport vessels, all commanded by Vice Admiral Hiroaki Abe, were steaming down "The Slot." Kondo had not even been informed of their presence, and narrowly missed a collision that night between the Nagara and the Kinugasa. Two of Kondo's destroyers joined Abe, but Kondo returned to Rabaul and was later demoted for "running away in a decisive battle," even though he was badly outnumbered and unaware of Abe's approaching fleet.
In the very early morning hours of November 15, Callaghan's fleet, reorganized after the scattering of forces spurred by Scott's pursuit of the Junyō, steamed close to the northern shore of Guadalcanal in preparation for bombardment come daylight. Unknown to the Americans, however, Abe's force was approaching fast and was preparing to engage Callaghan's force with searchlights in a night battle, something the Japanese navy was much more adept at than the Americans.
The ensuing engagement started with the Hiei illuminating the San Juan at 12,000 yards at 0325. The Hiei and several Japanese destroyers began shelling the San Juan. Scott, though taken unawares by the sudden turn of events, ordered all of his light cruisers to turn broadside against Abe's fleet. Callaghan then ordered all of his battleships and heavy cruisers to do the same, and Scott followed by ordering his destroyers to make torpedo runs.
Less than ten minutes later, a salvo of 14-inch shells from the Hiei ripped through the San Juan's starboard side and set off a powerful secondary explosion. By this time, all of the American cruisers and battleships were firing at the Hiei, while the San Juan, still well illuminated, had taken severe damage. Turret B had been put out of action by a shell from the Hiei and her side had been punctured repeatedly; the captain was dead, the superstructure was in shambles and fires raged uncontrollably. The first mate gave the order to abandon ship. With the San Juan burning brightly, the Hiei turned its searchlight to the cruiser San Francisco, which became the subject of the Kinugasa's and the Suzuya's guns as well. Meanwhile, the Kirishima and most of the Japanese destroyers started firing at the destroyers O'Bannon and Laffey, which were launching torpedoes at the Hiei.
At 0410, the destroyer Monssen successfully struck the Kinugasa with two torpedoes. The Kinugasa's captain then ordered the ship to fire upon the Monssen, but the Inazuma was incorrectly shot at instead; she had just launched a salvo of torpedoes at the Portland, and scored one hit.
At approximately 0420, the Hiei was struck by a 16-inch round from either the South Dakota or the Washington--no one knows for sure--which entered a powder magazine for the 6-inch guns. The explosion created a brilliant fireball, but by that time the Hiei was doomed and Abe had been killed. Dead in the water and listing to starboard, she was scuttled by her crew.
Now the South Dakota, Washington, Northampton, Juneau, and several destroyers began firing upon the Kinugasa, which blew up and sank within fifteen minutes. Then the O'Bannon, crippled by the Kirishima's gunfire and struck by a torpedo from a Japanese destroyer, began to sink.
The Kirishima and Suzuya were now firing at the South Dakota, while three Japanese destroyers made torpedo runs against the burning San Francisco. The San Francisco started to zigzag but she was hit by two torpedoes and started to sink. Callaghan boarded a lifeboat and transferred in the chaos of battle to the Washington.
The South Dakota was badly damaged by now, and Turret A was out of action.
After the Kinugasa was destroyed, the American ships concentrated all their firepower on the Kirishima. The Suzuya torpedoed the South Dakota, but she was in turn torpedoed by an American destroyer, the Barton. The Northampton was listing to port from three torpedo hits; meanwhile the Kirishima was badly damaged. The South Dakota retired from battle, while the Suzuya concentrated her efforts on the Barton and the Northampton. The Kirishima, repeatedly torpedoed, kept firing at the Washington, achieving minor damage to the battleship, and sank the destroyer Cushing before a salvo of 16-inch rounds from the Washington hit the Kirishima right at the waterline, ruptured her hull, and started large fires below deck.
By this time the Japanese transports were unloading their cargoes onto the western part of the island, and the sun was approaching the horizon. The Japanese had only a damaged cruiser, a crippled battleship, and seven destroyers still in action, while only a few American destroyers had escaped damage.
The Kirishima sank just after sunrise, while the Northampton was slowly capsizing after being hit with three torpedoes. The Japanese destroyers began firing torpedoes at the Washington and also attacked the remaining, outnumbered, American destroyers. The Suzuya, badly damaged, retreated from battle at 0710, and the destroyers, after firing their torpedoes at the Washington, did the same. The Washington was struck by only one torpedo, but the destroyer Laffey was sunk by another. The Japanese destroyer Murasame, meanwhile, after having been crippled by destroyer gunfire, became the target of the Washington and the Juneau, and she sank at 0735.
At 0815, a wave of G4M "Betty" bombers approached from Rabaul; they dropped torpedoes at the Portland but scored no hits, and four were shot down by anti-aircraft fire. However, it prompted Callaghan, after conversing with Scott, to retreat from the battle area to Nouméa.
The Japanese transports and surface ships left as well. The inconclusive Naval Battle of Guadalcanal had ended; the Japanese lost 1 carrier, 2 battleships, 1 heavy cruiser, and 1 destroyer; in addition, 1 heavy cruiser and 3 destroyers were badly damaged. 47 aircraft were also lost. The Americans had suffered the loss of 2 heavy cruisers, 1 light cruiser, and 3 destroyers; 2 battleships, 2 heavy cruisers, 3 light cruisers, and 5 destroyers were also damaged. While it was a tactical victory for the Americans, they had failed to stop the Japanese from reinforcing Guadalcanal and without air cover, they could not risk staying in the area.
-------------------------------------------------------------------------
When the Japanese pilots were debriefed, they reported "Two battleships damaged, one cruiser sunk, one cruiser damaged." Kondo decided that the Americans were still a threat and the Junyō to launch another strike, then start retreating from the area.
By 15:12, November 14, six Vals and four Zekes had managed to get aloft. It was a bright, clear day and by this time the American ships were almost in sight of the Japanese ships. The Junyō with her accompanying task force began to withdraw west-northwest at 21 knots.
At 15:29, the Japanese aircraft began making their runs against the American ships. All of them targeted the nearest ship, the cruiser San Francisco, which was Rear Admiral Daniel Callaghan's flagship. Concentrated anti-aircraft fire claimed two Vals, while two more were destroyed as they made their way home. However, a 250kg general purpose bomb struck the San Francisco aft of the second funnel, wrecking the seaplane facilities. Three 60kg bombs also hit the ship, including one that landed square on Turret B, but did no significant damage.
By 15:34, Kondo realized that his aircraft had no chance of stopping the Americans, and ordered his ships to turn northwest and increase their speed to 25 knots. Rear Admiral Scott then ordered his force of light cruisers and destroyers (minus the San Diego, which was steaming back to Nouméa for repairs) to increase their speed to 32 knots, while Callaghan's force was trailing at 26 knots. Scott also ordered two of his destroyers to stay with Callaghan, two to follow the light cruisers, and the remaining five to head for the Japanese ships at 36 knots.
In order to escape the Americans, Junyō had to sail with the wind, which meant she could not launch her aircraft without turning around and being badly exposed to the American ships' guns.
But that afternoon, the Helena closed the distance between the opposing fleets enough open fire on the Junyō at a range of 12 miles with her forward 6-inch guns. Before long, the destroyers began firing with their 5" weapons. Soon the Junyō was hit, and small fires appeared. The shelling continued; the destroyers were approaching the Junyō fast and now the San Juan and Juneau began shooting. A gunnery officer on the Helena perfected a firing solution for the Junyō, and soon 6-inch shells began scoring punishing hits. Junyō began burning brightly. Several secondary explosions rocked the ship. Several Japanese destroyers, and the Nagara, began shooting at the pursuing American ships with their rear guns, but did only minor damage to the destroyer Monssen.
Kondo ordered the crew of the Junyō to scuttle the ship. He then ordered his remaining ships to escape at high speed, fearing the superior strength of the American ships. The crew of the Junyō detonated explosive charges in the hull before making their way to nearby Savo Island.
Naval Battle of Guadalcanal, part 1, showing fleet movements as well as Japanese air strikes.
But the battle was not over yet. Several days earlier, Yamamoto had sent several large ships to Guadalcanal to counter Callaghan's fleet. The battleships Kirishima and Hiei, the heavy cruisers Suzuya and Kinugasa, ten destroyers, and a convoy of thirteen transport vessels, all commanded by Vice Admiral Hiroaki Abe, were steaming down "The Slot." Kondo had not even been informed of their presence, and narrowly missed a collision that night between the Nagara and the Kinugasa. Two of Kondo's destroyers joined Abe, but Kondo returned to Rabaul and was later demoted for "running away in a decisive battle," even though he was badly outnumbered and unaware of Abe's approaching fleet.
In the very early morning hours of November 15, Callaghan's fleet, reorganized after the scattering of forces spurred by Scott's pursuit of the Junyō, steamed close to the northern shore of Guadalcanal in preparation for bombardment come daylight. Unknown to the Americans, however, Abe's force was approaching fast and was preparing to engage Callaghan's force with searchlights in a night battle, something the Japanese navy was much more adept at than the Americans.
The ensuing engagement started with the Hiei illuminating the San Juan at 12,000 yards at 0325. The Hiei and several Japanese destroyers began shelling the San Juan. Scott, though taken unawares by the sudden turn of events, ordered all of his light cruisers to turn broadside against Abe's fleet. Callaghan then ordered all of his battleships and heavy cruisers to do the same, and Scott followed by ordering his destroyers to make torpedo runs.
Less than ten minutes later, a salvo of 14-inch shells from the Hiei ripped through the San Juan's starboard side and set off a powerful secondary explosion. By this time, all of the American cruisers and battleships were firing at the Hiei, while the San Juan, still well illuminated, had taken severe damage. Turret B had been put out of action by a shell from the Hiei and her side had been punctured repeatedly; the captain was dead, the superstructure was in shambles and fires raged uncontrollably. The first mate gave the order to abandon ship. With the San Juan burning brightly, the Hiei turned its searchlight to the cruiser San Francisco, which became the subject of the Kinugasa's and the Suzuya's guns as well. Meanwhile, the Kirishima and most of the Japanese destroyers started firing at the destroyers O'Bannon and Laffey, which were launching torpedoes at the Hiei.
At 0410, the destroyer Monssen successfully struck the Kinugasa with two torpedoes. The Kinugasa's captain then ordered the ship to fire upon the Monssen, but the Inazuma was incorrectly shot at instead; she had just launched a salvo of torpedoes at the Portland, and scored one hit.
At approximately 0420, the Hiei was struck by a 16-inch round from either the South Dakota or the Washington--no one knows for sure--which entered a powder magazine for the 6-inch guns. The explosion created a brilliant fireball, but by that time the Hiei was doomed and Abe had been killed. Dead in the water and listing to starboard, she was scuttled by her crew.
Now the South Dakota, Washington, Northampton, Juneau, and several destroyers began firing upon the Kinugasa, which blew up and sank within fifteen minutes. Then the O'Bannon, crippled by the Kirishima's gunfire and struck by a torpedo from a Japanese destroyer, began to sink.
The Kirishima and Suzuya were now firing at the South Dakota, while three Japanese destroyers made torpedo runs against the burning San Francisco. The San Francisco started to zigzag but she was hit by two torpedoes and started to sink. Callaghan boarded a lifeboat and transferred in the chaos of battle to the Washington.
The South Dakota was badly damaged by now, and Turret A was out of action.
After the Kinugasa was destroyed, the American ships concentrated all their firepower on the Kirishima. The Suzuya torpedoed the South Dakota, but she was in turn torpedoed by an American destroyer, the Barton. The Northampton was listing to port from three torpedo hits; meanwhile the Kirishima was badly damaged. The South Dakota retired from battle, while the Suzuya concentrated her efforts on the Barton and the Northampton. The Kirishima, repeatedly torpedoed, kept firing at the Washington, achieving minor damage to the battleship, and sank the destroyer Cushing before a salvo of 16-inch rounds from the Washington hit the Kirishima right at the waterline, ruptured her hull, and started large fires below deck.
By this time the Japanese transports were unloading their cargoes onto the western part of the island, and the sun was approaching the horizon. The Japanese had only a damaged cruiser, a crippled battleship, and seven destroyers still in action, while only a few American destroyers had escaped damage.
The Kirishima sank just after sunrise, while the Northampton was slowly capsizing after being hit with three torpedoes. The Japanese destroyers began firing torpedoes at the Washington and also attacked the remaining, outnumbered, American destroyers. The Suzuya, badly damaged, retreated from battle at 0710, and the destroyers, after firing their torpedoes at the Washington, did the same. The Washington was struck by only one torpedo, but the destroyer Laffey was sunk by another. The Japanese destroyer Murasame, meanwhile, after having been crippled by destroyer gunfire, became the target of the Washington and the Juneau, and she sank at 0735.
At 0815, a wave of G4M "Betty" bombers approached from Rabaul; they dropped torpedoes at the Portland but scored no hits, and four were shot down by anti-aircraft fire. However, it prompted Callaghan, after conversing with Scott, to retreat from the battle area to Nouméa.
The Japanese transports and surface ships left as well. The inconclusive Naval Battle of Guadalcanal had ended; the Japanese lost 1 carrier, 2 battleships, 1 heavy cruiser, and 1 destroyer; in addition, 1 heavy cruiser and 3 destroyers were badly damaged. 47 aircraft were also lost. The Americans had suffered the loss of 2 heavy cruisers, 1 light cruiser, and 3 destroyers; 2 battleships, 2 heavy cruisers, 3 light cruisers, and 5 destroyers were also damaged. While it was a tactical victory for the Americans, they had failed to stop the Japanese from reinforcing Guadalcanal and without air cover, they could not risk staying in the area.
Last edited:
*Norton scratches off name for a TL* "Son of a ....."
I'm interested to see what you'll do, though.
I'm interested to see what you'll do, though.
Share: