The Red Crowns: The World of Imperial Socialism

Hello everyone, very sorry for the big gap but I'd like to be clear that more is coming, its just intense exam season for the rest of this week. Hopefully get something out on Sunday!
 
IX - The Bloody Beginning

Chapter Nine
The Bloody Beginning


Extract from: Echoes in a Crown - The Collected Works of the Poet Tsar

By: Tsar Michael II


A new Red Square,

Christened with blue blood,

A king lost,

A brother slain,

And a golden crown bounces across cobblestone


Extract from: Bloody and Brief - The Short War At Sea
By: Alexi Propov - Moscow University Press, 1954


The words of Nicholas II’s speech would mirror and resonate with the manner of his death. Nicholas insisted on the eternal nature of the Russian Empire, the strength of her arms and, in the final few minutes before his dramatic murder, her loyalty to France. Some of his final words (though not, as many have reported, his actual final words were) “The flags of Russia and France are forever tied and I have no doubt that even the President of France would die for Russia and have no fear that the Tsar of Russia would die for France.” Nicholas did not, truly, die for France but at this point that hardly seemed to matter. His ever more powerful confidant and Prime Minister, Pyotr Stolypn, leapt into action, ordering an immediate mobilisation of troops, the rounding up of well known dissidents and -most oddly- the firing of most of the cabinet. Stolypin was, by the 30th of May, Prime Minister, Imperial Regent, Lord President of the Imperial Council, Minister for the Economy, Minister for War, Minister for Security and a host of minor, mostly honourary titles as well. The rumours that Nicholas and Stolypin had bickered over the direction of the country in the weeks leading up to the speech are true, the idea that both had contacted senior army officers to confirm their support were - most likely- not.


The death of Nicholas II is one of the most pivotal moments in human history and both historians and writers have turned to it as a launching point for their work. Mike Anderson famously used the survival of Nicholas as the point of departure in his Look to the East work of alternative history. The first and most famous outcome of the attack was the start of the Short War with, to the surprise of many was started not by the British or French but by the Russians. The new Tsar, Michael II, had little to do with this declaration; he had been holidaying in Karelia and would not hear of his brothers death until 6th of June, nearly a week after Stolypin's 'Caretaker Government' had declared war. Michael returned to St Petersburg and was, it is reported, so stunned by the mutilated body of his brother - whom he insisted on seeing - that he turned inwards and, bar his singular speech and later coronation, would see no visitors. Again, accusations of a “house arrest” by the Stolypin government have likely been exaggerated - but perhaps not entirely falsified.

Mihail_II.jpg

'The Poet Tsar' Michael II, the younger brother and the reluctant ruler. Nearly powerless from day one.

Some see the declaration, coming on the 1st, as rash or illogical but one has to consider the situation of the time. The British were in a tense and already bloody standoff with the French, Russia's closest and friendliest ally, when all of a sudden and unknown and as of yet unidentified assailant struck at and killed the most important man in the country. The British were the first to be blamed and, whether this came from a genuine belief or from a purely ideological standpoint, Stolypin put the blame immediately at the feet of London, accusing them of “attempting to divide the indivisible and to vanquish the unvanquishable” by taking out Russia’s leadership from the top down.


The conflict started slowly; the British dominions unanimously declared their support for the motherland on the 7th (though this was of course not their choice but the decision of London), whilst the French too joined the fray on the 7th, issuing a statement that; "In Africa, Asia, Europe and across the globe, the French Republic is in a state of conflict and of war with the British, their minions and their Asiatic underlings". These 'Asiatic underlings 'were the Japanese who, whilst technically still neutral on the 7th, joined London's cause on the 8th as Emperor Meiji pledged; "the full and total support of the Japanese Government, Military and Emperor to the bold and righteous cause of the British. The first actions would be at sea; the Russian and Japanese Navies saw the first action as they clashed in the North Atlantic. The Russians had intercepted the Japanese Fleet on a journey south to meet up with the British China Squadron, led by Admiral Sir Alexander Buller. The Japanese Admiral, Dewa Shigero, was something of a wunderkind of the Imperial Japanese Navy, having travelled to London in the early 1890s for his education. The Japanese fleet was modern but small and truly half built, in the middle of a series of expansions based on British-built vessels that would bolster the Japanese against the Russian foe. For this reason, it was thought that a combined Anglo-Japanese fleet would be more likely to decisively batter the Russians and win the Pacific. The Russians knew of this plan and were terrified; there was next to nothing they could do once the two fleets combined and so they hoped to score a quick and easy win against the Japanese. With the two navies storming rapidly across the Pacific, the IJN was intercepted by the Russian Eastern Fleet in the Chinese Straights and the Battle of Taiwan began on the morning of June 17th.


1024px-Battle_of_Port_Arthur_crop2.jpg

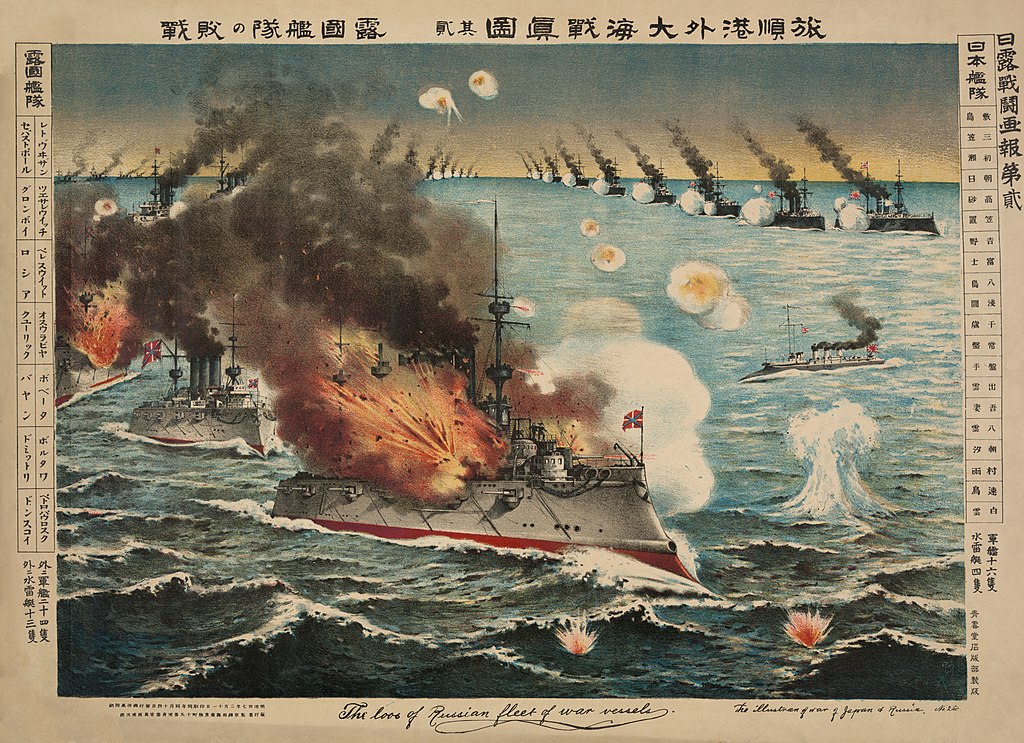
The famous - if heavily stylized and unrealistic - painting "the Battle of Taiwan".

The Japanese were actually almost at parity with the Russians, despite being a smaller, younger and (at least in thought) weaker Empire. The Russians had seven battleships and 5 cruisers whilst the Japanese had four battleships but ten cruisers with both sides possessing a litany of smaller gunships and, amongst the Japanese, some experimental torpedo boats. The Japanese battleships of the Fuji, the Yashima, the rushed and new Shikishima and the flagship Hatsue immediately broke off from their positions in the Japanese column and turned the fight directly to face the Russians head-on. The Russian Admiral, Oskar Viktorovich Stark, saw this as a mistake and immediately started pounding the Japanese flagship. Initially, Stark seemed to be doing well and the Russians scored three powerful hits; one on the Hatsue and two on the Yashima, which almost immediately began taking water. Before long, however, the battle began to turn. The Russians outnumbered the Japanese in terms of tonnage but their ships were mostly a decade or more old whilst some of the Japanese vessels had barely been under commission for four months. The Japanese ships were all British made and, with modern armaments, were able to begin returning fire with a much higher rate of fire and accuracy. Immediately after the Russian salvo, the Japanese scored hits on five of their seven foes. Fire was traded for but a few minutes as the Japanese pumped out more and more than their Russian foes could manage. Despite the advantages of technology, however, The Yashima, which had been flagging for some time began sinking and the Hatsue lost its steering ability. Just as the Russians seemed to be winning, however, a shot from the Fuji struck the battery of the Russian Flagship Sevastopol, which exploded almost immediately, killing the Admiral Stark. The Russians, leaderless, immediately began to fall apart as soon another Russian Battleship, the Poltava, was also sunk. The Russians, scattered and scared, began to break off almost immediately and, whilst neither side could declare a victory, the Russians had been bloodied and failed in their objective, whilst the Japanese Fleet could hobble southwards into the loving arms of the Royal Navy.

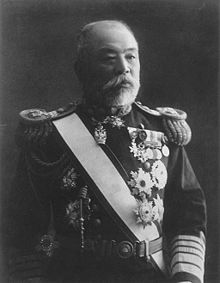
220px-Dewa_Shigeto.jpg

Rear Admiral Dewa Shigero would go into to become a national hero for many years to come.

With British power now entering the sphere, there was nothing the Russians could do to prevent an Anglo-Japanese domination of the Pacific. They turned instead to their offensives in Afghanistan and Korea, hoping that a victory on land might bring both London and Tokyo to the negotiating table. Meanwhile, their allies in France too struggled at sea in the Mediterranean and Atlantic whilst the British rushed to bring their massive naval might to bear. As fighting began in Africa as well, the Short War had burst into a - short lived - struggle.
 
BOOM WE'RE BACK - Sorry for the collosal delay but I'm back at uni so there's a lot less time! Hopefully get at least 3 updates out a week still and we should get through the Short War within the next two weeks, then the exciting times of the 19th century really kick into gear!
 
X - All Along Those Quiet Shores

Chapter Ten
All Along Those Quiet Shores


Extract from: Film and Visio - Issue 342 - November 2014

By: Stan Dinkelidge
Fighting along the Congo River is perhaps the most well-known conflict of the Short War but, surprisingly was one of the least brutal. Whilst the Afghan Front and the brief but bloody Invasion of Dainam actually saw greater casualties on both sides, in all the great depictions of the war it is the Congo that captures the imagination. Bridge over the River Congo, Hearts of Darkness, Where the Wildmen Are, His Majesty’s Jungle Riders, Winston’s Heros, the list of books, films and visioshows based on the conflict are seemingly endless. The majority of these are British accounts which, unsurprisingly, gloss over the litany of early French victories. Whilst the British had naval superiority throughout the conflict, the French actually began the conflict with a larger and better-armed force in the region. Attempting a more realistic depiction of the difficulties both sides faced in the conflict, the director of Once More Into the Breach, Land of Glory and Land of Hope comes a prequel to his riveting Churchill Saga that, in a risky move, changes the perspective to an entirely new character.

Michael Scott’s latest production, “All Along Those Quiet Shores” takes the perspective, interestingly, of a local tribesman, Muteba, who, through a series of confusing events, fights on both sides of the conflict. Muteba starts as a follower on of the British as his tribe, the fictional Olomede, throw their weight behind Churchill’s Army following their victory at the Battle of Fort Leopold. Indeed, the chilling opening scene of the brutal and bloody siege is one of the most immediate eye catchers. The opening looks at the French assault from the eyes of a doomed and unnamed French Sergeant whose futile charge through the British trench carries us, in slow motion, through the horrors of that first battle. As the Sergeant loses more and more troops, the camera goes more erratic, the sound more dulled and the action ever slower until his eventual death on the sword of a dismounted British cavalryman. The beautiful but chilling shot of the Sergeant slouching into the Englishman’s embrace with the setting African sun silhouetting them is one of the most striking in cinematic history. Historically the film sticks to the facts; this first battle unfolds at first in the favour of the French as they breach the British walls but thanks to Churchill’s predisposition for guerrilla fighting and his cunning use of hidden dynamite, the French are shattered and routed. One minor historical inaccuracy is the British use of Lee-Metford rifles which, whilst in use at home and in the later African deployments, had not yet reached the British Congolese Forces.


Once the action moves to Muteba, the film deviates from the traditional British War-Movie tropes to explore the oft forgotten lives of civilians and support troops as Mateba signs up alongside Churchill and eventually rises to be his chief native advisor. The relationship between Churchill and Mateba has been accused of whitewashing the racism of the British commander but indeed whilst Churchill was extremely dismissive and prejudiced against Africans resistant to British rule, by all accounts he treated ‘loyalists’ well. Following Churchill’s move into the jungle as the larger French Army of the Congo approaches and the turning of the British to spottier raids and harassing French supply lines, Muteba begins integrating local tactics into the British doctrine. An early setback at the Battle of Fort Nord sees the British reeling and losing any and all positions on the river east of Fort Leopold. Over the next two weeks Churchill is met with increasing success in harrying the French as they move down the Congo, slowly turning the tide and desperately holding off the French until reinforcements can arrive. Their numbers bleeding, the French begin to torch local villages and eventually capture Muteba. With this victory, French domination of the region seems at least temporarily assured and the film takes a very dark turn. His brief stint as a French ammo carrier, working alongside some of his old captured tribesmen is on the the most chilling depictions of African imperialism ever put on screen as Muteba is beaten, whipped and starved into brutal work, at one point even being forced to pull the French guns like a packhorse. The cinematography here is beautiful as the colour drains the longer Muteba lies in captivity, the final scene of his escape takes place entirely in black and white with only blood highlighted in pure red. As Muteba breaks out of the jungle and reaches the Africa coast, a bright red-white-and-blue flag covers half the screen as he runs into the HMS Outrageous and the arrival of British reinforcements. The film's final note is one of hope as the British, having held off French assault for over a month, now see their numbers increased six-fold as the war begins to swing in their favour.

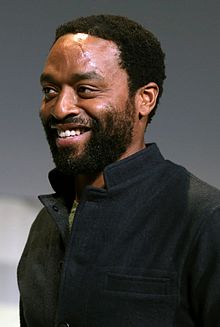
220px-Chiwetel_Ejiofor_by_Gage_Skidmore.jpg

Ejiofor's Muteba keeps the film human and is a delight to watch during the scenes of victory whilst chilling you to your core during the torturous "Slave" segment.
The film is spectacular and the performance from Arinze Ejiofor as Muteba compliments well the colourful return of Richard Cox into his seminal and career-defining role as young Churchill. Whilst the film does have a few inaccuracies, it does do justice to the first half of the Short War in Africa; initial British victory soon turning into a gruelling guerrilla melee before the arrival of reinforcements that effectively settle the war in Britain’s favour.


With stellar performances, beautiful direction and a nice, wholesome lump of historical accuracy, All Along These Quiet Shores wins an impressive 9.5/10. It’ll be a real contender for both the CAFTAs and the Filmies with nominations for Best Film, Best Direction, Best Cinematography and, of course, Best Overall Performance.
 
Indeed, the chilling opening scene of the brutal and bloody siege is one of the most immediate eye catchers. The opening looks at the French assault from the eyes of a doomed and unnamed French Sergeant whose futile charge through the British trench carries us, in slow motion, through the horrors of that first battle. As the Sergeant loses more and more troops, the camera goes more erratic, the sound more dulled and the action ever slower until his eventual death on the sword of a dismounted British cavalryman. The beautiful but chilling shot of the Sergeant slouching into the Englishman’s embrace with the setting African sun silhouetting them is one of the most striking in cinematic history.

Reminds me of the final charge in Gallipoli.
 
Nice way to tell the story through showing how it was told through the medium of film. Gives an insight into events and their effects after their time in history. Short-term victories by the alliance followed by the British using their resources to great effect appears to be the general thread here.
 
XI - Heart of Oak
Chapter Eleven
Heart of Oak


Extract from: Essay #7 TT19, Britain's Short War at Sea
By: Arthur E Johnson, Marked by Prof Langely


There is a general consensus on the Short War; Entente preparedness allowed for early victories on every front as the larger armies of the French and Russian Empires plunged themselves into combat and caught the Pacific Alliance (WRONG - term used out of context, now it's just the Anglo-Japanese Alliance or “Allies”, the PA comes later) largely by surprise. The British Royal Navy was the most powerful naval force at the time and in Europe and the Atlantic, this was immediately apparent (good). The French Navy was, of course, reluctant to engage at sea at all; the Royal Navy was the undisputed world power and outnumbered not only the French but the combined navies of the Entente. Indeed, since 1889 Britain had operated on an official “Two-and-a-half power policy” (correct but try and include the real name of the Naval Power Bill) in which they were to be as powerful navally as the next two powered combined whilst holding the ability to engage a third. A series of dramatic and ambitious shipbuilding plans had been undertaken in the 1880s and 1890s and indeed just one year before the start of the Short War, the government had commissioned several new ships for construction but of course, none of these were yet ready for deployment. Nevertheless a general souring of Anglo-European relations in the 1880s and a mounting fear of particularly the French meant that whilst the Army and the Empire as a whole was quite unprepared for the conflict, the Navy was ready.

britishfleet1914.jpg

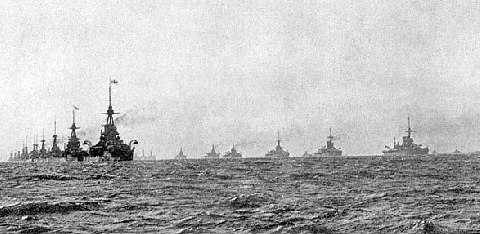
The Royal Navy's Britannia Squadron in 1901

In the open Atlantic, the French immediately abandoned any hope and in the Pacific their colonies and ports went into lockdown. The French Navy had two priorities; hamper the British in the North Atlantic in order to slow the spread of the Royal Navy and to contain the Royal Navy in the Mediterranean and keep supplies flowing between France and North Africa. On both of these fronts, they failed. The Battle of the Channel Islands was an utter disaster for the French Navy. (Probably true but still be careful with platitudes) Operating on old and dubious intelligence, the French believed the British to be in the middle of a major naval shakeup - true - and therefore disorganised in their movements - untrue. Attacking what they believed was a small portion of the recently designated “Britannia Squadron” they were in fact sailing towards the combined might of both of Britain’s Home Fleets, “Britannia Squadron” - which was based out of Portsmouth and served for the protection of the Home Isles and the North Sea - and “Atlantic Squadron” - based in Plymouth. Vice-Admiral Arthur Wilson led the combined British force which composed more than 100 ships: 19 battleships, 29 large cruisers, 23 small cruisers and 61 screens. The French meanwhile mounted the pitiful (??? They're still a big fleet, remember that they had parity in the Med) number of 8 battleships, 31 cruisers and 40 screens. Both fleets were amalgams of their respective nation’s various Atlantic divisions and both were larger than almost any other battle-fleet ever put to sea.

You neglected to mention the battle of the Mediterannian at all but overall its pretty solid and very well written in parts, just needs more work and sharpening up. 2.1


Extract from: Heart of Oak: The Autobiography of an Imperial High Admiral
By: Arthur Wilson


I do regret what casualties we sustained, of course, however one must take such deaths in one's stride. When Empire and nation is at stake, what are the lives of a few hundred Britons? The Battle of the Channel Islands is oft remembered as a smashing success and indeed it is to be my legacy. The French were doomed from the start, they set upon us with poor knowledge and under false pretences. I like to think that the men and officers performed well, both in setting up the trap and executing it. The tally at the end of it was more even than it might have been but nevertheless a smashing success. They fired on the first ships they could see in range, the Raleigh and the Mars (which had been put to see but months before) and sank the former. The later meanwhile immediately responded and, with a lucky shot sunk the Redoubtable with a blasted magazine. It was the sinking of this ship, a symbol of French engineering and pride, with such ease that set the pace and tone of the battle.

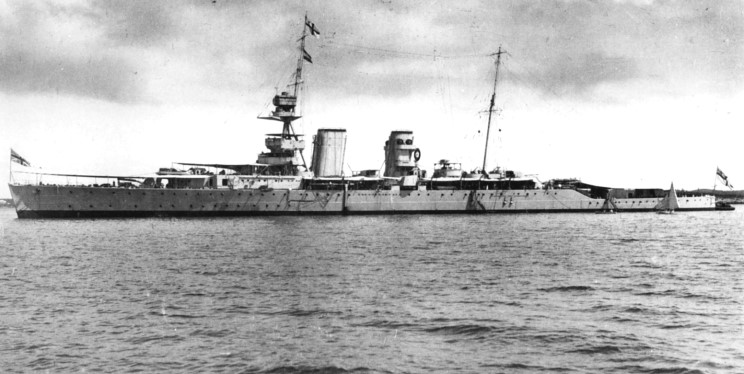
raleigh_unk_a.jpg

HMS Repulse, flagship of the greatest fleet of the Royal Navy

Aboard the Repulse I saw the battle from its head and was lucky, perhaps, to stay afloat when the Raleigh, Inconstant, Revenge and India all were lost. Alongside them were a great many of our cruisers I am afraid to say; 19 in total if memory serves and then only 11 of our screens. The French, however, were shattered, one battleship escaped alongside two cruisers and a handful of the destroyers. That was a good day for myself and for the country. In truth, however, the battle did not settle the war; it simply reasserted Britain’s dominance of the Atlantic, which had never been in doubt. It was in more southerly waters that the war would be decided.
 
Sorry for the massive delay and short update, busy busy busy! I hope to get one more up tonight and another later in the week, hopefully back to 3 or more a week from now on! :D

Nice way to tell the story through showing how it was told through the medium of film. Gives an insight into events and their effects after their time in history. Short-term victories by the alliance followed by the British using their resources to great effect appears to be the general thread here.

Glad you like it, I enjoy mixing it up and playing with perspectives of the past.
Also yeah thats the trend in general; France and Russia are more prepared for the conflict as Britain still consider themselves isolationist and Japan are still small but honestly the British have much more power, at sea at least, that can be brought to bear.

Don't really have to much to contribute other than to say nicely done and keep up the good writing.
This is the good stuff

Thank you very much! I'll endeavour to keep it up.
 
I find this essay thing amusing,

Aha thanks, I like to go for less conventional formats :)

Its been too long again! I am bad at this!
To make up for it, here's some maps: War aims for each alliance and then the state of the war atm:
(Mild spoilers for the next update, which will be up tonight, promise)

Entente Aims:

5CRmYj3.png


Alliance Aims:

mlLDBj5.png


Current State of the War:

qUbdjkM.png
 
XII - Battle for the Orient
Chapter Thirteen
Battle for the Orient
Extract from: The Imperial Wars: 1650-1919
By: Gregory Mann, Warwick University Press, Published 1999


The Short War in Asia had three fronts; Afghanistan where the Russians and British finished the Great Game, in Manchuria where St Petersburg and Tokyo clashed over Chinese territory and
Dainam where Australasian troops saw combat for the first time as an independent country. Each of these fronts was unique and complicated but this essay will attempt a brief outline of all three.


I. Dainam


The French colony of Cochinchina was an attempt to expand the fledgeling Empire eastwards; whilst the British had India and the Dutch Indonesia, France found herself increasingly relegated to Africa alone. In the 1870s and 1880s however, she wrestled Indochina from Chinese influence and planted the tricolour firmly in the Pacific.

Despite the pride brought by the new colony, its position was incredibly vulnerable from the start. The Pacific, Indian and Atlantic ocean were all dominated by the British and their cronies in Australasia and Canada. Supplies and even information from the mainland took a great deal of time to reach the east whilst the British had considered options for some time. The newly founded Australasian Army Corps was free of the commitments that bound British comrades to the African front whilst the Siamese, who had attempted to walk the line between British and French for the last few decades, threw their own strength behind the Empire they thought unbeatable. In truth, French Indochina could never have resisted the overwhelming strength of the Allies. Understaffed and facing local rebellion, the French were beset first from the sea as three Australasian Divisions landed but a few miles south of Saigon in the city of Vung Tau on the 23rd of July 1894. and began their march north, and from land as the Siamese, their army of 100,000 outnumbered the French Garrison 10 to 1.

anemf.jpg

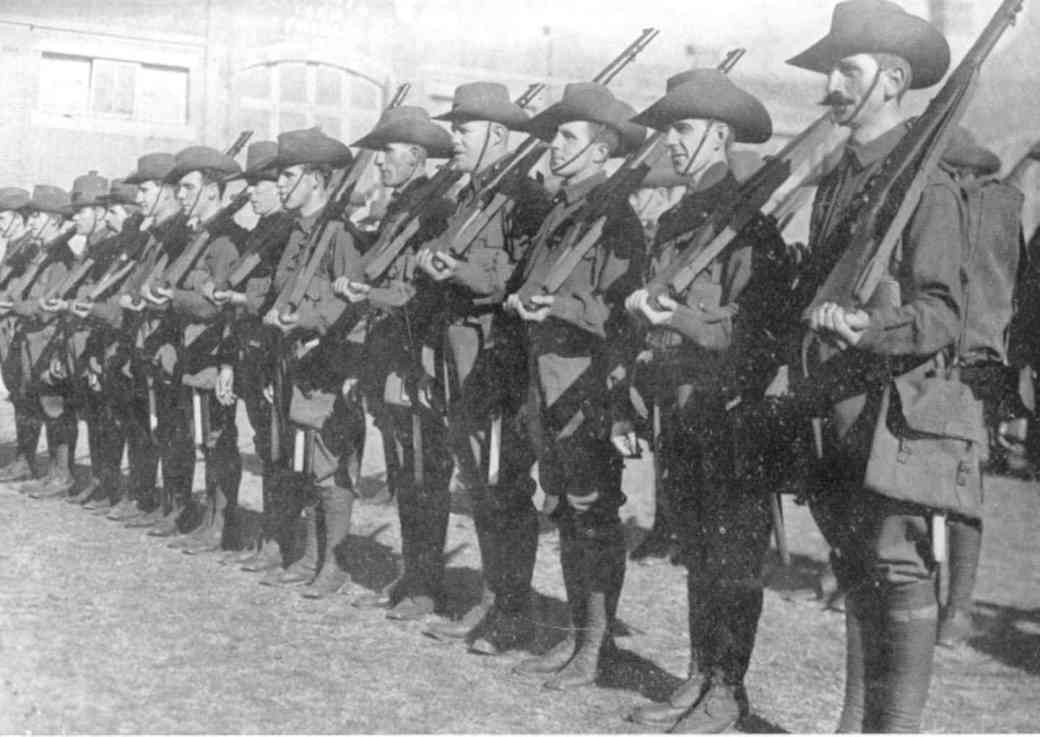
The Australasians (and a minute amount of their Westralian counterparts) made a name for themselves in the Short War and with their distinctive headgear and laid back mannerisms, developed a reputation as relaxed, stylish figures that raised their global image enormously.

Marching north at a rapid pace, the Australasians encountered a French Army. The majority of the French force had been based on Saigon; some 6000 men outnumbered by the Australians by nearly 3000. The odds were against them but the French nevertheless put up a stiff fight. The dirt roads of Indochina were underdeveloped and whilst the main clash occurred along the road to the Saigon, fighting continued in the jungles where it was brutal and
confused. Neither the French nor the Australasians gained a clear victory in this jungle periphery as both were entirely unprepared for the environment. The centre of the battle was decided quickly however as the French were working largely on the nearly two-decade old equipment that Dainam had been occupied with whilst the AAC were armed with the relatively new Lee-Metford. The French were nested within a few hours and fell back, largely scattered. Saigon fell on the 1st of August, but 2 weeks after the Australasians landed. The Siamese occupation of the North would take longer but by the end of the month the French had been entirely vanquished. Perhaps one of the least interesting theatres of the conflict, it has never the less been an essential part of Australiasian history and indentity as for the first time as a united people, they fought and overcame a foe.


II. Korea and Manchuria


Korea and China have developed something of a reputation for having poor historical luck and indeed this manifested itself most openly during the Short War. The Japanese, who had recently established authority over Korea had lost out on influence over both Manchuria and the coastal port of Port Arthur as the Russians leptin to counter rising Japanese influence in the region. The tension this created, barely six years before the Short War began, led the two nations to the brink of war. Now the Russians outnumbered the Japanese in the region but not by a significant amount. The Russian garrison guarded the railway under construction between Port Arthur and Vladivostok and found themselves largely split between the two areas, with roughly 50,000 men at each end. The Japanese meanwhile only had about 40,000 men total deployed in Korea. This might imply an unfair balance of power but a) the Japanese were much closer to Manchuria and so could send and receive information and reinforcements at a much, much greater rate than the Russians. Particularly after the defeat of the Russians at sea in mid June, the Japanese held naval dominance that allowed them to pummel Port Arthur and other coastal enclaves.

By the 1st of August, the Japanese had moved on both land and sea to put Port Arthur to siege. The initial garrison of 40,000 men reinforced by a further 30,000 men of the Japanese Army as well as ~15,000 Marines, both British and Japanese. Port Arthur fell surprisingly quickly and the Battle of Port Arthur barely lasted more than a day. Again, the Russians had only held the city for some 6 years and whilst rudimentary fortifications had been established the main Fortress was still little more than a base foundation. The Japanese took the city on the 3rd and proudly renamed it Ryojun. From here the Japanese swung their main force east as their navy and that of the British headed to Vladivostok to continue their shelling of Russian ports. Meanwhile it seemed that neither the Russians nor the Japanese were comfortable making any large advances; the Russians were more confident when it came to stomping around in Manchuria but were unwilling to make their way southwards over the Japanese line. The Japanese too, having secured their main targetted, did not want to risk an advance northwards for fear of being crushed by a larger Russian force. Border skirmishes occurred daily but the casualty rates rarely broke into the thousands. A front that could have been colossal ended up as quite a static one as the caution of two Empires with more southerly priorities led to a somewhat dull front.


Assaut-Kin-Tch%C3%A9ou.jpg

The Japanese Assault on Port Arthur was brutal and short but resulted in the first major bloody nose a European Empire had been handed on land by an East Asian state in a century.


III. Afghanistan


The First Great Game played out over more than a century and forever pivoted around control of Afghanistan and Central Asia. The Short War is, in the opinions of most scholars, the event that settled this decisively...


Extract from: Great Battles of Asia 1890-1990
By: Frederique Dumas, Leon University Press, 2019, Translation published 2021


Russia had, in a rare show of preparedness, been building up her forces in the Central Asian theatre for some time. The British, particularly post-Sepoy Rebellion,
leaned on the Indian Army for the defence of their South Asian colonies but under the leadership of Nicholas II (and truly thanks to the influence of Stolypin) had been steadily but silently preparing their forces in the region. It is important to understand that, whilst to the British and French the Short War was an unexpected and standard colonial conflict, to Stolypin’s Russia it was a chance to reset the scale. Russia had been on the backfoot for nearly a century and Russia’s increasingly powerful Prime Minister saw the clash between the British and French as an opportunity, a chance for Russia to redefine her position in the world. Whilst unprepared for the Japanese onslaught (Stolypin and most others in Russia considered them to be an incredibly backward people and not capable of a victory at sea, nevermind at Port Arthur) they were prepared for an assault against the British.

Afghanistan was not, truly, a British protectorate. Moreover they were British aligned by sheer necessity. The strength of British India and the even less appealing idea of Russian domination pushed them into the London camp. The Russians hoped that, with a quick, decisive push into Afghanistan they would meet with little resistance and, by threatening British India achieve a negotiated victory. Stolypin knew that the war was not one that either the British or French needed but gambled (perhaps correctly) that a quick win over the British and their Japanese allies would not only allow for a renegotiation of their nation’s borders but for a propaganda win of epic proportions. Slap down the upstart Japanese, kick back the British and prove that the Russian bear still has claws. Whilst the British began to turn the tide in Africa, Stolypin was finally ready to put his plan into action by early August and, crossing over the border on the 4th, Russian troops entered Afghanistan. Making a bee-line toward the capital of Kabul, Stolypin (and of course the Tsar) hoped to secure the capitulation of the Afghans and the frightening of the British.

Abdur_rahman.jpg

Adbur Rahman Khan, Emir of Afghanistan, was pragmatically Anglo-phillic and backed the efforts of the Alliance out of a belief that should they win Afghanistan would remain largely free whilst, with a Russian victory, he would be deposed or made into a powerless puppet. History proved him right in this assesment.

Almost immediately, the Russians were beset with problems. The paths were small, slow and very poorly maintained and the march was long. Russian supply chains were hit by Afghan skirmishers regularly and it seemed, despite their mutual dislike of the British, that the Afghans were sufficiently offended by the Russian incursion to throw their weight fully behind the Alliance. The Russians were
harried as they marched south but met with very little resistance. Indeed, the British only learned of the invasion on the 8th of August, by which point most of British High Command believed a negotiated peace to be soon at hand. A scramble was immediately entered to deploy the Indian Army ASAP. 100,000 Russians had entered Afghanistan and the British command of Bombay stood at 12,000 above that number. Movement was immensely slow but by the 20th the Indian Army had also entered Afghanistan, traveling north along the more well maintained (and partially british funded) roads of South Afghanistan. Meanwhile, the Russians had been marching slowly South. Both nations knew that this battle could be entirely decisive; should the Russians be knocked out in Afghanistan then not only would the mounting defeats in Africa and Manchuria be followed up with another but the British would a) have free reign to invade Turkestan and b) have the freedom to deploy more soldiers east and aid the Japanese in attacking the Russian Far East. Should the Russians win in Afghanistan and march into India however, the British did not believe they could count on the loyalty of either the Indian people or the Princely States and the defection of even one Indian Prince could send ripples through the Raj that could end in disaster. India lost was the Empire lost and with no Empire, Britain would have lost the war. These fears were probably entirely unfounded but the Liberal government was full of men old enough to remember the Sepoy Revolt and represented a King who, it is now known, favoured peace and stability and made this opinion quite clear to Gladstone.

30300-004-16C80900.jpg

Brusilov was the pride of the Russian High Command and, despite his comparative inexperience, was the apple of Stolypin's eye for his innovative style and boldness on the field.

The Russians had not reached Kabul but, finding their progress increasing slowed, occupied the city of Nili on the 18th and set it up as a base of
forward operations. They had barely began their march south when the Indian Army encountered them at Chora. The Battle of Chora lasted a week and was perhaps the bloodiest in the entire war. The Russian Army was led by the indomitable Aleksei Brusilov, a dynamic and skilled man that, when compared to the British Horatio Kitchener, was practically a genius of modern skill. Brusilov, who’s vigilant forward deployment of scouts warned him of the advancing British two days in advance, allowed him to prepare a complex battle plan revolving around a large, hastily assembled defensive line on the outskirts of Chora whilst a small contingent of around 11,000 marched around the South-East to strike the British and push them northwards, where they might be isolated from their supplies and persuaded to surrender. Kitchener meanwhile opted for a traditional assault; strike the Russians head on whilst the Afghan Army harried them from the sides and what few Afghani skirmishers could be deployed hit them and specifically their artillery from behind to cause chaos. Military historians almost universally rank Brusilovsky plan as better but the Russians were at a severe disadvantage with much longer supply chains, which were being stretched thin through hostile territory, and less local guidance. The Battle was always going to be close but the stakes were higher for the Russians; the British could easily withdraw south to Kabul or even over the border into India, whereas the Russians had a much longer march back to friendly territory and could be harried along the way. It is of little surprise then that, with more than 20,000 deaths on either side...
 
Top