The Battle at Dawn: The first battle between the United States and Japan December 7-10, 1941

Status
Not open for further replies.
Steaming toward Battle Midway Part 1 December 9 1941
  • December 9 1941 Steaming toward Battle

    Kido Butai (First Air Fleet) (Striking Force)
    Carriers Akagi, Kaga, Soryu, Hiryu, Shokaku, Zuikaku, battleships Hiei Haruna, Kongo, Kirishima, CA Tone (fleet flag: Yamamoto), , Chikuma, CL Abukuma, 14 destroyers, 12 fleet oilers,

    detached
    Refueling Group 1 – 3 oilers, 1 destroyer (en route to Japan after refueling fleet on December 6)
    Refueling Group 2 – 5 oilers, 3 destroyers, CV Zuikaku (en route to Japan after refueling December 8)
    Refueling Group 3 – 2 oilers, 1 destroyer (with Midway Invasion Force)
    Refueling Group 4 – 2 oilers, 2 destroyers (off Marcus Island)

    Midway Island Assault Force
    CA Aoba, Furutaka, Kako, Kinugasa, 4 destroyers, 2 gunboats, 6 submarine chasers, 1 seaplane tender, 2 tenders, 9 transports, South Sea Force (4,886 troops)
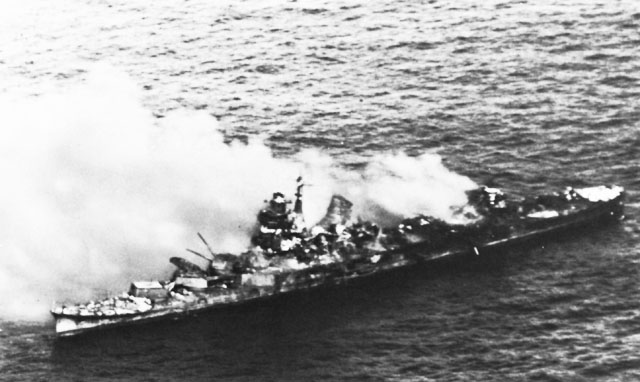

    losses: CVL Soryu,
    aircraft losses: 203 aircraft all causes

    The Japanese strike force left Japan with 459 aircraft (including spares). With only four available flight decks and serious losses among all squadrons, Admiral Yamaguchi orders a reorganization while the fleet is refueling on December 8. The Fleet has 111 fighters, 91 dive bombers and 88 torpedo bombers remaining. Each carrier is assigned 27 fighters, with 3 flown off to the Zuikaku to provide it with minimal defense. The Akagi, Kaga and Shokaku each are assigned 27 dive bombers with 10 assigned to the Hiryu. The Hiryu also gets 12 torpedo bombers, while the 27 each are assigned to the Akagi, Kaga and Shokaku, and 8 are sent with the Zuikaku to provide it with search and submarine patrol capability.

    Also available are 12 Jake float planes aboard the Tone and Chikuma, while the battleships each carry 2 Pete float planes. However heavy seas and the high speed of the Japanese movements prevent the use of any of the float planes after noon on the 7th, as the Fleet cannot afford the time needed to recover them if launched.

    Steaming to Battle
    Night December 8/9
    The Japanese forces steam at their best speed during the night. At 0700 hours 450 miles west steaming at 15 knots and is zig-zagging as the likelihood of American submarines has increased as they approach Midway. However the Striking Force runs into a severe storm during the night and is forced to slow to 12 knots and move off its track to the south to avoid the worst of it. While this prevents it from having to zig-zag to avoid any possible American submarines, it also delays the Japanese substantially. As dawn breaks on December 9 the Japanese Striking Force is still 500 miles from Midway, and still almost 1,000 miles away from the Invasion Force it is supposed to cover.

    Although the seas are no longer running nearly as heavy by dawn, and the rain has ended, flight operations are still delayed for nearly 3 hours by still heavy seas and a low overcast. Yamamoto is able to order his fleet to return to 27 knots by 1000 hours, but including the need to zig-zag, the fleet is still 25 hours from where it is supposed to be and will be nearly 18 hours late. With little choice, Yamamoto orders a radio signal be sent to the Invasion Fleet to relay this vital information. The Invasion Force recieves the message and adding a blunder to the unavoidable, signals receipt. With zig-zagging the Japanese Invasion Force is 40 hours from Midway as of 0700 hours.

    Midway Island picks up the two signals and immediately alerts Halsey. Unwilling to expose his fleet to possible discovery by radio intercept but with a need to have access to communications, he passes command over to Admiral Brown and he and his chief of staff Miles Browning fly over to Midway aboard a SBD. There not only does he have access to radio without danger of exposing his position (as the Japanese obviously know where Midway is), he also has access to the cable connecting Midway to Oahu. As acting commander of the Pacific Fleet (as senior officer left) he know does not have any longer has the luxury of being out of communication from Washington and the rest of the Pacific Fleet. He also for the first time is able to get a comprehensive report of the situation at Pearl Harbor and he issues several orders:

    Task Force 1 is loading what Marines can be spared from the defense battalions at Oahu (2 machine gun companies), and is to begin steaming toward Midway at 1200 hours making best speed (18 knots) to Midway as planned to land reinforcements, spares, and ammunition. But at that speed and with the need to take evasive action against the submarine threat it is nearly a week away. Halsey decides that the issue will be decided in by then and orders Task Force 1 to remain at Pearl Harbor for now. The exception are the cruisers Helena and Phoenix, which are to leave port at 0900 hours and make a high speed run to link up with Brown by the morning of the 10th (30 knots can cover 1200 miles in 24 hours if they don't take evasive action, they will be going somewhat faster than that). While it is a risk for the cruisers, Halsey deems it a necessary one. Both cruisers with their duel purpose 5 inch /38s are considered vital for protecting the carriers with their anti aircraft guns.

    Task Force 2 (the Scouting Force) will move to a position 100 miles southeast of Midway allowing it to remain close enough to support Midway. Once in position, 3 squadrons of Dauntless Scout Bombers plus the Marine Scout Bomber squadron of Vindicators will fly off to Midway and will be organized into a provisional air group commanded by Browning. A detachment from each carriers of fighters (4 Buffalos, 8 Wildcats) will move to Midway as well. In effect Midway is being used as a shield and a forward patrol base.

    The float planes at French Frigate Shoals, as well as the destroyer seaplane tenders Swan and Avocet, as well as the destroyer minesweeper Breese will steam at their best speed to Midway to support the float planes (12 in all) which with the dive bombers will allow a very dense search pattern out to 250 miles, while the 12 PBYs will conduct long range searches out to 500 miles in the direction of the radio signals to the west and northeast.

    Patrol Wing 1 will send 16 PBYs to French Frigate Shoals, where they will meet with the seaplane tender Wright. They will conduct long range patrols to the north and northwest to find the enemy.

    Halsey also receives orders to not unduly risk the fleet straight from Admiral Stark, who is already digesting the losses suffered so far. Aircraft and aircrew can be risked, but avoiding unnecessary loses it important as well. However, Hawaii must be held, even if it costs what remains of the Pacific Fleet, and Midway is the outer redoubt of Hawaii. In an exchange of communiques Stark grants Halsey permission to defend Midway, but he is ordered to preserve the Fleet if it comes to a choice.

    The Battle of Midway - 1st Day (December 9, 1941)
    At 1000 hours, a PBY from Midway spots the Japanese Midway Assault Force 400 miles west of Midway. Working out the math, the Japanese will barely be within strike range by dusk, even if Brown moves his fleet and any strike will have to return in the dark. At their present speed the Japanese will reach Midway sometime on the 10th. Meanwhile the Japanese carriers finally launch their scouts at 1000 hours, using 40 Kates flying in pairs for that mission as slowing to recover float planes will slow the fleet.

    Meanwhile in the morning hours PBYs arrive from Hawaii at French Frigate Shoals and are refueled. They have orders to begin a search as soon as visibility permits on the 10th.

    A pair of Japanese scouts flies over Midway at 1300 hours and reports a large number of single-engined aircraft at the airfield, large numbers of seaplanes and flying boats, and several warships. However the one operational radar set on the island had picked up the Japanese Scouts, and flight of 4 Buffalo fighter bounces them, shooting one down almost immediately and heavily damaging the other which crashes on the way back to its carrier. This also makes it clear that the Japanese carriers are at least within search range, and a pair of PBYs are sent a signal to look for them.

    At 1454 hours, the PBYs both spot the Japanese Carrier Force, 383 miles from Midway on a course that will take them 100 miles to the west of it. This is the first confirmation that the Japanese fleet has been reduced to four carriers, confirming that two have been sunk or forced to retire. This force too is beyond air strike range and likely to remain that way past darkness.

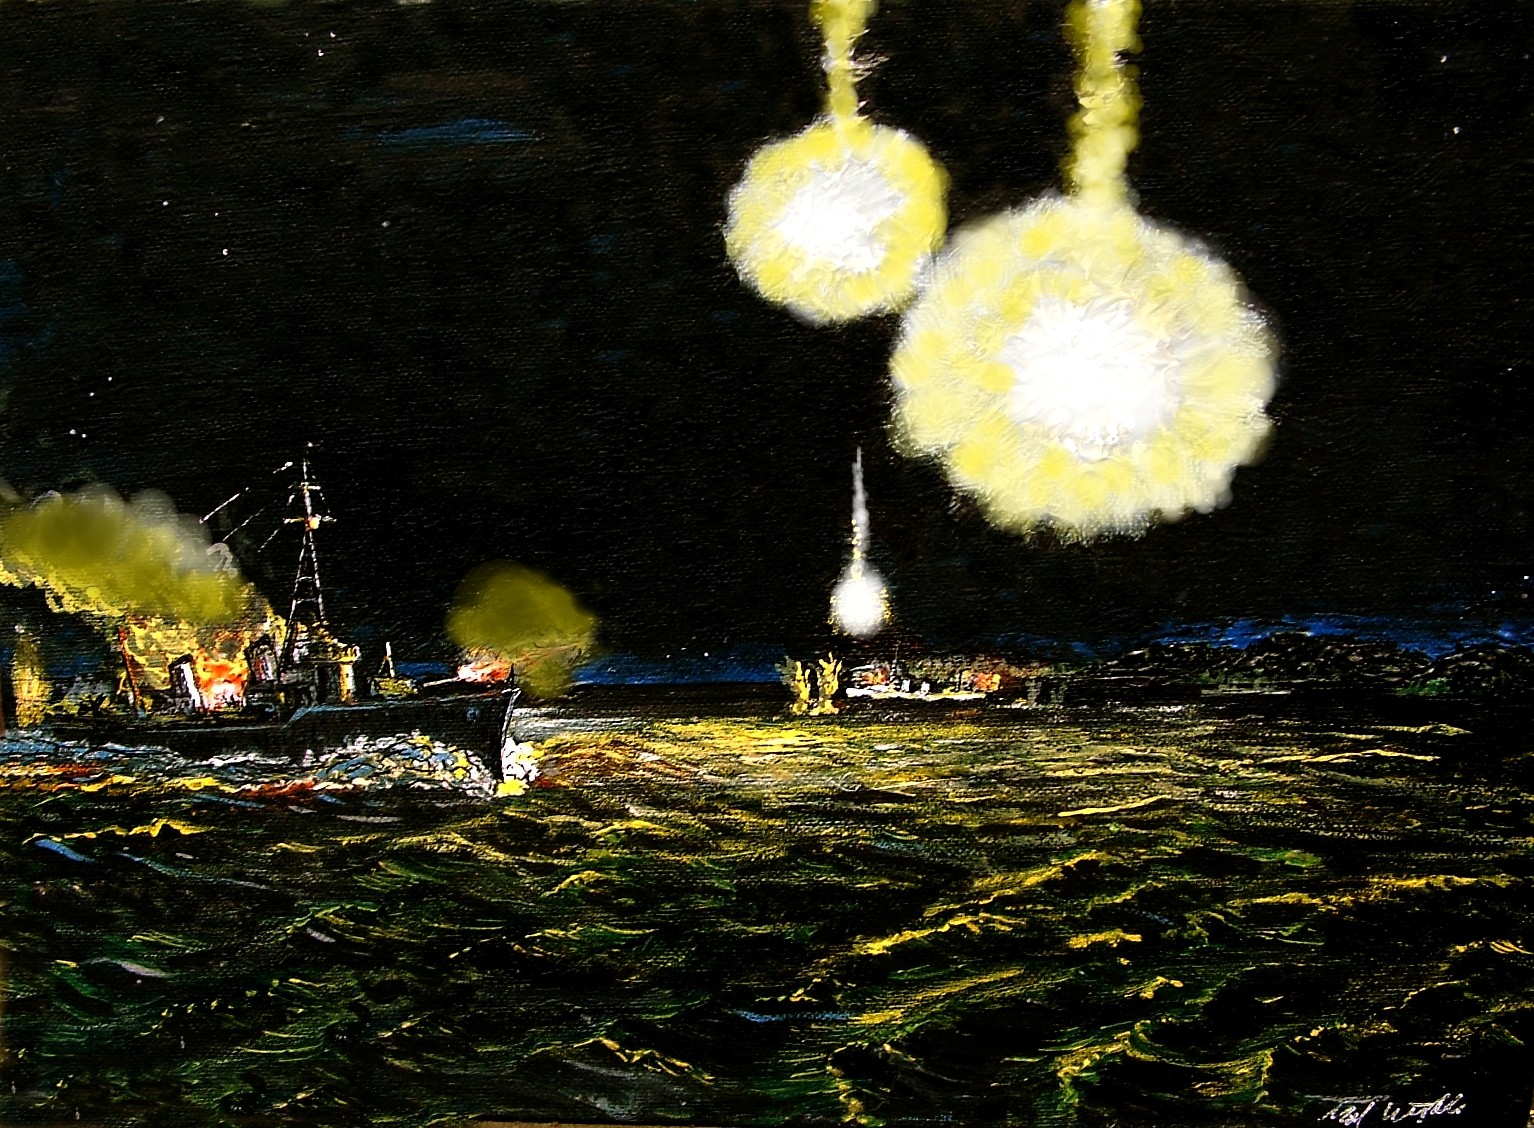
    Meanwhile, at 1500 hours, aware that he has been spotted, Yamamoto orders the 4 cruisers of the 6th Cruiser Division (Aoba, Kinugasa, Kako, Furataka, Rear Admiral Goto commanding) with a pair of destroyers to proceed at full speed to Midway Island and under cover of darkness shell the airfield until it is neutralized and high explosive ammunition is exhausted. By morning the Carriers should be within range to provide air cover in case the American carriers are nearby and thus they should be able to withdrawal without undue risk. At 33 knots there is little fear of submarine attack, and what risk there is deemed acceptable. At this speed the Japanese cruisers will arrive offshore at 0200 hours December 10.

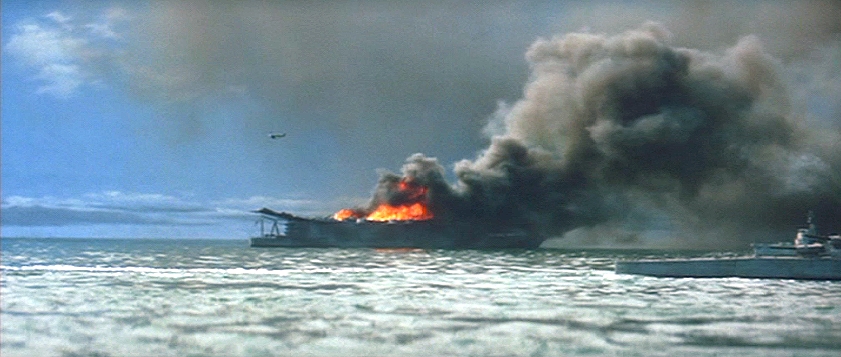
    At 1800, a pair of Dauntless Dive Bombers from VB2 spots the Japanese cruisers 245 miles west of Midway steaming at high speed straight for the island. A warning is sent to Halsey. Both make attacks but miss while Japanese flak inflicts little damage to the American aircraft.

    By the time the message reaches him, it is 0610 hours and it will be night within 20 minutes. A hurried scramble is out of the question as is a hurried attack. There is only one option available. A force of surface warships will have to meet and engage the Japanese and prevent them from shelling the airfield.

    At 1830 hours, instructions are sent to Brown and Rear Admiral Raymond John H Newton to form a surface task force consisting of 5 cruisers and for Newton to take this force, along with 8 destroyers to meet the Japanese force. The remaining ships under Brown's command will form one task force and steam to a position 100 miles south of Midway which puts them within range to hit Invasion Fleet directly on the 10th, and by staging out of Midway hit the Japanese carriers or potentially strike them directly. Brown (aboard the Indianapolis) detaches the Minneapolis and Astoria (Cruiser Division 6, Rear Admiral Fletcher aboard the Minneapolis) to reinforce Newton's Cruiser Division 4 (Chicago, Portland) as well as the Chester from Cruiser Division 5. Rear Admiral Raymond Spruance is appointed commander of the screening force for the carriers.

    Newton and his 13 ships form up by 1900 hours and steam at high speed (32 knots) to meet the enemy. His destroyers are deployed in an arc ahead of the Chicago (the flag ship) as only one of his ships (the Chicago) has radar and this will provide him a scouting force to spot the Japanese.

    Task Force 6 (Rear Admiral Newton aboard Chicago)
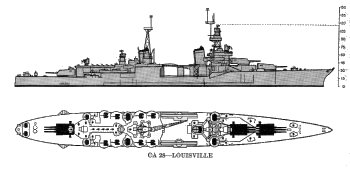
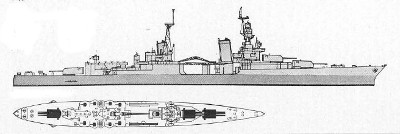
    Heavy Cruisers Chicago, Portland, Minneapolis,Astoria, Chester
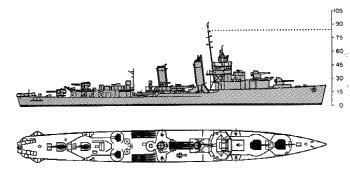
    Destroyers Farragut, Aylwin, Monaghan, Porter, Drayton, Flusser, Lamson, Mahan,


    Midway 1st Bombardment Force (Rear Admiral Goto)
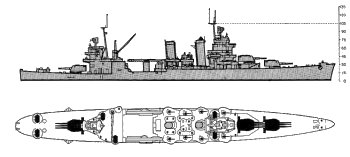
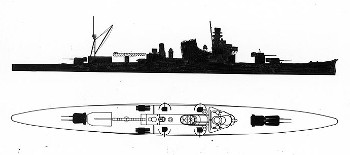
    Heavy cruisers Aoba, Kinugasha, Kako, Furataka
    destroyers Shigure, Yugure


    Yamamoto decides that a follow up bombardment will be conducted in the afternoon on December 10. He orders Mikawa to prepare a battle plan using his 4 battleships, 1 light cruiser, and 3 destroyers to finish off the American base or to engage any American surface forces in the area , while Yamaguchi is ordered to hit the island as soon as he can launch at first light with half his dive bombers and a third of his fighters. His torpedo planes will be held in reserve to deal with any American carriers that may be nearby, although 24 plus all of the available float planes will conduct a search at first light. The remainder of the dive bombers will also be held in reserve for an anti-shipping strike and one third of the fighters will cover the carries, and the remaining third will be split between covering the cruisers and Mikawa and the Invasion Fleet which is coming into range of a possible strike from Midway. The fleet will change course so that it is within 50 miles of the island as soon as practical on the 10th and that zig-zagging can be dispensed with after dark to cut down the steaming time.
     
    Last edited:
    Battle of Kure Atoll December 9 1941
  • Night action December 9, 1941 (part 1)

    15 miles east Kure Atoll (43 miles west of Midway)


    The Ships (US)
    The Americans are steaming with a line of 5 heavy cruisers (1,000 yards apart)
    In the lead is the Chicago, which has a CXAM radar, which can detect surface ships at a range of 14 miles.

    The Chicago is a Northhampton class heavy cruiser commissioned in 1931, and is flagship of Cruisers, Scouting Force, Pacific Fleet, as well as Cruiser Division 4. Aboard is Rear Admiral Newton who has limited experience with radar but is one of the few admirals in the US Navy with any experience at all. The Chicago (as well as the Chester) have the following details
    http://www.pwencycl.kgbudge.com/N/o/Northampton_class.htm
    Northampton_class__schematic.jpg


    all of the float planes from the cruisers are flown off with orders to fly to Midway Atoll (which with its bright white sand is easily visible in the dark)

    Next in line is the Portland http://www.pwencycl.kgbudge.com/P/o/Portland_class.htm


    which is a bit newer, and a bit better armored (authors note: Richardson had his cruisers get their 1.1 inch guns earlier than OTL, but the 20 mm guns have not yet been added (.50 caliber machine guns are in place instead)

    Portland_class__schematic.jpg


    Next in line is the Minneapolis, a New Orleans Class heavy cruiser (as is the Astoria) which are newer still. They are heavier armored than the other American cruisers present.
    http://www.pwencycl.kgbudge.com/N/e/New_Orleans_class.htm

    New_Orleans_class__schematic.jpg


    the cruisers are 1,000 yards apart in line ahead formation with the Chicago in the lead, followed by the Portland, Minneapolis, Astoria and Chester

    2,000 yards behind the cruisers is Destroyer Division 9 (Commander George Kriner), 4 Mahan class destroyers
    in line ahead, with 1,000 yards between them are the Drayton, Flusser, Lamson and Mahan)
    http://www.pwencycl.kgbudge.com/M/a/Mahan_class.htm

    Mahan_class__schematic.jpg


    ahead of the column, 2,000 yards ahead of the lead cruiser, and 2,000 yards to the starboard (right for you non sailors) is the destroyer Alywin (Destroyer Division 2, Commander Flynn commanding), and 2,000 yards off to her starboard is the destroyer Farragut. Their mission, as well as the Monaghan, which is 2,000 yards ahead and 2,000 yards to the port of the lead cruiser as well as the destroyer Porter which is 2,000 yards to the port of the Monaghan, is to illuminate the enemy fleet with starshells once it is discovered, as Newton is not certain of how effective his radar will be in providing early warning.

    the Alywin, Farragut and Monaghan are all Farragut class destroyers
    http://www.pwencycl.kgbudge.com/F/a/Farragut_class.htm

    Farragut_class__schematic.jpg


    The Porter is the only ship of her class present (and is the lead ship of her class)
    http://www.pwencycl.kgbudge.com/P/o/Porter_class.htm

    Porter_class__schematic.jpg


    In total the American force covers an area 12,000 yards across (the picket destroyers), and in all stretches over 14,500 yards from beginning to end
    (6 miles across by almost 8 miles in length) from beginning to end.

    The American force is steaming at 30 knots, on a course to the northwest which will encounter the Japanese force at just after 2205 Hours local time.

    Visibility: Lunar conditions Waxing Quarter Moon, sea state: 6 foot swells, with partly cloudy skies (40% cloud cover).

    (authors note: for those who have never been to sea, it is pretty damned dark)
     
    Battle of Kure Atoll (part 2)
  • Japanese Forces: Midway Bombardment Force (Cruiser Division 6 plus escorts)

    The Japanese force is steaming due west at 30 knots and is not expecting to run into any enemy forces as none of been spotted. The last report was of a pair of old 4 stack destroyers anchored off Midway (spotted by search aircraft in the late afternoon) and they are not expected to remain in the area.

    However, after the submarine attack on the 1st Air Fleet, and just in case the Americans are willing to fight with those old ships, Rear Admiral Goto has his two destroyers 5,000 yards ahead of his cruisers, with the Yugure south of the cruisers track at 2,000 yards (thus on his starboard side ahead) and the Shigure off to the north (thus port side) of the column.

    The Yugure is a Hatsuharu-class destroyer
    http://www.pwencycl.kgbudge.com/H/a/Hatsuharu_class.htm

    Hatsuharu_class.jpg


    The Shigure is a Shiratsuyu-class destroyer
    http://www.pwencycl.kgbudge.com/S/h/Shiratsuyu_class.htm
    Shiratsuyu_class.jpg


    in gun power the Japanese destroyers are markedly inferior to the American destroyers and indeed they carry about the same number of torpedoes. However they have far better weapons than the American torpedoes

    The four cruisers are 1,500 yards apart in a line ahead formation. They are the Japanese 6th Cruiser Division, with years of working together and have been under Admiral Goto's command for 4 months.

    In the lead (in the order indicated) are the Aoba and the Kinugasha, each are Aoba class heavy cruisers. This class is smaller than the American cruisers, have only 3 x 2 gun 8 inch turrets, but unlike the American cruisers carries 12 torpedoes.

    (authors note: the Pacific encyclopedia neglected this class, so using wikipedia for those interested in them)
    https://en.wikipedia.org/wiki/Japanese_cruiser_Aoba

    300px-AobaTrial.jpg


    next in line are the Furataka and Kako (in that order)

    Furutaka__class_schematic.jpg


    http://pwencycl.kgbudge.com/F/u/Furutaka_class.htm (number of 8 inch guns is incorrect)

    these ships are the smallest of the Japanese heavy cruisers, and the oldest but while having only 6 x 8 inch guns they carry 8 torpedoes.

    The Japanese force is steaming at 30 knots due west and expects to reach Midway around midnight. The cruisers have their aircraft aboard, and 1 Kawanishi E7K Alf floatplane on their catapults which they intend to launch once they are within 15 miles of Midway to drop flares and correct the ships bombardment of Midway.

    300px-Kawanishi_E7K_seaplane.jpg


    Goto has instructions to neutralize the American airfield and the aircraft located on it, and to avoid pointless engagements with shore batteries and thus is to remain out of range of the American 5'inch guns expected to be there.
     
    Battle of Kure Atoll Part 3 Opening Action
  • Night Battle of Kure Atoll

    Impending Battle
    2200 Hours 9 December, 1941
    The American warships are moving at high speed to engage the enemy with the expectation of attacking the Japanese squadron before it reaches Midway. The American crews are at their battle stations and have been for over an hour after having their supper and a brief rest before the night ahead.
    The Japanese are steaming at the same speed (30 Knots) with the expectation of beginning their bombardment around midnight. Crews are already preparing the cruiser float planes for launch, and the Japanese commanders are preparing to call their crews to general quarters within an hour. For now half of their crews are at their stations, the rest are resting as best they can as it is expected to be a long night.

    The Enemy is in Sight!
    2205 hours
    Radar operators aboard the Chicago spot 6 surface contacts at 12 miles from the Chicago (which puts them 11 miles from the American destroyers in the van). Admiral Newton is quickly alerted.

    2207 hours
    Newton gets on TBS (Talk Between Ships voice radio) and orders Commander Flynn and his four ships to proceed directly toward the enemy, close as per the battle plan hurriedly put together three hours before. This plan calls for Flynn and his destroyer division to close with the enemy and after illuminating the enemy column launch their torpedoes and turn west to get out of the line of fire. Meanwhile Newton orders a course change from its current heading of 315 degrees (northwest) to 290 degrees (north northwest) as he is hoping to cross the T of the approaching enemy.

    Aboard the Aoba a Japanese radio operator makes out what he thinks is a voice message but it is garbled. He attempts to locate the channel he heard it on better, intently listening for more.

    2210 hours
    On the Aoba, the Japanese communications officer is alerted that the radio is picking up what sounds like it could be voice chatter from somewhere close. Admiral Goto is alerted.

    2215 hours
    At this point the American destroyer Porter has accelerated to its full speed of 36 knots on a course heading 315 NW. The Japanese destroyer Yuguri is steaming at 30 knots on a heading of 90 W. The Porter is 10,000 yards from the Yuguri at a 1 o'clock position relative to the Japanese ship. The Monaghan is directly ahead of the Yuguri (12 o'clock position) at just over 12,000 yards.

    Aboard the Aoba, Admiral Goto decides that perhaps the American destroyers spotted earlier at Midway have come out to fight. He orders a signal of battle stations be sent by voice radio to his force with signal lamp to also be used to ensure that all ships receive the warning. The Aoba goes to general quarters.

    2216 hours
    aboard the Porter, American lookouts spot the signal lamp message from the Aoba to the Yuguri. Captain Overesch, commander Destroyer Squadron 5, and senior destroyer command tells Lieutenant Commander Entwistle to illuminate the ship that used its signal light. Meanwhile, at the 1 o'clock position relative to the Aoba, the Chicago is just over 16,000 yards away and the American cruiser column is about to cross the Japanese “T”.


    300px-USS_Porter_DD-356.jpg


    (authors note: A handy reference for compass points
    https://en.wikipedia.org/wiki/Points_of_the_compass
    also remember, for you non sailors, port is left, starboard is right, aft is the rear (as is the stern), and forward (as is the bow) is the front. I know most of you don't need me to tell you that, but putting it in there just in case)
    Talk Between Ships is low powered voice radio. For long range communications morse code is used (in the respective code for each Navy of course), and signal (Aldis) lamps are used at night. A star shell is basically a flare shot out of a cannon. All of these ships have multiple searchlights
     
    Last edited:
    Battle of Kure Atoll Part 4 Commence FIring!
  • Copy+of+Night+action.jpg


    Commence Firing!
    2217 The Porter opens fire at the Japanese column. A Turret fires just ahead of the Aoba, while B Turret fires just behind a total of 15 rounds a minute, illuminating the Aoba and Kinugasha in a flurry of starshells. The Porter executes a high speed turn to come to course 270 W, and her rear turrets open fire adding more starshells to the illumination already under way. The Monaghan also executes her turn, which puts her on a collision course with the Yugari. Aboard the Alywin, Commander Flynn orders his ship and the Farragut to maintain their heading and open fire at the enemy warships to their port side. The Farragut spots the shape in the darkness that can now be made out as it is backlit by starshells. Within seconds 5 inch starshells light up the Shigure.

    Aboard the Japanese ships, sailors are frantically running to their battle stations and officers are hurriedly trying to figure out what is happening ahead.

    2218 hours
    The Porter launches 8 Mark 15 torpedoes aimed at the Japanese battle line as she turns. This takes a couple of minutes. The Japanese cruisers are 12,000 yards away, within range, but long range for the American torpedoes. She also continues to pour out starshells, illuminating the Furataka and Kako as the she passes them at 36 knots while they are still steaming at 30 knots.

    The Yugure sees the approaching Monghan and makes an emergency turn to starboard while the Monaghan also spots the enemy. Both ships open fire with their forward guns, getting off several rounds in the opening exchange. Most miss, but two each slam into the respective bridges of the two destroyers, killing or wounding many at those stations. The Japanese torpedo crews hurriedly prepare their torpedoes to launch.

    2220 hours
    The Chicago is now at the 11 o'clock position relative to the Aoba, with the Portland at the 12 o'clock position, the Minneapolis at the One o'clock position and all 5 cruisers have the lead Japanese ships in their sights. They open fire with a total of 45 8 inch guns and 20 5 inch guns which lights up the sky, themselves, and of course not long after that the Aoba. Each 8 inch gun is able get off up to 5 rounds a minute and they all do in the opening moments. A total of 225 8 inch rounds and dozens more of 5 inch splash all around the Aoba, which has yet to open fire. In all 8 of the heavy 8 inch shells hit her from her forward superstructure to her bow. Of these three smash her forward turrets, knocking them out and starting serious fires which threaten her magazines but disaster is narrowly averted by flooding them. The other 5 hit her around the bridge or higher, killing Admiral Goto, most of his officers as well as the ships captain and starting serious fires that light up the sky. It also knocks out control, and the ship takes a turn to the port that is unplanned while the executive officer hurries to take back control from the auxiliary control station further aft. Meanwhile his rear turret is still in commission and it, along with his secondary 4.7 inch guns crews struggle to get the Porter into their sights. They are soon joined by the other cruisers as weapons are finally manned and begin to return fire.

    Aboard the Kinugasha, Captain Sawa quickly realizes that the Aoba is out of control and seeing the fierce blazes already marking the pyre that was her forward superstructure he is just starting to realize he is likely now in tactical command. With destroyers to his starboard, cruisers to his front, he makes a quick decision.

    As the cruisers are in action or about to be, and the Porter and Monaghan are making their brave charge, the Shigure comes under fire from the Alywin and Farragut who pour 5 inch rounds into her. Several hit, starting fires in the forward superstructure and knocking out her forward gun mount. She makes an emergency turn to port and opens fire.
    300px-USS_Quincy_CA-39_savo.jpg


    The Japanese Return Fire
    As of 2222 Hours the situation is as follows:
    The Aoba has taken an emergency turn to port while it was out of control and during the two minutes since the American cruisers opened fire on her numerous 8 inch shells have wrecked her from end to end, knocking out her fire control, her bridge, both forward turrets, and finally her rear turret. The floatplane has been blasted off the catapult and over the side, and a fierce fire rages in her forward superstructure. A shell has also knocked out her steering compartment, two have penetrated and wiped out her boiler rooms and she is coasting to a stop. Her torpedo crews have been swept away by shrapnel as has most of her crew on exposed decks. She is out of the fight.

    The Yugure has turned to starboard and is accelerating to her best speed of 30.5 knots on a course heading of 180 degrees S. This places her within firing range of the American Destroyer Division 9. She opens fire with starshells from her rear gun mount, trains what searchlights she has available, and illuminates the American destroyers which are 2,000 yards behind the Chester, as well as the Chester and Astoria. She launches her full spread of six Long Lance torpedoes aiming just ahead of the Astoria but as all ships are moving at over 60 miles an hour relative to each other, her torpedoes are actually going to have the Chester as a target. As she launches she is taken under fire by the Drayton and secondary 5 inch guns of the Chester. She is also under fire from the Monaghan which continues to pour rounds into her while the torpedo crews of that ship fire their spread of 8 torpedoes at the Aoba.

    The Shigure has executed an emergency turn to port and is steaming due north at 34 knots and finds herself paralleling the Americans with the Alywin at 8,000 yards immediately to her portside. Her crew launches a spread of 8 torpedoes hoping to hit anything and her remaining gun mount opens up on the Alywin, scoring a pair of 5 inch hits on her aft superstructure and starting a serious fire. She however comes under fire from the 5 inch guns from the Chicago, Alywin, and Farragut and suffers numerous more hits which quickly silences her guns and starts more fires as well as killing her exposed torpedo crews. However she remains under power and in control for the moment.

    The three Japanese cruisers all open fire on the Porter and she is illuminated by searchlights and in moments is hit many times by 8 inch and secondary weapons. Captain Overesch (and future CIA Director, Far East and Vice Admiral USN) survives the firestorm as does the ships captain, but the ship and many of her crew do not. The Porter comes to a halt on fire from end to end, her engine room flooding, her steering destroyed, and the ship is ordered abandoned. In all 38 of her crew die with the Porter.

    Captain Sawa, who now finds himself in command of Cruiser Squadron 6, orders a 180 degree column turn, all ships to fire torpedoes as they bear. American Destroyer Division 9 will find itself squarely in this spread. Meanwhile an signal is sent to Yamamoto reporting that the bombardment mission force is under fire by an overwhelming superior force, with the flagship already knocked out of action and Admiral Goto out of command.


    1942_08_09_Savo_Battle_Painting_2_JH_1200x.jpg
     
    Last edited:
    Battle of Kure Atoll Part 4 The Empire Strikes Back and finale
  • The Empire Strikes Back
    2224 Hours
    Torpedoes are in the water from the remaining Japanese cruisers, both Japanese destroyers as well as the Monaghan. The Porter launched its torpedoes as well but none hit although two exploded in the wake of the Aoba. The first Japanese torpedoes hit the Alywin with two hitting her aft of her rear superstructure and detonating her aft 5 inch magazine, blowing the rear 100 feet of the ship to pieces and killing nearly half her crew in seconds. She immediately begins sinking, and the surviving 85 crewmen including her captain make it over the side before she goes down. Her attacker, the Shigure, meanwhile blows up under a barrage of 8 and 5 inch shells from the Portland and Chicago. Only a handful of her crew make it over the side and only a pair of young Japanese sailors are eventually rescued and captured by the US Navy.

    The next ship hit is the Chester, which takes 2 torpedoes amidships, flooding her boiler rooms and starting a ferocious fire amidships as several 8 inch rounds from the Kinagusha hit her at the same time. Power is immediately knocked out, and she begins to coast to a stop, forcing the American destroyers behind to shift their course to avoid her. As the crew of the Chester begin an ultimately futile effort to save their ship, the Aoba is hit by 3 torpedoes from the Monaghan, one of which explodes, blowing off much of her stern and speeding her flooding substantially.

    1942_08_09_savo_battle_painting_1_jh_4x3_700x.jpg


    The Japanese cruisers meanwhile make their column turn, putting 24 torpedoes into the water. Hurriedly launched nearly all of them miss, but one hits the Lamson in the engineering spaces, causing her to slow enough that two more hit her in rapid succession. She detonates in a spectacular explosion, and with her die 106 of her 158 men. The Yugari in the meantime is smothered by more shells and comes to a halt completely ablaze. She sinks soon after taking all but 6 of her crew directly or who refuse rescue by the Americans.

    However her death buys time for the Japanese cruisers, who complete their turn successfully masked in part by the American ships blowing the Yugari to pieces and the death of Lamson and disaster suffered by the Chester. The remaining destroyers of Division 9 are forced to take action to avoid collision and enemy torpedoes and manage to avoid further damage but also lose contact with the enemy.

    2230 hours
    In less than 25 minutes the battle is over. The 3 remaining Japanese cruisers are retiring at high speed west while the concussion of repeated salvos fired has temporarily knocked out the radar aboard the Chicago, while the Chester has lost all power and is rapidly flooding.

    Admiral Newton sends a signal to Halsey who orders him to leave a pair of destroyers to rescue survivors and for the rest of the task force to hurry as quickly as possible to rejoin Brown.

    Task Force 3
    Meanwhile during the night Task Force 3 is steaming at high speed to put it 150 miles southwest of Midway and within range of the Japanese Invasion Fleet at dawn and Brown has orders to attack it as soon as it is light enough to launch and the PBYs from Midway find it again.

    Striking Force
    Over the tense night that follows Yamamoto receives another signal from Sawa reporting the destruction of two destroyers and the flagship and that he is retiring to rejoin the Invasion Fleet. As of midnight Yamamoto is still pondering his next move.

    Epilogue
    The Chester goes down at 0120 hours December 10, taking with her over 150 of her crew. The Aoba sinks shortly after dawn, burning all night and abandoned. She ends up taking over 650 men with her either directly or who refuse rescue later. Only 25 Japanese sailors accept rescue.

    USA-P-Strategy-46.jpg
     
    Last edited:
    The Battle of Midway: Plans and Approach December 10 1941
  • The Battle of Midway: Plans and Approach

    1145 Hours December 9
    Halsey orders Brown link up with Newton and his cruisers and destroyers 100 miles south of Midway but to detach Spruance who will take the Enterprise, Yorktown, 2 heavy and 2 light cruisers and 9 destroyers to a position 200 miles WSW of Midway, which will put them behind the Japanese Invasion Fleet. Once that force is spotted by PBY's from Midway, Spruance is to launch strikes against them. Brown will hold his strike aboard the Lexington to be launched at the Japanese carriers when they are found. Brown and his force of 4 heavy cruisers, 10 destroyers and the Lexington will be close enough to either stage out of Midway to attack the enemy, or if Midway is hit and made inoperative, able to recover the survivors of strikes against the enemy carriers. Meanwhile the submarines Trout and Argonaut are directed to move 100 miles west to attack the enemy Invasion Fleet as it steams past them.

    All aircraft in Midway Lagoon (12 PBY, 36 floatplanes) will take off at nautical twilight (0615 hours), while the strike aircraft (45 Dauntless, 17 Vindicator dive bombers that are operational) plus the 8 Buffalo fighters are to be on strip alert. They are already bombed up, having brought their bombs with them from their carriers, but the 3 Navy Bombing Squadrons (VB2, VB5, VB6) the Marine bombing squadron (VMSB 31) and Fighting 3. Captain Browning intends to lead that strike force himself flying one of the Dauntless divebombers of VB2.

    0002 Hours
    Yamamato and his staff are debating what to do next as word of Goto's defeat is digested. While the losses are serious the battle does show that the American fleet is nearby and thus can be brought to battle which is the entire point of the Midway Operation to begin with, and indeed is the objective of the entire campaign. The American battleship fleet has been neutralized, but the enemy carriers must also be brought to battle and destroyed to ensure that the Americans do not interfere with operations in Southeast Asia.

    0300 hours
    The fleet changes course to a direct heading for Midway, which will put the carriers and their escorts 50 miles from Midway at nautical first light (0612 hours). The carriers are to send 90 fighters into the air, with 60 to conduct a fighter sweep to catch the Americans as they try to get into the air while 30 will provide fleet CAP. Yamamoto and Yamaguchi assume the Americans will spot the 2nd Bombardment Force (all 4 battleships, 1 light cruiser and 3 destroyers) as soon as their air patrols take off at the same time, and by the time the American strike aircraft and fighters are in the air the Zero's will be upon them. The battleships will launch their float planes once fighter cover is over Midway and provide spotting with the fleet opening fire once it is within 30,000 yards (just under 15 miles) and close to 26,000 yards and continue bombardment until 1800 rounds total are expended, which should take 90 minutes.

    Once the fighters are in the air, the carriers will launch 24 Kate's to provide extra search planes for the 8 float planes that are operational aboard the Chikuma and Tone. A strike force of 6 fighters, 6 Kate torpedo bombers, and 10 dive bombers from the Hiryu will seek and destroy any American ships in the local area, while an additional 18 fighters are launched from the remaining 3 Carriers to relieve fighters that have exhausted their ammunition or have been lost. Another 9 dive bombers from the Akagi, Kaga, and Shokaku will provide anti-submarine patrol while an anti-shipping strike is below in the hangers of those 3 carriers consisting of 21 Kate torpedo bombers, 24 Val dive bombers and 6 fighters (each ship) is readied to be launched when the enemy fleet is spotted. Fighters will be used after the fighter sweep is completed to provide the escorts for the missions later in the day.

    The Japanese expect that the enemy will be sighted no later than 0900 hours but if not a second search will be conducted by aircraft from the Hiryu as well as the cruisers after Midway has been eliminated as a functioning American base. The Invasion Force will reach the area by 1100 Hours with the landing to be conducted at 12:30 hours, which is high tide and landing craft will have the easiest time getting over the reef while providing sufficient water for the patrol craft carrying additional soldiers to two islands of Midway Atoll. It is expected that after the bombardment and with the large number of troops available that the island should be taken quickly.
     
    Last edited:
    Battle of Midway: Slaughter and Sacrifice at Dawn
  • Battle of Midway: Early Morning Talley Ho!
    0530 hours Midway Island
    PBY Catalina's, J2F Ducks, SOC Seagulls, and Sikorsky JRS1 (Sikorsky S-43 Flying Boats) start engines and begin preparations to take off at Midway Lagoon. At Midway Air Station the fighters are readied for immediate take off, with the Marines readied for first take off, then the Navy squadrons from the Lexington, Enterprise and Yorktown in that order. Crews are near their aircraft or making last minute stops to the latrine. Admiral Halsey is in operations, which is wooden building on Eastern Island near the runway, waiting patiently for dawn and his planes to take off.

    0530 hours Carrier Hiryu
    Aircrews take to their planes aboard the decks of the carriers, and final preparations for flight begin. Happily, unlike on the 7th, the seas are moderate today with 5 foot swells. At 0600 a signal is sent by lamp for aircraft to prepare for launch.

    0600 Hours
    The PBY's begin taking off, followed by the JRS1s, Seagulls and Ducks. The last aircraft is in the air by 0610 hours.

    0615 Hours
    A Duck, call sign Tare 14, spots the 2nd Bombardment Force a mere 32 miles from Midway heading straight for it at 27 knots. As the observer frantically calls out his spotting report the aircraft drops flares illuminating the enemy fleet.

    2nd Bombardment Force
    battleships Kirishima (Mikawa), Hiei, Kongo, Haruna, light cruiser Abukuma, destroyers Urukaze, Isokaze, Tanikaze

    73dff19d15ded6762bd11d70d2d0387b.jpg


    Meanwhile, aboard the Japanese carriers the first of 90 fighters begin taking off. The first 30 climb at 3,100 feet per minute to their patrol altitude of 15,000 feet, with the entire combat air patrol overhead and in position by 0622 hours. The next 60 fighters form up at 5,000 feet into their combat elements and by 0630 are racing toward Midway at 300 miles per hour, which means they will be overhead in 6 minutes (at 0636 hours)

    zero_val_kate_color_markings-300x287.jpg


    0617 hours
    Halsey receives the report of both Tare 14 and a radar report of many bogies appearing suddenly at a distance of 50 miles, on a bearing 5 degrees North. The Admiral realizes at once that the Japanese carriers are launching and orders an immediate launch of all aircraft with orders to ignore the battleships and hit the carriers.

    0619 hours
    Peter 8, a PBY, spots the Japanese carrier force 50 miles from Midway and radios a warning that it is launching aircraft. A few seconds later it is set upon by 6 Zero fighters and shot to pieces. All aboard are killed.

    0621 hours
    American fighters and dive bombers begin taking off in pairs every 15 seconds.

    0632 hours – 0645 hours
    The Buffalo fighters climb at full military power on a heading to take on the approaching enemy aircraft and slow them down before they reach the bombers. The Buffalos's climb at 2440 feet a minute at 322 miles per hour, reaching 6,000 feet in just over 3 minutes and complete forming up at 0632 hours, mere moments before intercepting the lead Zero's from the Akagi 10 miles from the island.

    300px-Brewster_F2A-3_g16055.jpg

    The combat is short and merciless. The Zero completely outclasses the Buffalo, and the Buffalo also lacks the toughness of the Wildcat. While the American pilots are skilled, they are simply overwhelmed by 24 Zero's that tear into them. However the Navy Aviators of Fighting 2 manage to down 2 of the Zero's before all are shot down, and 6 more Japanese fighters are forced to break off having exhausted their ammunition. However this brief 5 minutes of slaughter keeps a portion of the enemy from reaching the American bombers. Lieutenant Commander Paul Ramsey and three other pilots somehow manage to survive the encounter after bailing out, and Ramsey will receive a Navy Cross for his leadership.

    VMSB 231 and its 18 Vindicator's also climb at their best speed. They can only do 1,300 feet a minute and the full squadron finishes assembling at 13,000 feet 10 miles east of Midway at 0633 hours. Luckily for them, cloud cover hides them from the approaching Zero's and they make their way at their best speed of 230 miles an hour toward the reported position of the enemy carriers. Each carries a 500 pound bomb and they will reach their targets in 14 minutes.

    300px-Vought_SB2U-3_Vindicator_VS-1_1-S-16_%2816140609435%29.jpg


    VB2 and its 15 SBD Dauntless dive bombers are next in the air, and by 0636 hours are 5 miles west of Midway Atoll at 6,000 feet and climbing. At 10,000 they clear the low lying cloud level that hid them and they begin to form up before heading for the enemy at 0640 hours

    VB5 has just completed its take offs and VB6 is taking off when 36 Japanese Zero's roar in. They proceed to rip into the American scout bombers, downing 12 and damaging all 18 of the remainder which results in 8 more of them being forced to ditch not long after. All of the Enterprise and Yorktown bombers are forced to jettison their bombs and make a run for it. However the American gunners manage to claim 3 Zero's in return, including one that blunders into front of the twin 50 caliber machine guns of the SBD's. Another 4 Zero's suffer damage and 20 more exhaust their ammunition. But VB5 and VB6 are out of the fight. American flak manages to damage 6 more of the Japanese fighters and in all of 60 fighters the Japanese have only 20 remain available to fight as the rest have exhausted their ammunition, have been shot down or suffered damage severe enough to take them out of the battle. However half of Browning's strike force has been knocked out of the battle. In all 17 of the American aircrew are recovered, although several are wounded. None of the 5 Japanese pilots shot down survive.
     
    Last edited:
    Battle of Midway: Scratch One Flattop!
  • Battle of Midway: Scratch One Flattop!

    0641 hours
    PBY Peter 2 spots the Japanese Invasion Force 60 miles from Midway and closing. A message is sent to Midway which forwards it to Brown and Spruance.

    0645 Hours
    The Japanese combat air patrol spots the Marine Corps bombers as they approach and swarm in for the attack. Browning orders his squadron to attack the biggest carrier in sight (the Kaga) and then the Japanese fighters are on him and his attack force. The Japanese down 10 of the obsolete bombers, including the lead aircraft piloted by Captain Browning and the other 8 are shot to ribbons. However Browning, his aircraft in flames, crashes into the middle of 6 Japanese fighters aboard the Kaga getting ready to take off, starting a severe fire. None of the other American Marine Corps bombers score a hit and all 8 of the survivors run right into the Japanese fighters returning from Midway and 6 more are shot down.

    Dauntless_bomb_drop.jpg


    However the Marines and their sacrifice clear the way for Bombing 2, and they also aim for the Kaga, as the other carriers are hidden from sight by clouds as the American squadron reaches their target. They only face limited flak as they dive, and the American pilots score 9 more hits on the Kaga, blasting apart her flight deck and starting massive fires as well as a chain reaction of explosions as fully fueled and armed bombers detonate as fires reach them. In less than 5 minutes over 800 Japanese crew are dead or doomed, and the carrier is clearly a total loss.

    ad19.jpg


    Browning's family will receive the Medal of Honor in a ceremony in 1942 at the White House and an infant Chevy Chase (of later television fame and his grandson) will be present when a Fletcher class destroyer is launched bearing the name of Browning in 1944.

    However, the Navy dive bombers are subject to Japanese vengeance as the combat air patrol pounces on them on their way out. The Japanese down 4 of the 15 bombers, damage 6 more, and all of these end up ditching near Sand Island. Only 5 make it to the Lexington, along with 2 damaged Marine Corps bombers (which are both pushed over the side as total write offs).

    0655 Hours
    The Lexington launches 15 TBD Devastators and 16 SBD Dauntless dive bombers led by Lieutenant Commander Dixon. Brown orders the Lexington to keep back the remaining 9 Buffalo fighters for combat air patrol.

    0700 Hours
    Japanese battleships open fire on Eastern Island concentrating on the airfield. Meanwhile the Japanese carriers put 18 Kate bombers into the air to begin a search, while 7 float planes launch from the two Japanese cruisers. The strike by the Hiryu is cancelled and its remaining Kates and all of its Vals are put into the air on search missions as well.

    Meanwhile the Yorktown and Enterprise launch 28 SBD Dauntless dive bombers and 30 TBD Devastators on a strike mission against the Japanese Invasion Fleet. Orders are to concentrate on the transports. Spruance keeps back 6 Dauntless for antisubmarine patrol and all 28 of the Wildcats for fleet defense.
     
    Last edited:
    Battle of Midway: Hammer Blows and Finale
  • Battle of Midway: Hammer Blows

    East Island Midway Atoll
    The Japanese battleships steam at 26,000 yards from the Atoll, firing a steady stream of 14 inch rounds into the airstrip and other facilities on East Island (the Kongo, Kirishima and Hiei) and Sand Island (Haruna). The American Marines only have a few 5 inch guns available to reply and the Japanese are hopelessly out of range. The Japanese shoot unmolested until an airstrike from the Lexington arrives.

    However, the two islands suffer terrible damage, particularly East Island. The airstrip is left a field of craters, every building is burning or destroyed, over half the gun positions have been blasted into wreckage along with their guns, and personnel casualties number of 200 dead on East Island, while over 50 are dead on Sand Island. The wounded are similarly heavy and indeed the ability of the Americans to resist with anything more than small arms has been eliminated. Among the seriously wounded is Halsey, who lies unconscious in a slit trench, dragged there by a pair of Marines after the command post was destroyed.

    0747 hours
    The strike from the Lexington arrives overhead. Appalled at what he sees below, Lieutenant Commander Dixon ignores his instructions to attack the carriers and orders his torpedo planes and dive bombers to hit the Japanese battleships. The Japanese have only 9 fighters overhead, as most of the rest are still being rearmed and refueled or are providing cover for the carriers. Another 12 Zero's are en route to cover the Invasion Fleet as Yamamoto is concerned that the Americans might hit it with their strike aircraft and he does not know where the American carriers are yet but they must be close by.

    The 15 aircraft of Torpedo 2 focus on the Haruna, which is some distance from the rest of the Japanese force and are immediately spotted by the Japanese fighters, who swarm them. The slow poorly armed torpedo bombers suffer appalling losses, with 7 being shot down, and the Japanese battleship is well armed and supported by a destroyer which downs 3 more of the TBDs. Only 6 manage to drop their torpedoes and indeed they score 2 hits but none of the torpedoes explode.

    The SBDs have more success, pushing over into their dives and 6 each attack the Hiei and Kirishima and 3 attack the Kongo. Although near misses splash all around the Japanese battleships, only two hits are scored, with a single 1,000 pound bomb penetrating the thin 1 inch deck armor and starting a flash fire that forces the flooding of the rear magazine, effectively knocking C and D turrets of the Hiei, while another 1,000 pound bomb hits the Kongo amidships, knocking out several secondary 6 inch guns and inflicting heavy personnel losses as well as starting a serious fire that takes nearly an hour to put out.

    The Japanese fighters are too far away to catch the American dive bombers before they escape into the clouds and have instructions to not pursue but to defend the fleet. The surviving American aircraft flee the scene.

    0806 Hours
    Yamamoto is still digesting this latest blow and listening to appeals to withdraw when a report is received that a float plane from the Tone managed to get off a contact report reporting 1 carrier, 4 cruisers, and 10 destroyers 130 miles SSE of Midway and within strike range. There were no further reports. Yamamoto orders Yamaguchi to attack immediately with his entire strike force.

    0811 Hours
    Lieutenant Commander Wade McClusky arrives overhead of the Japanese Invasion Fleet with 28 dive bombers, while Lieutenant Commander Smiley leads 30 torpedo bombers. The Japanese fighter cover is at medium altitude, and spots the dive bombers first, attacking Bombing 5 but only down 3 SBDs and damage 2 more at the cost of 2 of their own. The dive bombers have split into 4 elements, aiming at the four largest Japanese transports and rapidly convert all four into burning wreckage as 1,000 pound bombs wreck them and slaughter hundreds of soldiers. The torpedo bombers follow up, concentrating on four other transports, and manage to score hits that detonate on each, leaving all four dead in the water and sinking. A few moments over a third of the South Sea Detachment of the Japanese Army have been killed or wounded, and urgent efforts are being made by the Japanese to rescue soldiers and sailors.

    The Americans have broken off by 0830 and are returning home, having lost only 4 dive bombers and 2 torpedo bombers, although several of each have suffered damage. The Japanese have 8 transports burning and sinking and over 1,600 soldiers are dead or wounded. In moments the invasion threat to Midway is over.

    6834556594_b97038849c.jpg


    At the same time the carriers Hiryu, Shokaku and Akagi complete the launch of 42 torpedo bombers, 48 dive bombers and 18 fighters which are winging their way toward Task Force 3.

    0821 hours
    Yamamoto is stunned by the devastating losses to the invasion fleet, and orders all task groups to regroup 75 northwest of Midway. Only the destroyers and patrol craft are to remain with the transports to recover as many of the soldiers as possible, and he sends 4 more destroyers to join them to add to the rescue force.

    All 8 ships are sinking wrecks, but in all 2,000 soldiers are lost either aboard their ships or in the water.

    0826 Hours
    The submarine Trout fires a spread of 6 torpedoes at the Kongo, scoring 2 hits that are duds. The Japanese counterattack forces her far below and out of the fight. The skipper of the Trout is simply convinced he missed the fast moving enemy ship.

    0905 Hours
    The Lexington finishes recovering its strike. Brown is appalled by air group losses, and aware that his group has been spotted, he orders Spruance to send fighters to support him and for Spruance and his own task force to retire east at 30 knots as soon as the last aircraft have been recovered and combat air patrols launched.

    0910 Hours
    16 Wildcats (8 each) from the Enterprise and Yorktown are launched and begin winging their way to the Lexington which is 75 miles away.

    0913 Hours
    Midway manages to restore the cable connection to Pearl Harbor and sends a message advising Pearl Harbor that Admiral Halsey is severely wounded and is no longer able to command. A request for reinforcements and assistance with the wounded are also sought.

    0935 Hours
    A message is sent to Vice Admiral Brown informing him that he is now acting commander of the US Pacific Fleet.

    0938 Hours
    Radar aboard the Chicago and Lexington picks up the Japanese strike passing to the northeast. For a few brief moments there is hope that they will miss spotting the American fleet in the increasingly cloudy conditions but then the Japanese begin a box search and it is clear that they are going to find the American task force.

    0947 Hours
    The American combat air patrol of 6 Buffalo and 14 Wildcat fighters move to engage the Japanese. The Wildcats engage the fighter escort, and outnumbered 14 to 18 still give a good accounting, shooting down 5 Zero's and damaging 3 more, but 6 Wildcats are shot down and 3 more damaged. Meanwhile the Buffalos dive on the Japanese torpedo planes, shooting down 5 of them and damaging 4 more and suffer only little damage themselves.

    But the sheer numbers of Japanese strike aircraft are overwhelming. In spite of furious flak that downs 5 more torpedo planes and 3 dive bombers, the Japanese land 10 bomb hits and 5 torpedoes against the Lexington, as well as 6 bombs and 3 torpedoes on the Astoria, which happened to be the closest cruiser to the stricken carrier. Both ships are left burning and sinking, and indeed the Astoria rolls over within 14 minutes of the attack, taking nearly 650 men down with her.

    In all the Japanese lose 6 fighters, 12 torpedo bombers and 4 dive bombers in the attack or forced to ditch on the way home. However by 1100 hours the Japanese have finished recovering their aircraft and are retiring northwest at the speed of the slowest transport (15 knots).

    The Americans too are retiring. The Lexington rolls over and sinks at 1055 hours, taking over 400 men down with her.
    220px-USS_Lexington_brennt.jpg


    The Battle of the Hawaiian Islands is finally over.....


    Last edited:
    Epilogue
  • The Consequences of the Battle of the Hawaiian Islands

    Claims
    The principal engagements at Pearl Harbor, Kure and Midway are officially described by both Navies as the Battle of the Hawaiian Islands. The Japanese claim (and believe) they have sunk 4 battleships, 1 aircraft carrier, 8 cruisers, several destroyers and several other support ships as well as destroying in the air or on the ground over 500 American aircraft. The Americans claim two carriers definitely sunk and believe they may have sunk another until radio chatter from the Zuikaku is picked up later in December. They also claim a cruiser and several destroyers sunk as well as heavily damaging three Japanese battleships and over 300 Japanese aircraft destroyed.

    American Losses
    Of course the real losses are serious enough. The battle has cost the United States Navy 3 battleships sunk (Arizona, Oklahoma, Nevada) of which only one is repairable as well as 3 others heavily damaged and in need of months of repair (Pennsylvania, California, Tennessee) leaving only the Maryland, West Virginia and after refit the Colorado rejoins the fleet in April 1942. One of the first things Admiral Nimitz does when he takes command of the Pacific Ocean Area and becomes CINCPAC is send all of the battleships to San Francisco, San Diego and Bremerton for upgrades to their anti aircraft and sensors. He would not see them again for some time as the 3 Colorado class ships end up in the Atlantic for much of the war.

    Also lost are the heavy cruisers Astoria and Chester off Midway, as well as heavy damage to the heavy cruisers San Francisco and New Orleans (knocking both out of the war for weeks), as well as serious damage to the light cruisers Honolulu and St Louis. Also lost are the destroyers (or converted destroyers) Gamble, Cassin, Downes, Hull, Dobbin, Thornton, Alywin, Lamson, and Porter, as well as the submarine Cachelot, fleet oiler Neosho, repair ship Vestal and the target and training ship Utah plus several PT boats. Damaged is the destroyer Selfridge as well as the fleet oiler Ramapo.

    The worst loss is the over 8,000 American sailors and marines killed and the loss of the carrier Lexington and the virtual destruction of 1 carrier fighter squadron, 1 carrier torpedo bomber squadron, 2 carrier scout bomber squadrons and heavy losses to several other squadrons. Several float and patrol planes are also lost in accidents or to Japanese fighters or bombs.

    The death of Admiral Richardson is also a severe blow as is the severe wounding of the next two men in line to take over the fleet (Pye and Halsey). Admiral Pye is forced to take a medical retirement while Admiral Halsey is out of the war until July 1942 recovering from his wounds. Admiral Richardson and Admiral Halsey are both awarded the Medal of Honor for their efforts leading up to or during the battle.

    The Army took losses too, with over 100 aircraft destroyed in the air or on the ground or written off as not worth repairing, as well as over 300 dead or dying. Hickam and Wheeler are both heavily damaged but the Army has its airpower mostly restored and reinforced within weeks of the battle.

    Japanese losses
    For the Japanese it is a costly and incomplete victory. Although the American battle line is shattered and one of the American carriers was sunk, it cost the Japanese Navy the carriers Kaga and Soryu sunk, the carrier Zuikaku damaged and knocked out of the war until April, plus the cruiser Aoba and two destroyers and heavy damage to the battleships Hiei and Kongo, knocking them out of the war until May 1942. Among the nearly 3,000 Japanese dead or missing is Admiral Nagumo, commander of the 1st Air Fleet killed during a strafing attack on the Akagi on December 7. His place is taken by Admiral Yamaguchi.

    The most important loss is of 343 aircraft (including those lost aboard carriers sunk or suffering fire damage as well as those written off) and 200 pilots that have been killed in air combat or from flak or lost at sea with their ships. This, along with two carriers sunk is tremendous blow.

    A serious blow to Navy prestige is the lost of 8 transports and 2,000 soldiers, and that the entire South Seas Detachment (a brigade group) has been reduced to an effective force of a single infantry battalion and the remainder of the outfit will have to be reformed, refitted and reequipped.

    After the battle
    The embarrassing defeat at Wake Island on December 11th infuriates Yamamoto, and he detours his fleet on its return to Japan to provide fire and air support in the second (and successful) attempt on the islands by a humiliated Admiral Inoue and his 4th Fleet. Yamaguchi is infuriated that he loses five more aircraft and two more pilots in this operation. Only 200 American Marines and Sailors, as well as 900 civilian workers survive to surrender in the fierce attack.

    In the weeks that follow the Japanese Navy forms the carriers Akagi, Hiryu, Ryujo, Zuiho, Shoho into the 1st Air Fleet. Aircraft are taken from the Shokaku as well as new construction to replace the outdated A5M fighters currently embarked, giving this force a total of 90 fighters, 78 torpedo bombers, and 51 dive bombers. There are no spares embarked, but this force is ready for action along with its escorts of 2 battleships, 2 heavy cruisers, 1 light cruiser and 8 destroyers by mid January 1942.

    The Shokaku and Zuikaku are out of action until May 1942 to replace their air groups, repair damage and increase their anti-aircraft capability. The Japanese also immediately order the seaplane tenders Chitose and Chiyoda to urgently return to Japan for conversion into aircraft carriers, however it will be late 1943 before either are ready for action. The work on the Hiyo and Junyo, both converted ocean liners, is ordered rushed, but neither will be ready before June 1942. The Hiyo, Junyo, Shokaku, and Zuikaku will be formed into the 2nd Air Fleet under Admiral Hara once they are ready for combat. Meanwhile work on the battleship Shinano is ordered halted and within a few weeks she is ordered scrapped on the ways in a deal with the Army (with the Army getting her steel) in exchange for troops needed for operations already being planned.

    The US Navy meanwhile orders the carrier Hornet to the Pacific as soon as she completes her work up, and she arrives at Pearl Harbor on April 10, 1942. In the short term, the Navy sends the Saratoga to Pearl with fighter squadrons VF3, VF5 (stripped from the Ranger) and Wildcats and pilots stripped from VF71 and VF72 (from the Wasp) adding 44 Wildcats to the fleet and allowing the Yorktown and Enterprise to have 2 fighter squadrons of 18 Wildcats each, as well as 2 scout bomber squadrons of SBD Dauntless each after the 2 squadrons from the Saratoga are stripped from her. This gives the Americans 2 fully operational carriers by mid January 1942. The Saratoga is sent back to California with all the remaining TBD Devastators and F3A Buffalos that survive where they are sent to the Atlantic as the Ranger and Wasp are less likely to need immediate fighter cover as their primary mission for the moment is not likely to face anything more threatening than the occasional German Condor patrol bomber and the TBD is a perfectly adequate anti-submarine aircraft. Torpedo bomber squadrons do not return to the Pacific War for the US Navy until August 1942, when they arrive with the new TBF Avenger.

    On her second trip carrying P40s for the Army and Wildcats for the Marine Corps, the Saratoga completes her delivery but is torpedoed by a Japanese submarine on January 24, 1942, knocking her out of the war until mid June 1942. This in turn causes Admiral Stark to send the Ranger and Wasp to the Pacific for a few months in early 1942, with consequences to the War in Europe. Admiral Nimitz, impressed by the performance of Spruance in his handling of the attack on the Japanese invasion fleet, promotes him to permanent command of the Enterprise and Yorktown task force and sends him to raid the Japanese Marshall Islands in February 1942.

    Meanwhile in the Southwest Pacific Area, the Japanese juggernaut begins to roll over American, British and Dutch possessions.
     
    Last edited:
    Status
    Not open for further replies.
    Top