Photos from Featherston's Confederacy/ TL-191

107ddf1d5dfbcd3597b89d359a3fc61c.jpg

The Union Battleship USS New Mexico firing her guns at the Confederate fortification known as Fort Semmes on the coast of Cuba, circa 1944.

Nice picture.

I remember mentioning my own version of a USS New Mexico being sunk in the Bahamas by the Confederates. The picture also reminds me of the Hodder & Stroughton book cover version of The Grapple.
 
832599d1430137067-spanish-m65-otan-f1-calmero-helmet-p1010489.jpg

A photograph of a Mexican copy of the Confederate Sydenham M1937 Helmet which in Mexican service was called the M943. The M943 would adopted in 1943 as a replacement for the Adrian Helmet in Mexican Military Service, and the Confederacy would at first provide the Mexican Army with 8,000 helmets and would allow licensed production in Mexico. The Mexican Military would use Sydenham Design from 1943 all the way to their ultimate replacement by Kevlar Helmets in the mid 1990s. Other non-Confederate users of the Sydenham would include the Dominican Republic (which has been closely associated with the Trujillo Regime there), Nicaragua, El Salvador, Argentina, Spain, Venezuela, France (who used a slightly different design as the Mle. 1943) Brazil (briefly used by the riot police until being retired to the design's negative connotation), and Texas (who used left over Confederate helmets until the 1960s when they were replaced the Stahlhelm Design.) The Mexican M943 along with the Spanish Modelo 1947 helmets would be commonly used by reenactors, film, tv, and theatrical productions because these helmets were much cheaper than the original Confederate helmets.
 
Last edited:
"The Army Marches North"
The British Invasion of Norway, Part II

dday0.jpg

A scene of the chaotic landing of British troops south of Oslo following the Battle of Oscarsborg Fortress, August 9th, 1941
Disembarking their assault ships far from their original landing point, the British troops shambled about in a sense of general disorganization for several hours, establishing a lackluster defensive ring around their landing site as the gunfire and explosions of the sinking Exeter lit up the horizon to the north. It took a personal effort by Assault Commando Leader Lord Lovat to organize the landing force, commandeering a tour bus from a local marina and seizing the nearby police station to get a bearing on their location.
With no Motor transport landed yet, Lovat took his handpicked force of Commandos in the Bus and several commandeered civilian vehicles ahead with him to Oslo to try and achieve their mission of capturing the King, while the rest of the army set out on foot. Air cover was provided by fighter planes launched off the Carrier HMS Furious, which quickly purged Norway's minimalist Air Force from the skies.

British_2nd_Army_soldiers_advance_Zeven.jpg

British Troops on the outskirts of Oslo, August 10th, 1941.
By Dawn the next morning and without having encountered any strong enemy resistance, the bulk of the British troops arrived in Oslo to discover a city relatively nonplussed by the presence of a foreign army on their soil. Linking up with Lovat, the Commanders of the operation were dismayed to learn that the Royal Family had escaped to the north during the battle in the Fjord, but Oslo had fallen to the British invasion almost without a fight.

Weimar_Reichstag.jpg

Hans Von Seeckt, Chancellor of the Reichstag, Condemns the British Invasion of Norway, August 10th, 1941.
In Berlin, news of the British invasion came as a shock, and an emergency session of the Reichstag condemned the British action and offered the Norwegian Ambassador immediate military aide. At the same time, the governments of Denmark, Sweden and Finland all declared a severing of ties with London, and the King of Denmark, after negotiations, agreed to allow the German army to station troops and aircraft in Denmark to protect against a similar invasion by the British, as well as use of her ports. Sweden's own military was mobilized with the anticipation of a similar attack.

70839f8b8d680d0b4edef749e34b888c.jpg

Norwegian Troops form an ad-hoc unit to try and stem the British attack, August 1941
While the Norwegian army lacked many of the modern weapons and equipment found in the militaries of the major powers, its troops were highly skilled and motivated in their defense of their homeland. Unfortunately, Norway's tepid mobilization meant that many of her reserves had not assembled or been equipped before the invasion, with most of the assembly messages still in the mail.


Norwegen-Seemann.jpg

A Norwegian Sailor, of the unit that would defend the port of Narvik from the British Invasion.

Eidsvold_%281900%29_a.jpg

Coastal Defense Ship Eidsvold, Photographed before the War

While the Royal Norwegian Navy would never match the sheer might of the Royal Navy, her sailors and ships were among the few activated and readied forces available to Norway at the time of the invasion, and the defensive fleet stationed in Narvik quickly rallied to oppose the British Landings.

On the morning of August 9th, After receiving warning via radio from minesweepers in the south, the Coastal defense ship Eidsvold, Along with a Squadron of the modern Sleipner class destroyers, sailed out of the harbor and engaged an approaching force of British Cruisers who were intent on landing and seizing the city, which was the primary shipping port for the Iron Ore being sent to Germany.
The British Squadron, led by HMS Trinidad, had not been expecting resistance, and were initially caught off-guard by the Norwegian sortie. First blood therefore went to the Norsk, with Trinidad taking several punishing hits from Eidsvold's powerful 8-inch guns.
Falling out of line, the British Cruiser's escorting destroyers engaged the Norwegians, and a close-quarters brawl ensued in the early dawn of the far north. The British, having been caught unawares, were initially on the back foot, and another vessel, the destroyer HMS Fury, was disabled and driven aground on the rocks. The british ships turned about and headed into deeper water to regroup, leaving the Norwegians with, as at Oscarsborg, a temporary victory.

HMS_Trinidad_repair.jpg

HMS Trinidad disabled and undergoing repairs in Narvik, August 19th, 1941.

HMS_Fury_wrecked.jpg

HMS Fury wrecked and aground in Narvik, August 1941.
 
I have a series of questions about the TL-191 universe for you guys.

I was doing some research into Free Black communities in the United States and realized that they existed not just in the North, but also in the South before the Civil, albeit with their own laws that govern their actions in public. See: https://en.wikipedia.org/wiki/Free_Negro#Regional_differences

We all know that in TL-191, the Confederacy was able to continue the institution of slavery until the 1880's and Black Confederates were never given citizenship, except for those that served during the First Great War. Presumably, a type of segregation was practiced in this alternate timeline that only got worse and worse as time went on. It has been explicitly said that Blacks in the Confederacy were not allowed to have surnames and it is implied that the community did not receive any kind of official help from the government in order for them have access to education. At the same time, however, the books mention that some states, like Cuba and Louisiana, Blacks were able to obtain some kind of prosperity within their own communities until Featherston became president.

Given all that information, from real-life and TL-191, what would have been the fate of Free Blacks in the Confederacy before 1882 in this alternate timeline? I tried finding some thing from the Confederate Constitution that addresses this question, but there appears to be nothing on the matter.
See: https://en.wikipedia.org/wiki/Confederate_States_Constitution#Differences_By_Subject

Would they continue to follow the general laws that existed during the Antebellum Era and leave these Free Black communities alone? Would they immediately strip citizenship from all the Free Blacks in the newly-formed Confederacy and force them to become slaves until after the Second Mexican War?

Once again, this is another interesting topic that Dr. Turtledove never tackles. It would have added another layer of complexity that the Confederacy would have dealt with.

The reason why I am asking is because I want to know what would be the general consensus from TL-191 fans about the plausible fate of Free Blacks in the South before slavery is abolished in the Confederacy. I would very interested in reading your responses before I go forward with my own stories on this topic.
 
The Forgotten Campaign: The True Story of the Alaskan Front during the SGW Part 5
d9c32579845b40307f1e0dc60c4b04fb.png

A Union soldier using a Captured PTRD-41 Anti-Barrel Rifle during a firefight at the settlement of Telegraph Creek, circa August of 1942.

For the remainder of May as well in the months of June, July, and early August, the Alaskan Front would prove to be a bloodbath for the Union Army on land. On May 13th, the elements of the Union's 21st Infantry Division along with some artillery and armored support would launch an attack on the Terrace Salient. The Combined Russo-Canadian defenders would put up a determined resistance to their attackers, which would prove that the Union attack would end in disaster with 582 men dead, 207 wounded, 18 captured, and 2 M2A4 light barrels destroyed. The following day, the Russian forces under the 15th Infantry Division with it's own armored support would launch a counter attack to the north, south, and east of the settlement of Terrace. On that same day, the forward units of the 1st Canadian Rifles Brigade would link up with the Russian 98th Paratroop regiment at the settlement of Nass Camp. Thus would complete the encirclement of about 7,400 Union Troops in the Kitsumkalum Valley, which many of them would attempt to retreat across the mountains into the Union held Skeena River Valley, however most of the Union soldiers were not mountain troops thus the trek over the mountains would see a large number of Union soldier becoming casualties (an example was with the 4th Infantry Regiment which started with 1,800 men, but when the unit got to the other side of the mountains, it only had 962 men left.)

To the north, the Union forces were not faring much better against the renewed onslaught of the Allied Russian, Canadian, and Japanese forces. At Meziadin Junction, the Russian forces would finally break though the Union defenses would start to advanced southward along the Nass River. The Russians would also breakthrough at Chutine Landing and at the base of the Faisal Peak as well as the Japanese launching their attack down the Tuk River Valley further in the north.
09efe3263b83753f818c89ea5aba3610.jpg

Russian Mountain Troops battling Union Mountain Troops on Grass Mountain.
s-l400.jpg

Union soldiers firing at advancing Canadian Liberation Army troops near the banks of the Kiteen River.
Soviet_M3_Stuart_Eastern_Front.jpg

Two destroyed M3A1 Pulaski Light Barrels on the outskirts of Kitwanga, which had occurred on June 2nd, 1942 between elements of the Russian 102nd Infantry Division and the 62nd Mechanized Cavalry Regiment and the Union 14th Infantry Division with some armored support. The Second Battle of Kitwanga would prove to be the first major tank battle of the Alaskan Front, which 16 Union M2A4 and M3A1 light barrels clashed against 20 Russian T-46 light barrels. The Union forces would lose a total of 12 barrels and the Russians 10 barrels. The Union troops would however successfully stop the Russian advance along the Skeena River.

While the fighting raged on land, the Russians and the Japanese would also achieve a few victories at Sea off the coast of Alaska and American Columbia. In late May, the Russian Navy in Alaska would be reenforced by the cruisers Admiral Kornilov and Diana, 4 destroyers, 5 submarines, and a flotilla of a new weapon known as the G-5 Motor Torpedo Boat as well as the Imperial Air Arm also coming into possession of 36 Ilyushin Il-4 bombers. The Russians would use the Il-4 bombers to great effect in both the anti-ship role as well as using it attack the Union position on the Queen Charlotte Islands.
1200px-Kirov%26TKA-G-5-1940.jpg

A G-5 Torpedo Boat photographed sailing past the newly repaired Russian cruiser Pallada, circa 1942. The G-5 Motor Torpedo Boat was a small yet fast and nimble vessel that was armed with one or two DShK machine guns and two torpedoes. The type would first prove it's worth when two of the type had sunk the Ottoman Light Cruiser Hüdâvendigâr in the Black Sea on February 9th, 1942.
full

Ground crew arming an Ilyushin Il-4 bomber for an operation off of the Queen Charlotte Islands.

The Union forces at the same would make efforts to reinforce the garrison of the Queen Charlotte Islands, as it became the site of a major naval and airbase to interdict Russian shipping in the Gulf of Alaska. The Union Navy would reinforce Task Force 36 with the aircraft carrier USS Hornet, the older dreadnoughts USS Iowa and New Hampshire, the heavy cruiser USS Astoria, the light cruisers USS Newark and Boise, and 8 destroyers.

The first use of the G-8 Boats in the Pacific was done on June 2nd when a small force of 7 boats operating out of Lax Kw'alaams would venture out into the Hecate Strait, there they would encounter 4 Union Navy destroyers that were escorting two cargo ships to the Port of Queen Charlotte. The Russian Torpedo Boats would then attack and it would prove to be devastating, responsible for the loss of the destroyers USS Perkins and Rowan while one of the others, the USS Benham, left badly damaged along with one of the cargo ships. Only two of the Russian MTBs would be destroyed by the Union gunners in return. Two days later, the G-8 boats from the same would strike again in the same area, this time, they would successfully sink the gunboats USS Erie and Statford and the minesweepers USS Gladiator and Gannet.

On June 6th, 1942, the Russian Air Force would conduction it's air raid on the Queen Charlotte Island, which two formations of Tupolev SB2M bombers escorted by Polikarpov Po-4 fighters had attacked the Sandspit Naval Base and the Masset Inlet NAS. As the Russians approached the island, the Union forces would ready their AA guns and scramble a few P-39 and P-24 fighters from the Islands' only airfield near the settlement of Queen Charlotte. In the ensuing Air Battle would result in 5 SB2M bombers being shot down along with two Po-4, two P-39, and three P-24 also being shot down. The Russian bombers had managed to destroy a machine shop and a warehouse at Sandspit and a hanger, a fuel depot, and three Catalina flying boats at the Masset Inlet Base.
vintage-air-p39-01cr-12.jpg

A photograph of three P-39 Airacobras at the Queen Charlotte Airbase on Graham Island, which was taken on May 10th, 1942.
Destroyed_PBY_at_NAS_Kaneohe_1941.jpeg

A photograph of a burning PBY Catalina that was destroyed by one of the Russian Bombs at the Masset Inlet Naval Air Station, circa 1942.​
 
Last edited:
Scene from the film The Crowned Heads Fall, The film itself is about the criminal underworld in the US State of Sonora, this scene in particular is a flashback for one of the main characters, Robert Davis, in his time fighting in a Freedomite Remnant during the 1950s. The scene in question depicts said Remnant fighting against the US Army somewhere in Chihuahua.

 
"Blood on the Snow"
The British Invasion of Norway

Part 3: The Central Intervention

Navy-library-c69291a.jpg

Narvik Harbor in the aftermath of the British Counterattack, August 10th, 1941

Norway's successful defense of Narvik was short-lived, as the British squadron quickly reorganized and counterattacked. Coordinated and delivering punishing firepower, Eidsvold and several of the Norwegian destroyers were soon outflanked and sunk, with the remainder retreating into the inner harbor, where it was hoped the tight confines of the Fjord would even the playing field, especially as the Norwegian squadron had already exhausted much of its reserves of fuel and ammunition.

Unnoticed by the Norwegians was the presence of the British Battleship HMS Revenge, one of the few capitol ships the Royal Navy had been allowed to retain after the First Great War, as part of the assault force. Her powerful 15-inch guns and escorting destroyer squadron set upon the Norwegians with a furious vengeance, especially when news of Exeter's loss came through. Royal Navy pride damaged, the British squadron hunted down and smashed the remaining 4 Norwegian destroyers, sinking three and driving one to scuttle at the cost of two of their own destroyers and three aircraft (launched from carriers out at sea) shot down. The Norwegian sailors, many of them wounded and most of their officers dead, armed themselves with whatever weapons could be salvaged from the ships or found in the city. As the British force closed in and began landing troops in the harbor, a brief skirmish broke out. However, Captain Max Manus, commander of the few norwegian Army troops in the area, saw that the disorganized force of Sailors was no match for the British, and managed a fighting withdrawal out of the city into the surrounding hills.
The Union Jack was soon raised over Narvik, and for the moment, at least part of the British operation, the cutting off of Ore shipments via the port, was successful. The British Forces quickly moved outside the perimeter of the city itself and began to dig in against the inevitable counterattack.

Norfolk-Regiment.jpg

British troops take up defensive positions outside Narvik, December 1941.


NORWEGIAN_PZKPFW_III.JPG

The First two Panzer III tanks arrive from Germany via Sweden to Equip the Norwegian Forces, September 1941

Norway's Lack of motor transport, to say nothing of Barrels, was not out of ignorance of their versatility: it was more due to both the country's desire to avoid antagonizing their neighbors as well as the vehicles themselves not being entirely practical in the mountain-and-fjord-thick countryside of Norway. This lack would, however, contribute to Britain's early advances into the country, with Oslo, Trondheim, Bergen and several other key cities falling to the invasion in short order.
However, not everything was going the British way: Narvik, despite initial success, would prove to be a running sore in the British plans, as would their failure to cut off German shipping in the Baltic.
The Germans quickly organized several divisions of reserve troops, in particular their 9th Mountain Division, to be deployed to the aid of the Norwegians. In addition, a delivery of modern Panzers and motor vehicles, light machines suitable for the rough terrain, was organized for Norwegian use, their operators to be trained by the Germans. German Bombers also began harassing raids against British Ships in the North Sea from bases on Jutland as per the agreement with the Danish, who themselves called up their reserves and began to rally against a potential British attack. The First German units, transferring via the Swedish border with Norway, arrived in the city of Hamar just north of Oslo beginning on the 28th of August, 1941. The arrival of reinforcements in the beleagured city bolstered the morale of the population greatly, and the well-behaved Germans soon ingratiated themselves with the locals.

BEO-083s.jpg

A German Soldier from the newly formed "Nordland" Force explains the function of an MG-34 Machine Gun
to an enthusiastic group of Norwegian onlookers, October 1941. Used to the heavy, watercooled Browning
machine guns
used by the Norwegian Army, many in both the Norwegian military and
the population were duly impressed by such modern German weapons.

qqkbJdK.jpg

Old as they were, however, the Browning M1917 Machine guns in Norwegian service were nevertheless effective against
both ground and Air targets. Here is a Norwegian gun crew deployed in an Anti-Air configuration outside Narvik, December 1941.

Film03-08-16-01.jpg

Danish troops mobilize against a prospective British Invasion, August 1941.
 
The Forgotten Campaign: The True Story of the Alaskan Front during the SGW Part 6
7d3d12af1a93116d249860c7fbe7fadc.jpg

Union soldiers engaged in a firefight with Canadian Liberation Army soldiers at the town of Kispiox, circa September of 1942.

By September of 1942, the Alaskan Front was proving to be an ever escalating conflict. By then, the Russian led forces had managed to advance to the banks of the Kitwancool Lake and the town of Kispiox, which were north of the settlement Kitwanga. To the South, the Japanese forces from the 34th Infantry Division was laying siege to the Union positions at the town of Kitimat on the Kitimat River. To the north, a major battle at Telegraph Creek was underway between the Russian 343th Rifle Division and the Union 77th Infantry Division. The Japanese advance in the Taku River Valley would ground to a halt thanks to stiff resistance put by the 7th Mountain Division at the Battle of Inklin. At the sea, the Union Navy would continue on with it's attempts of cutting the Russian and Japanese supply lines to Alaska, but without suffering their own losses. By the start of September, the US Navy would lose the USS San Diego and two destroyers to the Russian Navy in naval skirmish in the Gulf of Alaska as well as another destroyer sunk by Japanese aircraft and three submarines sunk. The Russo-Japanese forces would also keep up their siege of the Queen Charlotte Island by launching constant air raids on the bases on the Island. The Russian in their part would also launch constant raids with the G5 Torpedo Boats on Sandspit Naval Base and in the Hecate Strait, targeting Union supply ships.
philippines.jpg

Imperial Japanese soldiers assaulting a Union Army held position north of Kitimat.
3418426627_39258fe2c0_b.jpg

A Union Cargo ship sinking in the Hecate Strait photographed by a gunner aboard a G5 Torpedo Boat, circa August of 1942.
manchuria-china-senior-lieutenant-kurayev-instructs-soldiers-before-picture-id522581142

Russian Soldiers during a break in the fighting near Kitwanga.
W-Partisans-3-HT-Jul05.jpg

Canadian Partisans launching an attack on a Union Army convoy near the town of Topey. During this time, there would a sharp increase of attack on Union military installations, supply lines, and communication lines by Canadian Partisans, which would led to many Yankee units being tied down in suppressing the partisans.
maximpartisans2_orig.jpg

Newly recruited Canadian conscripts with Russian weapons of the CLA. In the area that the Russian forces control, there would a major recruiting program for the locals to join the Canadian Liberation Army. Unsurprisingly, many local Canadians would join the Russian cause in droves as they wanted the Yankees, whom had been in control of Canada since 1917, gone.
tumblr_np6li8RvqU1rcoy9ro1_1280.jpg

A post-war painting by a Canadian Nationalist of two Canadian partisans laying a mine on a railroad track while a third is watching out for Union Military Police somewhere in American Columbia. This painting would go on to be popular artwork for Canadian Nationalists and also with the extremists of the modern Canadian Liberation Movement.​
 
Hey all. Long time no see!

I got question. How do you think US and CS military formations were organized during the Second Great War? As in, what constituted a division or a regiment or an armored division? In our timeline, the US Army organized its divisions in a very different way compared to the British and the Germans. How exactly do you think each side would organize their formations?
 
Here is what I have so far for Abner Dowling's ground forces in the 11th Army. After totaling the numbers, it looks like he should have at least ~22,600 men, possibly a little more given what additional units he may have cobbled together. They will mostly be composed of National Guardsmen from various states called up and federalized for military service along the border, with most coming from New Mexico and Sequoyah. While I believe motorized vehicles will be available for logistics and recon operations, horses will likely make up a larger share of the army. Cavalry was stated as being used, primarily for border patrol, recon, and skirmishing.

Here is what I have so far for US Forces in West Texas:

US 130th Infantry Division:
View attachment 560022

Attached Units:
View attachment 560023

This is not including Colonel Terry DeFrancis' USAAF air wing, which would likely augment the 11th Army's strength.

Are these symbols patches that the soldiers would wear?
 
The Forgotten Campaign: The True Story of the Alaskan Front during the SGW Part 7
945c1738ba58748e0a71662d46a47d12.jpg

A photo of the Japanese Aircraft Carrier Zuiho coming under intense air attack by dive bombers from the USS Hornet, circa September of 1942.

As the land battle in American Columbia had come to a stalemate, at sea, the naval battle was heating as both the Imperial Russian and Japanese began intensify their siege of the Queen Charlotte Islands. The Japanese would do this by strengthening their naval forces in the North Pacific with the addition of the battleships Fuso, Kongo, Mutsu, and Yamashiro the aircraft carriers Kaga, Akagi, and 
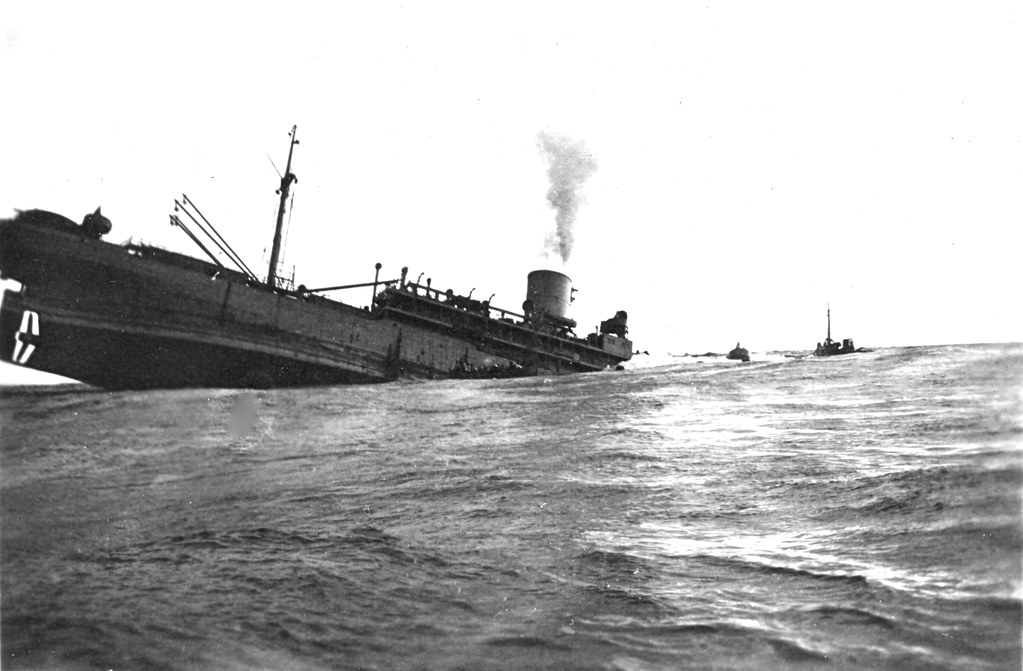
Shoho, two heavy cruisers, three light cruisers, and 5 destroyers. In addition, the Russians in their part would intensify the naval blockade by having their submarines laying mines around the island, with in conjunction with the G5 Torpedo Boats, would prove deadly to Yankee ships in the region. In addition, the Russian Air Force and Naval Air Arm would step up their air raids on the island by launching 3 raids per day as well as engaging Union shipping. In time, the Hecate Strait would become known as Iron Bottom Sound due to the amount of shipwrecks in the area (a majority of which were of Union supply ships that were sunk by the Russians.)

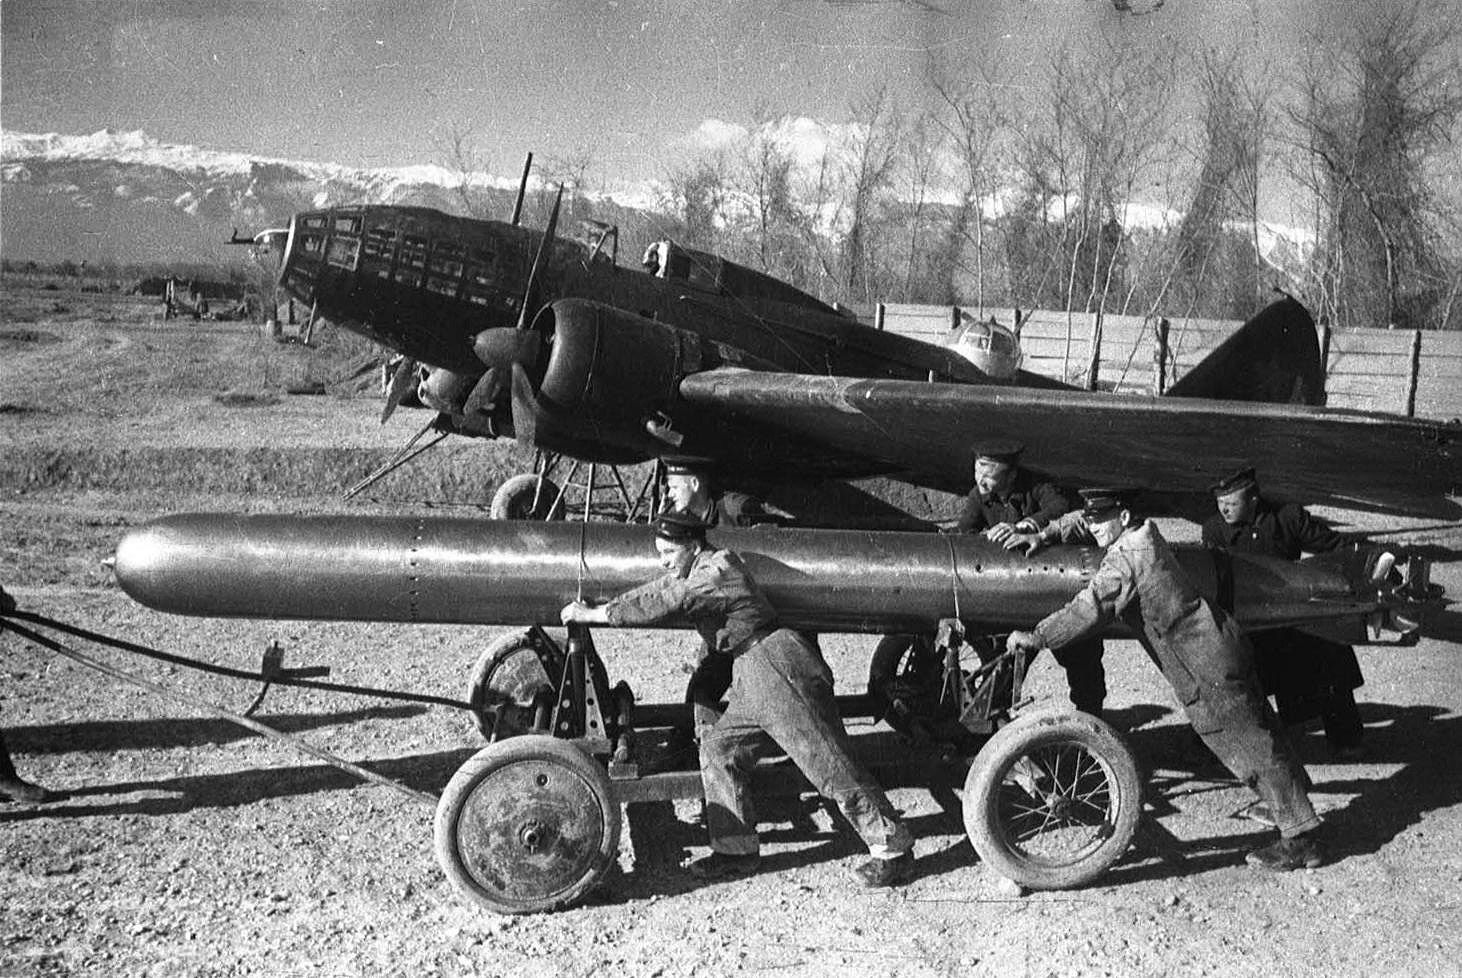
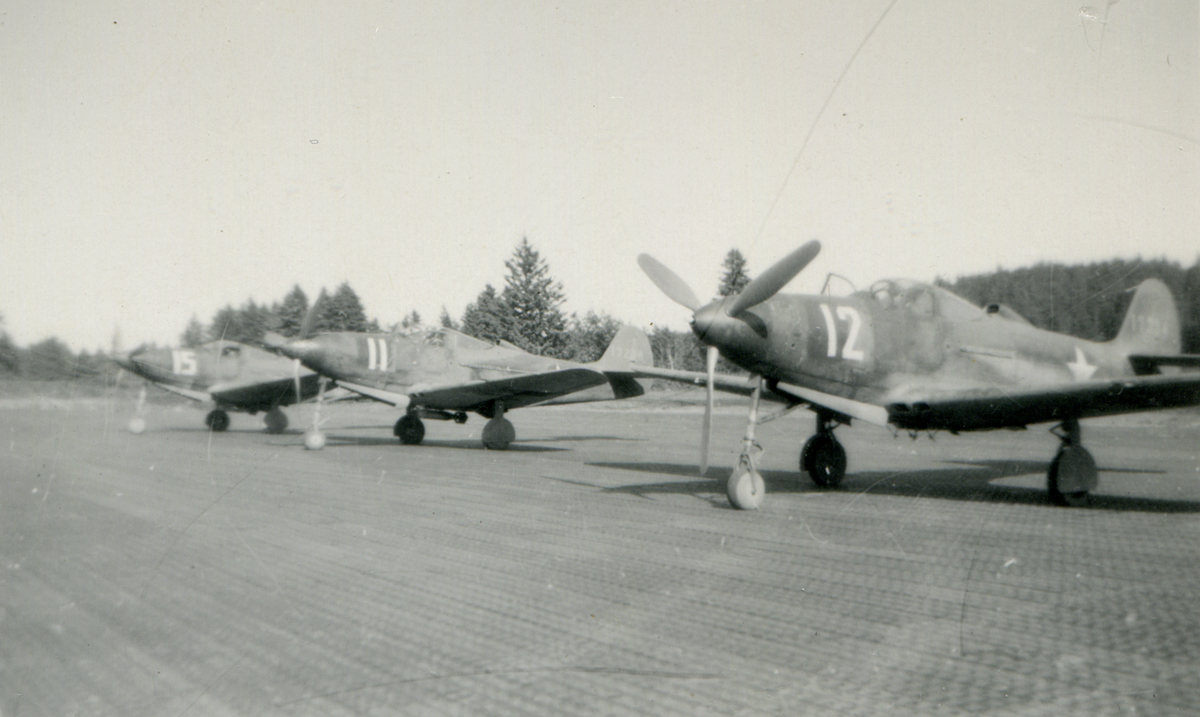
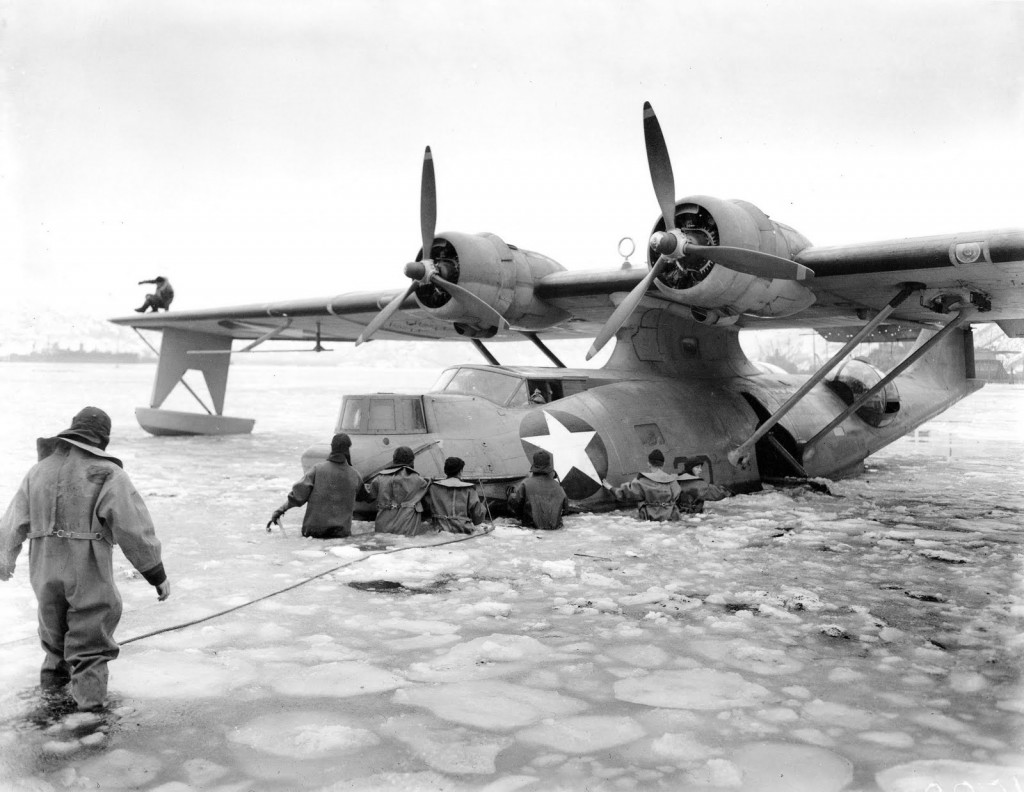
On the Union side of things, the Union Navy would begin reinforcing the defenses of the islands by building three additional airfields, and with them, a delivery of new P-39, P-38, and P-27 fighters, A-20 light bombers for anti-shipping duty, and PBY Catalinas for reconnaissance and anti-submarine roles. Task Force 36 would further reinforced in response to the arrival of more Japanese warships with the battleship Vermont, the aircraft carriers Benhomme Richard, Roanoke, Cowpens, and Princeton, two heavy cruisers, four light cruisers, 9 destroyers, and 15 escort destroyers. In resupplying the island and it's garrison, the Union forces would begin to use faster ships, such as destroyers and corvettes in the resupply role along with some new PT boats serving as their escorts to ward off attacks by the Russian motor torpedo boats.

14086803305_e7b47ee781_b.jpg

In late August of 1942, the Japanese and Russian naval commanders had a meeting aboard the battleship Mutsu about their plans for eliminating the Union garrison on the Queen Charlotte Islands. After heavy considerations and talking, it was decided that their naval forces would engage the Yankee and hopefully incapacitate their carriers and battleships so that they would secure the sea. After that, they would cut off the sea supply line to the island, which they would then support and sea and airborne operation to take the islands. This operation would be dubbed as Operation: Thunder and was to take in mid September of 1942.

On September 13th, 1942, the Russo-Japanese combined naval force would depart from New Archangel toward the area south-east of the Queen Charlotte Islands. In response to this, Task Force 36 would depart from Puget Sound in Washington to deal with the enemy movements. These events would set the stage for the Second Battle of the Three Navies aka the Second Battle off the Queen Charlotte Islands.
W-Jun19-Guadalcanal-10.jpg

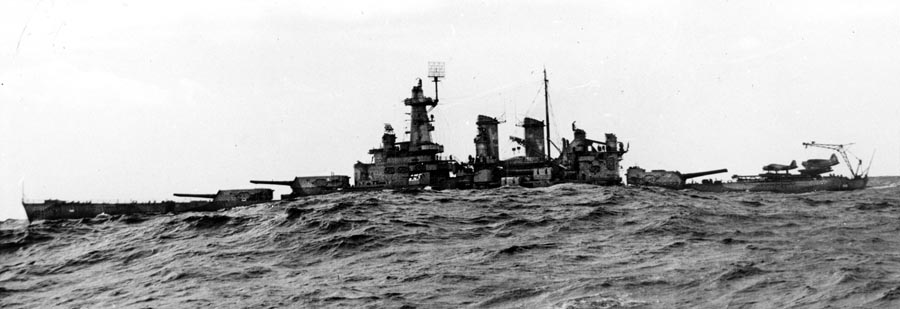
A photograph of Admiral Spruance's flagship, the USS Constellation underway with the rest of TF 36 off of Vancouver Island.
91bce32c0cf390974a6ac44ffae1f76d.jpg

A postwar painting of the Union light cruiser USS Boise making a suicidal attack on the Japanese battleship Haruna during the second night of the battle.
6V8yEsunWhtRIrAdPurDATvM-LHwyHhdj83rUuP2kL8uZkk24xAMEqaoF49QNBfH_8zrAvF-SVf5vwUMayBCYbDOyI5pWxPJrH4bnfiblZJxHWI

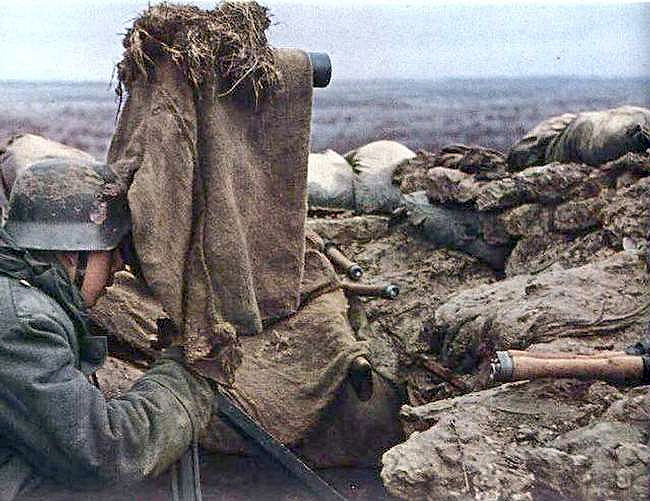
Russian heavy cruiser Pallada firing her guns at Union warships on the first day of the battle.
Large_explosion_aboard_USS_Lexington_%28CV-2%29%2C_8_May_1942_%2880-G-16651%29.jpg

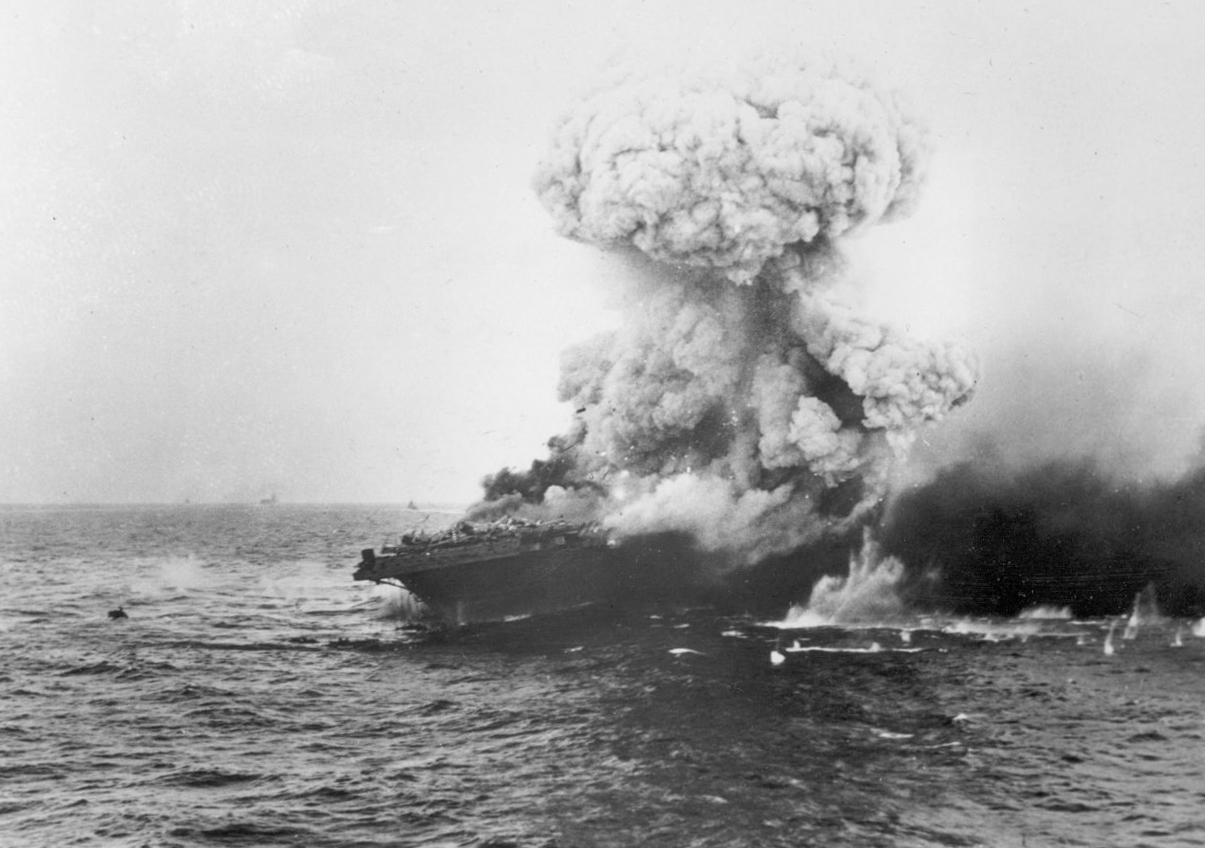
A explosion from a Japanese aerial bomb aboard the USS Bonhomme Richard.
660px-Destroyers_laying_smoke_screen_during_Battle_off_Samar_1944.jpg

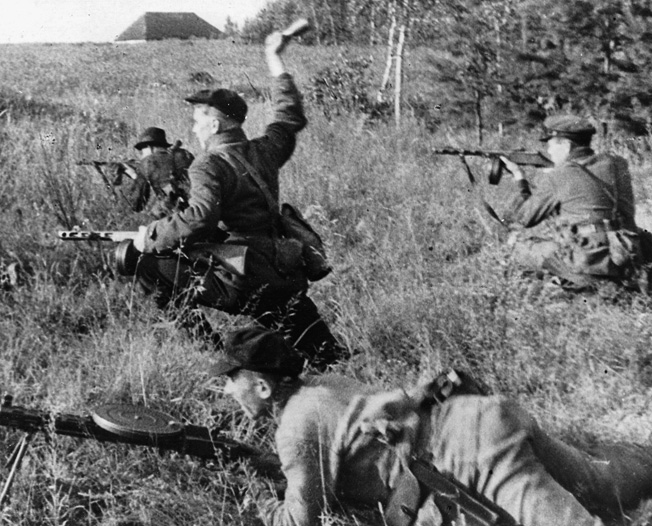
A flotilla of Russian destroyers laying a smoke screen under intense fire during the eighth and final day of the battle.

For eight days at sea in an area 16 miles off the coast of the Queen Charlotte Islands, the Radius and Union forces would be engaged in a heavy naval battle. When the dust settled, the Union navy would suffer the loss of the carriers Bonhomme Richard and Princeton, the heavy cruisers Astoria, the light cruisers Boise, Sacramento, and Newark, 6 destroyers, and 62 aircraft. The carriers Hornet and Roanoke, the capital ships Constellation, Iowa, and Vermont, the heavy cruisers York and Salt Lake City, 2 light cruisers, and 8 destroyers damaged. The Japanese would suffer the loss of the carrier Zuiho and Shoho, the battleship Fuso, the heavy cruisers Chikuma and Kako, light cruiser Isuzu, and 7 destroyers, and 48 aircraft. The Russians would suffer the loss of the heavy cruiser Pallada, the light cruisers Oleg and Diana, 5 destroyers, and 12 aircraft. The Battle would turn out to be a victory for the Union forces due both the tactical mastermind of Admiral Spruance and due to poor communication and coordination between the Russian and Japanese Naval Forces.

dutch-harbor-alaskajune-4-1942-678x381.jpg

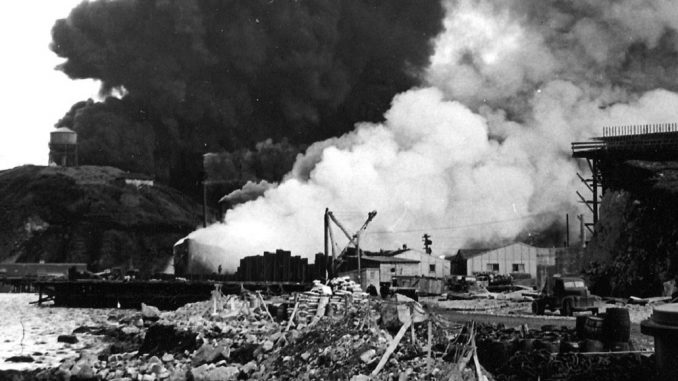
A photograph taken of the aftermath of a Russian air raid on the Sandspit Naval Base in July of 1943. Which this particular air raid would be the last one of that the Russians would conduct on the island.

For months after the Second Battle of the Three Navies, the Russians would maintain their siege of the Queen Charlotte Islands all the way up until August of 1943 when the siege of the islands was finally lifted due the Russians fortunes of war changing following both the Betrayal of the Japanese earlier in the year and their catastrophes on the European Front.​
 
Last edited:
The Forgotten Campaign: The True Story of the Alaskan Front during the SGW Part 2
LG-GermanFortifications.jpg

A photo of a Union Army soldier manning a forward observation at the foot of Mount Shorty Stevenson, circa Spring of 1942.

Following the battles of Mount McLeod and Clements Lake in late December of 1941, the Russian offensive in American Columbia stalled and had dug in to prepare for a potential Union counter-attack. The Union forces would not launch any counter-attack, and no major land confrontations had occurred the next 4 months. However at sea, a few confrontations between Spruance's Task Force 36 and the elements of the Russian Pacific Fleet under Admiral Vitaly Fokin did occur. The first of which had occurred on December 7th, 1941 when the Union Task Force had attacked a Russian Convoy in the Gulf of Alaska that was carrying supplies to New Archangel for the Russian Ground Forces. The resulting 32 minute sea battle would prove to be inconclusive despite the Russians losing the destroyer Kapitan Belli and a single freighter badly damaged along with electrical system aboard the USS Brooklyn being knocked out. Days later on December 13th, the Russian cruisers Rynda and Izumrud would bombard a Union Coastal Defense Fort on the northern part of Graham Island, the raid would be somewhat successful as the Russians would damage some of the fortification's important structures and knocked one of the 12' batteries out of action.
orfey-class-destroyer-9c7292ba-f064-410f-bebf-c162cd638c5-resize-750.jpg

A pre-war photograph of the Russian destroyer Kapitan Belli, which was a First Great War era Destroyer that was transferred to the Russian Pacific Fleet in 1938.
e20e2dec71db62a4f23ff1e97b740632.jpg

A photograph of the USS Brooklyn during the early days of the Second Great War, circa 1941. During the Battle, a shell from the Russian destroyer Rastoropny had struck the ship's center section, which consequently knocked out the cruiser's electrical system. As a result, the Brooklyn would spend a month at Seattle Washington undergoing repairs and was ultimately transferred to Task Force 38 stationed in the Sandwich Islands to replace the recently lost USS Topeka, which was a sistership to the Brooklyn.

The next naval confrontation would come on January 2nd, 1942, when the Russians would attempt an amphibious landing on the Queen Charlotte Islands with the cruisers Pallada, Rynda, and Izumrud, 9 destroyers, and 5 transport ships. However, the Union forces with a limited force of 8 PBY Catalina flying boats, 2 gunboats and the destroyers USS Little, Gregory, and McCall would make a determined resistance against the Russians to prevent it's capture. In the ensuing naval battle, the Union Navy would lose the USS Little and USS Gregory and 4 of the Catalinas to the Russians. In return, the Russians would lose two destroyers and the troop ship Stribog along with the cruiser Pallada and Izumrud, 3 destroyers, and two of the troop ships badly damaged.
Molotov1941-1942.jpg

The Russian Heavy Cruiser Rynda during the Battle of the Queen Charlotte Islands, circa 1942.
air_catalina9-1024x792-for-davis-post1.jpg

A PBY Catalina at Masset Inlet Naval Air Station on Graham Island after the Battle of the Queen Charlotte Islands.

Later that same month, the Imperial Russian Navy would start to deploy it's submarine flotilla along the Union coastal regions of Vancouver Island, Washington, Oregon, and California. Within the first month, the Russians would sink a total of 92,000 GRT worth of Union shipping.
b8d17f2865b81ce3bd2201b27447188d.jpg

The Imperial Russian Submarine S-51 leaving it's home base at Konstantinovsk, circa May of 1942. Kostantinovsk would go on to be the Russian Pacific Fleet's main submarine base in Alaska during the Second Great War and during the Frozen Conflict, would also become a major base for the US Navy's Submarine Fleet in the North Pacific.

Likewise, the Union Navy's forces in the North Pacific would also deploy their submarine force against the Russian and Japanese forces. These submarines would mainly patrol the Bering Sea and the Gulf of Alaska, which they would interdict with Russian shipping in the region. Around March of 1942, Task Force 36 would receive three new Fletcher class destroyers, the light aircraft carrier USS Fundy, and four escort destroyers of the Edsall class for Anti-Submarine duties.
47360541531_d08f6edeb7_b.jpg

The USS Sturgeon leaving it's base at Vancouver on to a war patrol in the Gulf of Alaska, circa 1942.
USS_Block_Island_%28CVE-21%29_leaving_Norfolk%2C_October_15%2C_1943.jpg

USS Fundy underway off the Alexander Archipelago, circa 1943.​

Good stuff. I find that I like the naval aspect of war more now as I read more stuff for it. So, this was a treat. Good to see the Alaskan Front fleshed out a bit, instead of it being a quiet sector.
 
Homemade and Improvised Weapons of the 3rd Mormon Uprising

There were three Mormon uprisings or revolts in Utah, the first during the Second Mexican-American War, 2nd during the First Great War and a final one during the Second Great War.
In all three clashes the Mormons were always in bad need procuring firearms and heavy weapons and went thru various means to obtain them, in most cases weapons were smuggled in Moron territory by the CSA, Great Britain, Russia, various Native American tribes and to a lesser extant Mexico and France.

Throughout all the uprising the Mormons also attempted to produce their own weapons this was of course very difficult because of the strong presence of US troops who always on the look out for such endeavors. The persisted in their attempts to produce weapons just as they had persisted in challenging the US.

Most homemade weapons made by the Mormons were very crude and some just downright dangerous to their own users but during the Second Great War the Mormons were able to produce some decent and more importantly reliable firearms.
One very innovate firearms make was John Browning who showed a true talent for the art of gun making, some of his guns were original designs and some were very good copies of mass produced firearms.

Below are some examples of captured homemade Mormon firearms.
No.1 is a Browning original handgun design, No.2 is believed to also be a Browning design and No.8 is a Browning copy of the Thompson sub-machine gun*.

None of these weapons were made in large enough numbers to have a lasting affect on the tide of battle.

Homemade-Impro-Guns.jpg


* An OTL Viet-Cong improvised Thompson made using parts from an M1 Carbine.
 
Here is something I made: a character model of Jacob Featherston.

I couldn't change his face or hairstyle in the manner that I wanted, but it's close enough.

2_2ceeee.jpg
 
Homemade and Improvised Weapons of the 3rd Mormon Uprising

There were three Mormon uprisings or revolts in Utah, the first during the Second Mexican-American War, 2nd during the First Great War and a final one during the Second Great War.
In all three clashes the Mormons were always in bad need procuring firearms and heavy weapons and went thru various means to obtain them, in most cases weapons were smuggled in Moron territory by the CSA, Great Britain, Russia, various Native American tribes and to a lesser extant Mexico and France.

Throughout all the uprising the Mormons also attempted to produce their own weapons this was of course very difficult because of the strong presence of US troops who always on the look out for such endeavors. The persisted in their attempts to produce weapons just as they had persisted in challenging the US.

Most homemade weapons made by the Mormons were very crude and some just downright dangerous to their own users but during the Second Great War the Mormons were able to produce some decent and more importantly reliable firearms.
One very innovate firearms make was John Browning who showed a true talent for the art of gun making, some of his guns were original designs and some were very good copies of mass produced firearms.

Below are some examples of captured homemade Mormon firearms.
No.1 is a Browning original handgun design, No.2 is believed to also be a Browning design and No.8 is a Browning copy of the Thompson sub-machine gun*.

None of these weapons were made in large enough numbers to have a lasting affect on the tide of battle.

View attachment 560088

* An OTL Viet-Cong improvised Thompson made using parts from an M1 Carbine.

Now, this is really good. It almost reminds me of how the Poles and Jews of Warsaw made their own firearms to resist the Nazi occupation of the city. The idea of John Browning existing in this timeline as a rebel making guns for the Mormons is pretty fascinating to me. If he wasn't butterflied away due to the changes in the timeline, I'd say that he would probably be making guns in a very clandestine way.
 
Now, this is really good. It almost reminds me of how the Poles and Jews of Warsaw made their own firearms to resist the Nazi occupation of the city. The idea of John Browning existing in this timeline as a rebel making guns for the Mormons is pretty fascinating to me. If he wasn't butterflied away due to the changes in the timeline, I'd say that he would probably be making guns in a very clandestine way.
Well maybe it isn't our OTL Browning but a close relative who shared his talent for gun making. :)
 
Top