April 1942 Alternate Indian Ocean

Status
Not open for further replies.
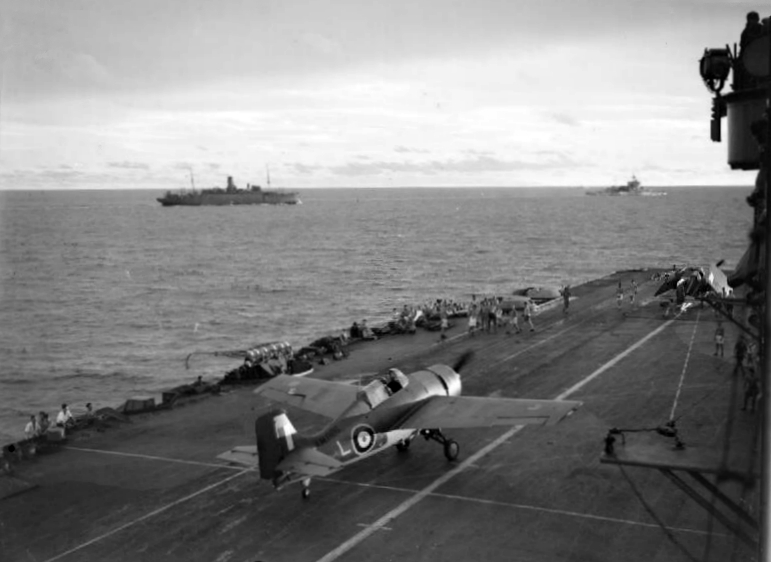
24 March 1942, Colombo - After a long voyage around the Cape of Good Hope on the aircraft carrier HMS Formidable, Admiral Sir James Somerville flew into Ceylon on 24 March 1942. Two days later he formally took command of the Royal Navy's Eastern Fleet while his friend Vice Admiral Geoffrey Layton stepped aside to assume duties as Commander-in-Chief Ceylon which included authority over the governor and the civil administration of the colony.

As the new commander of the Eastern Fleet, Somerville was a man with a great deal to do and not enough time to do it, in fact he had much less time than even he initially believed. During his voyage to Ceylon Somerville informed the Admiralty that he did not believe the Eastern Fleet could stop a serious Japanese attempt to invade Ceylon but that he could oppose minor hit-and-run raids. He also argued that it was important to maintain the Eastern Fleet as a "fleet in being" in order to influence enemy decisions while maintaining the ability to protect the lines of communication to the Middle East, something he stated he could not do if a significant portion of his fleet was destroyed. Layton concurred with Somerville's assessment and on 18 March the Admiralty signaled that the Eastern Fleet was not to be sacrificed to save Ceylon.

On the same day that Somerville formally took command of the Eastern Fleet, the Kido Butai with the aircraft carriers Akagi, Soryu, Hiryu, Shokaku, and Zuikaku as well as four battleships, two heavy cruiser, one light cruiser, and eleven destroyers under the command of Vice Admiral Nagumo Chuichi weighed anchor at Staring Bay in the Celebes and headed south for the Sunda Strait to execute Operation C - a raid by the Kido Butai against Ceylon and the Royal Navy's Eastern Fleet. The plan was to approach Ceylon from the southeast and raid Colombo on the 5 April. Nagumo had every intention of doing to the British at Ceylon what he had already done to the Americans at Pearl Harbor.

As the Kido Butai was departing Staring Bay, the Malay Force under the command of Vice Admiral Ozawa Jisaboru centered on the light carrier Ryujo along with five heavy cruisers including the four powerful Mogami class ships of Rear Admiral Kurita Takeo's 7th Cruiser Division along with a light cruiser and four destroyers entered port at Mergui, Burma to replenish after covering the seizure of the Andaman Islands. With the Andaman Islands and Rangoon secure, the Japanese now controlled the Eastern Bay of Bengal and it was time to push their advantage further west. In conjunction with the Kido Butai's raid, the Malay Force along with five submarines would proceed into the Bay of Bengal via the 10 Degree Channel and attack British merchant shipping sailing along India's east coast and it was planned for Ryujo's small air group to conduct harassment raids on Indian cities in order to induce panic.

As the Japanese forces assembled and set in motion, the hard working codebreakers and analysts of the Far East Combined Bureau at Colombo pieced together clues gleaned from codes and radio traffic and a picture began to emerge of a large scale enemy operation in the Indian Ocean. The first big break came on 28 March when a Japanese radio operator spelled out one of the operation's primary targets phonetically as KO-RO-N-BO. It also became clear to the codebreakers that the operation involved a large number of enemy ships organized in disparate task forces over thousands of miles of ocean.
 
The Japanese seemed never to learn that separating their forces left them open to death by piecemeal. The assistance of the code breaking, taking a chance to go after the weaker force, and minimizing losses at Ceylon should allow the British to get a win.
 

Riain

Banned
I like the idea of attacking the weaker Ryujo group, most IO TLs involve the suicide mission of attacking Nagumo.
 
I like the idea of attacking the weaker Ryujo group, most IO TLs involve the suicide mission of attacking Nagumo.

Better to take out a weaker foe and live then go after big game and get squat. Or even worse get swatted yourself.
 
The only real advantage of the British was that they had laready trained their FAA aviators prewar in nocturnal operatyions, long before other navies started to do so. The FAA was equipped from the start on with second rate aircraft, compared to the RAF, so it had to deal with the knowledge that most likely opposing aircraft would outperform their own in combat, so day operations were seen as problematic at best. This early understadning had resulted in the FAA training program to learn to operate attack aircraft effectively at night, also starting to use early forms of aircraft mouted radar as soon as it became available (In mid 1941, the Fairey Albacore TRS plane was startting to be standardly equipped with such a set, meaning in march 1942, the FAA most likely had some stationed on at least HMS Indomitable, as HMS Formidable perhaps had retained her older marks of FAA planes.)

The relatively good operational range of the slow, but sturdy biplanes might have had a good turn of succes against the IJN taskforces in the Indian Ocean, when operating at night, as soon as the British had a pinpoint location of their target. British airborne torpedoes were at least reliable, compared to the ones used by the USN, also carrying a more effective warhead in 1942. Even a single hit in a night attack would be welcommed, as that would cause some problems in the Japanese Fleet, when knowing they could not defend themselves against such an unseen enemy. Possibly Nagumo would turn around and flee the Indian Ocean, out of fear he would loose one of his priceless flattops. (He had strickt orders to avoid damage to his vital carriers at all times, as the IJN Combined Fleet Command had other plans for the next stages in the war in the Pacific.)
 

Riain

Banned
The problem with a night attack on Nagumo is the lack of weight it would have, only 57 Albacores in the 3 carriers. This could only do so much damage and would leave a large force capable of an overwhelming (to the RN carriers with their small CAGs) response.

Would a squadron of Skua be of much value if it could be accommodated as well as the 57 Albacores?
 
The problem with a night attack on Nagumo is the lack of weight it would have, only 57 Albacores in the 3 carriers.

This is the common estimate of damage to the KB. 1 - 2 torpedo hits on one or two carriers. Which leads to the question of the effect on the May/June operations of the IJN with a damaged carrier or two returning to the Pacific in mid April. Would the damage have been repaired? ...and what effect would the down time have on the Coral sea or Midway battles?

The other side of this is the number of variables in trying to estimate the damage from a Brit strike. Weather conditions and tactical situation can make a big difference between none, one, or three capitol ships hit. There is also a question of how vulnerable the IJN carriers were to torpedo hits. Off the top of my head I cant think of many good examples. The vulnerability to bomb hits is clear, but the probable damage from torpedos is another question. Striking two or three carriers may not mean much if damage control prevents any serious flooding or fire, or if the hull structure means repairs are easy.


This could only do so much damage and would leave a large force capable of an overwhelming (to the RN carriers with their small CAGs) response.

Sommerville was well aware of this. If you examine closely his decisions during Op C it is clear he was very careful about keeping his fleet clear of Japanese counter attack. Despite the Japanese having the larger & more capable fleet only three second tier warships were lost. Even when his fleet was close enough to strike the KB the Japanese were unaware of its location, their searches failing to locate it.

Here is the link to one of the earlier discussions https://www.alternatehistory.com/discussion/showthread.php?t=245897&highlight=Sommervilles+Chance
 
Last edited:
Carl - I read some of the other discussions on this board (there have been a couple) on ATLs for Operation C.

Keep in mind that this ATL has Somerville taking a totally different approach to the problem. Instead of playing cat and mouse with Nagumo in the hope that he can get off a night strike and then maybe send his battleships in for a night engagement he is making a deliberate decision to not even try to engage Nagumo and is instead taking his fleet up into the Bay of Bengal to engage Ozawa.

My next couple of updates will flesh things out some more but one of the main PODs is that Somerville gets Midway quality intelligence on enemy plans and the enemy OB. Alan Warren's new book Burma 1942 has a couple of good chapters on Operation C and he states that Somerville initially thought that the Japanese would come with "two or three battleships and a couple of carriers" - that's a force he could engage with a reasonable expectation of success. Somerville also wrote that until he learned about the fate of Dorsetshire and Cornwall from survivors he didn't fully appreciate just how capable the Japanese were.

In this ATL Somerville has better situational awareness of the enemy and a better idea of what they can do and he adjusts his plans accordingly.
 
Instead of playing cat and mouse with Nagumo in the hope that he can get off a night strike and then maybe send his battleships in for a night engagement he is making a deliberate decision to not even try to engage Nagumo and is instead taking his fleet up into the Bay of Bengal to engage Ozawa.

Entering the BoB with Nagumo approaching to the south will cut off Somerville's line of retreat.
 
The point of a nocturnal attack by FAA is not so much to hit carriers, although scoring a hit on them would be great. The point was to show the FAA could strike at night, while the IJN could not. Nagumo was under orders to avoid damage to his vital flattops, as these were soon to be returning to the Pacific to support operations there. As such these pesky FAA TRS aircraft operating at night would be enough to have him return to savety and withdraw, leaving the show in the Indian Ocean mostly to the already present submarines and merchant cruisers, which Japan had there already in a small number.

With this show of capability, the British could simply scare the Japanese enough to make them turn away for good, as Nagumo was not het sort of commander to make bold and agressive decissions. He was conservative and followed orders to the letter most of the time.
 
Well with the damage that Ozawa suffers and Nagumo's orders, the RN can slip away. Then with the possibility of RNsubs getting into position to get a few shots, the IJN will leave the Indian Ocean for awhile. This may allow the RN to harrass the Japanese around Burma and the NEI.
 

Riain

Banned
It isn't a good trade to lose 2 RN fleet carriers in exchange for a couple of damaged IJN fleet carriers, despite the butterflies at Coral Sea and Midway. Not that OTLs events are much better, but at least the 2 RN fleet carriers were not sunk.
 
Well with the damage that Ozawa suffers and Nagumo's orders, the RN can slip away. Then with the possibility of RNsubs getting into position to get a few shots, the IJN will leave the Indian Ocean for awhile. This may allow the RN to harrass the Japanese around Burma and the NEI.

One practical problem: the Royal Navy at the time only had two submarines in the Indian Ocean. More would follow only in 1944 at its soonest, due to more urgent jobs in the Mediteranean and North Sea.
 
It isn't a good trade to lose 2 RN fleet carriers in exchange for a couple of damaged IJN fleet carriers, despite the butterflies at Coral Sea and Midway. Not that OTLs events are much better, but at least the 2 RN fleet carriers were not sunk.

The Royal Navy also needed its carriers in the planned attack on Northern Africa, which stricly had forbidden the unneded endagering of the two modern British CV's under Somerville's command. A single night attack would be the best he could do possibly and then run like hell to savety (possibly just as the IJN would make a run away, leaving the Indian Ocean for what it was.)
 
One practical problem: the Royal Navy at the time only had two submarines in the Indian Ocean. More would follow only in 1944 at its soonest, due to more urgent jobs in the Mediteranean and North Sea.

Then I guess then the RN subs will not be getting a chance to make a carrier go boom. :D

Thanks for thevinformation though. :)
 
The Royal Navy also needed its carriers in the planned attack on Northern Africa, which stricly had forbidden the unneded endagering of the two modern British CV's under Somerville's command. A single night attack would be the best he could do possibly and then run like hell to savety (possibly just as the IJN would make a run away, leaving the Indian Ocean for what it was.)

I can almost imagine a comedy where the British launch their torpedoes and miss. Then both sides are calling out "RunAway!" and only the merchant ships ply the waters.
 
There were four Dutch submarines at Ceylon - K-XI, K-XIV, K-XV, and O-20.

HMS WARSPITE - Operation Pedestal robbed Somerville of HMS Indomitable, Operation Torch robbed him of HMS Formidable, and HMS Illustrious which he inherited after Operation Ironclad went to home waters in January 1943. Somerville also told the Admiralty that it was preferable to lose Ceylon to a Japanese invasion if it meant preserving the fleet because keeping the SLOCs to the Middle East open was paramount so I agree that he would not risk the carriers in a foolish operation.
 
Introduction, the Battle of the Bay of Bengal – The Battle of the Bay of Bengal fought in the first week of April 1942 does not receive the level of attention as the later battles of Coral Sea and Midway as a significant Allied victory in the early months of the Pacific War, particularly from American historians who tend to view the Pacific War as a US only show. The battle was different from Coral Sea and Midway in that it did not involve action between the two opposing aircraft carrier fleets. In fact, it was Admiral Sir James F. Somerville’s refusal to engage the Kido Butai, the Japanese carrier force, that ensured an unexpected by still welcome victory by the Royal Navy’s Eastern Fleet. However, despite the lack of combat between the main fleets, the importance of the battle should not be diminished. It was after all, the first substantial reverse suffered by the Imperial Japanese Navy up to that point in the war and it was also the first in a series of defeats for Japan that occurred over the next two months that ultimately put the Allies in position to begin limited offensive action on several fronts. Additionally, while not recognized in the early histories it has since been acknowledged that the inexorable attrition of Japan’s elite corps of naval aviators began with this action.

The battle’s impact on Allied morale should not be underestimated either. While the US Navy’s carriers made a nuisance of themselves with raids on Japan’s outposts in February and March of 1942, the material damage caused by these raids was minor. In the Bay of Bengal, Somerville’s forces managed to sink a light aircraft carrier, three of Japan’s most modern heavy cruisers, as well as a number of smaller ships in exchange for relatively light losses in surface ships. The Battle of the Bay of Bengal combined with Lieutenant Colonel Jimmy Doolittle's raid on Tokyo two weeks later acted as a shot of adrenaline for sagging Allied morale, devastated by four months of reverses at the hands of the Japanese. The victory also gave the Admiralty the confidence to permit Somerville to keep the main strength of his fleet based at Colombo in Ceylon and at Addu Atoll in the Maldives instead of ordering Somerville to retreat to bases in East Africa as some contingency plans called for. This in turn boosted the morale of Imperial troops and Royal Air Force units tasked with defending India and Ceylon because it demonstrated that the Royal Navy had not abandoned them.

The impact of the Eastern Fleet’s victory was also felt thousands of miles to the east in Hawaii. US Pacific Fleet Commander Admiral Chester W. Nimitz praised Somerville’s tactical agility and his ability to make do with what he had in order to bring about a victory. After the Battle of Midway, Nimitz stated that Somerville’s actions influenced his decision to commit his precious carriers at Coral Sea and Midway in May and June 1942 because the Royal Navy demonstrated that the Japanese could be outmaneuvered. Even the Anglo-phobic and acerbic Admiral Ernest J. King publicly stated that he was rather impressed with the performance of Somerville and the Eastern Fleet. For the longer term, the success of the Eastern Fleet in this action impressed Nimitz enough that he made assisting Somerville a priority, sending small by not insignificant US forces to operate with the Eastern Fleet. While US forces never played a large role in the Indian Ocean, Somerville did appreciate what Nimitz was able to send him, particularly since operations in the Mediterranean and North Africa were a drain on Somerville’s fleet in the second half of 1942 and early 1943. More important, Nimitz’s willingness to assist Somerville also led to the building of a great deal of trust between the two admirals that laid the groundwork for future Anglo-American cooperation in the later years of the Pacific War.

The Battle of the Bay of Bengal did have one significant similarity with the later battles of Coral Sea and Midway in that all three victories were enabled by superior Allied intelligence work. Diligent code breaking and traffic analysis by the HYPO team at Pearl Harbor provided Nimitz with enough knowledge of enemy plans and intentions that he was able to confidently put his carriers in position at Coral Sea and Midway where they had a reasonable chance of engaging the enemy with success. In March and early April 1942, similar work from the code breakers and analysts at the Far East Combined Bureau at Colombo provided Somerville and British commanders on land with enough information that they were able to take advantage of dispersed enemy forces and devise a plan that engaged the Japanese where they were weak while avoiding them where they were strong. The result was the first significant Allied victory against the Japanese in World War II and the first in a string of victories that put the Japanese on the defensive.
 
A Grumman Martlet II on HMS Formidable in the Indian Ocean. HMS Warspite is in the background:

Flightdeck_of_HMS_Formidable.jpg
 
Status
Not open for further replies.
Top